About Ebykr
Ebykr celebrates classic and vintage lightweight bicycles through provocative imagery and opinion. Ride along with us.
About Ebykr
Ebykr celebrates classic and vintage lightweight bicycles through provocative imagery and opinion. Ride along with us.

How two handbooks of 1913 and 1916 trued a wheel that had gone out of truth: the chalk held to the rim, the nipple key, the high places tightened and the low places let out, sideways first and then in the round, with a broken spoke replaced. Every instruction is from the Ebykr archive; the drawings are Ebykr’s own.
This page shows how period sources trued a wheel, step by step, in their own words and figures. It does not test or guarantee any repair. A wheel is a safety part, and Cassell warns that a wheel that has been trued can buckle again without apparent cause, from a weak rim or from unskilful truing. If you are not sure, ask a bicycle shop to true it or to check it before you ride.
On this page The drawing Tools and parts The steps in words What goes wrong Another way Sources
Your system asks for reduced motion, so each step is a still drawing. Play moves from still to still.
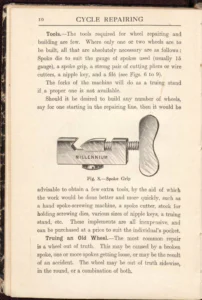
In the sources’ own terms; every item is named in them. Tick each one off as you gather it.
A truing stand is named by Cassell for a workshop; the forks of the machine do as one (Cassell).
The whole job, readable and printable without the drawing. Each step says what it rests on, and can take you back up to its drawing.
Take the wheel out and the tire off, then slip the wheel back into the frame and tighten both nuts. The forks will do as a truing stand if you have no proper one. Cassell says a wheel that is out only slightly sideways, and controllable by one or two spokes, can be trued with the tire on; but one that is much out, and especially one out in the round, is hard to true with the tire on, and spokes that stick out through the nipples can trouble the air tube.
Give the wheel a good spin and hold a piece of chalk by the fork to one side of the rim. The chalk marks the places where the rim is out of truth sideways. Stop the wheel and see where the marks are.
Take the nipple key and gradually tighten the spokes opposite the chalk marks, the ones that run to the other side of the hub. Cassell also slackens the nipples at the chalked place if the spokes there are very tight. Do not overdo it at first: try about half a turn, then spin the wheel and chalk it again. Then hold the chalk to the other side of the rim and tighten the spokes in the same way; chalking and tightening alternately on each side will bring the wheel true. If a nipple is a very tight fit, hold the spoke close up to the nipple while you turn it, or the spoke may be twisted.
Spin the wheel and hold the chalk to the top of the rim, so that it marks the high places, and gradually tighten the spokes on both sides under the chalk marks. To find the low places, fasten a piece of wire across the forks just above the rim, as close to it as you can, or hold a rule or anything with a flat edge up against the forks so that the wheel just clears it, and turn the wheel slowly. The low places show, and the spokes are let out on both sides at them. Underdo it rather than overdo it: a wheel can soon be pulled out of shape. Keep an eye on the wheel sideways all the time.
Spin the wheel again and chalk it until it is true sideways and in the round. Aim at an equal tension on every spoke: Cassell says every spoke should then do its share and the wheel will last much longer, and that a wheel with unequal tension will never remain true long. Then look inside the rim and file off the tops of any spokes that stick out through the nipples, so that they cannot penetrate the tube.
Make sure of the size: if you are not certain, look at the size stamped round the edge of the outer cover. Take the length for the new spoke from the old one, or from one of the others, and see that it is of the same gauge and fits the nipple; if you do not know the make of the nipples, fit a new nipple that suits the thread. If more than one spoke is broken, do not take them all out at once, or it may not be clear which hole in the rim each new spoke goes to. Slip the spoke through the hole in the hub flange, put the nipple through the rim, screw it on the spoke and tighten it with the nipple key. Bring the spoke to the same tension as the others, and true the wheel as above.
Each of these is a source’s own warning, except the last, which is what the sources leave out.
A rim that will not stay true Neither book says how to tell a rim that is too far gone from one that can be trued, how much a rim can be bent, or how hard to turn the spokes beyond underdoing it. Cassell says only that a wheel which buckles again wants a new rim.
Cassell says that replacing a broken spoke on the clutch side of a rear wheel without removing the clutch is only a makeshift job, unless the hub flange has slots as well as holes. It is done by enlarging the hole enough to push the head of the spoke through, or by screwing a small nut or washer on the end after putting it through the hole. Cassell 1916, page 16.
Cassell fits a new rim to a wheel that is too dented to true, and Henry builds a wheel from the hub with thirty-two or forty spokes. Cassell stresses spokes of one dead length, tension put on gradually, and equal tension. This page does not give either as steps. Cassell 1916, pages 14 to 16; Henry 1913, pages 31 to 39.
Every record opens in the Ebykr archive. Each step above names the page it rests on.
Henry’s book is the Library of Congress copy on the Internet Archive; Cassell’s is DTU Library’s copy (Danmarks Tekniske Kulturarv). Both are public domain, and the archive carries their page images in full with Ebykr’s own reading of the print. The two agree on the method, and differ only in the tool that shows the low places, a wire in Cassell and a rule in Henry. This page puts the sources in Ebykr’s own words and quotes nothing at length.
The Ebykr Digest
New articles, timelines, catalog finds and registry activity — assembled from the archive once a month. Your address is never shared.
Double opt-in. One email per month. Unsubscribe at any time with one click.