Repair Workshop Gears, chains and freewheels Rear derailleur

Repair · Gears, chains and freewheels

Fit and Set a Rear Derailleur

Simplex’s own nine steps for its Prestige 637: check the fork end, fit the gear and lever, set the two stop screws, size and rivet the chain, then try every gear. Every figure is from the sheet in the Ebykr archive; the drawings are Ebykr’s own.

DifficultyModerateThe care is in the order and the two screws (Ebykr’s estimate)
StepsNineIn Simplex’s order
You will needOne tool, six partsThe list, in the sheet’s terms
SourceSimplex Prestige 637 sheetRecord 75149; the sheet prints no date

Before you start

This page shows how a period source fitted and set a rear derailleur, step by step, in that source’s words and figures. It does not test or guarantee any repair. A gear that can move past its largest sprocket can put the chain into the spokes: if you are not sure of the setting, ask a bicycle shop to check it before you ride.

On this page The drawing Tools and parts The steps in words What goes wrong Other makers Sources

Escape also leaves this view.
    Drawing key
    Workbench view: one step at a time in large type, for a phone or tablet on the bench.

    Tools and parts

    In the sheet’s own terms; every item is named on it. Tick each one off as you gather it.

    Tools

    • A steel tool for the fork end Or your dealer, the sheet says

    The sheet names no other tool: not for its screws, and not for riveting the chain.

    Parts and materials

    • The gear, 637/P or 637/NI The 637/P keeps its bracket 2645, for a standard fork end
    • Screws 503, 2979 (two) and 2639 All on the gear, numbered as on the sheet’s drawing
    • The lever unit and its clip
    • The cable and its outer casing With clips or tape
    • A chain, 1/8 or 3/32 in. Riveted, never a spring link
    • Cycle oil

    What the gear takes

    • Speeds Three to six
    • Chain 1/8 or 3/32 in.
    • Capacity 37 teeth, front and rear together
    • Sprockets 13 to 28 teeth

    Leave the tension springs alone: the sheet says they are set correctly at the works.

    The steps in words

    The whole job, readable and printable without the drawing. Each step says what it rests on, and can take you back up to its drawing.

    Check the fork end

    Before anything else, make sure the rear fork end is parallel to the chainwheel. Simplex says to correct it with a steel tool, or to see your dealer. A fork end out of line puts the gear out of line.

    Never straighten a fork end by using the gear as a lever. The sheet warns that the gear breaks and the fork end stays as it was.

    What this step rests on
    • exact Parallel to the chainwheel, the steel tool or the dealer; the warning about the gear as a lever: record 75149, page 1.
    • schematic The bend and the tool. The sheet gives neither the tool’s shape nor how to check the fork end.

    Fit the gear to the fork end

    Take the wheel out. Fit the gear to the fork end and tighten screw 503. The 637/P comes with bracket 2645 for a standard fork end, and the sheet says not to remove it; the 637/NI has more notes overleaf.

    Check that the gear cage is parallel to the chainring, then put the wheel back.

    What this step rests on
    • exact Wheel out, screw 503, bracket 2645 left on, the cage parallel to the chainring, wheel back: record 75149, page 1. The 637/NI: page 2.
    • not stated How tight screw 503 goes. The sheet says only to tighten it.

    Fit the lever and run the casing

    Fit the lever unit to the right-hand side of the down tube and secure its clip firmly, at a height to suit your reach. Leave the lever forward, parallel to the tube.

    Run the cable toward the gear and fix the outer casing to the frame with clips or tape, avoiding sharp bends.

    What this step rests on
    • exact The down tube, the right-hand side, the clip, the height, the lever left parallel, clips or tape, no sharp bends: record 75149, page 1.
    • schematic The casing’s route and where the clips sit.

    Set the top screw

    Adjust the top screw, 2979, until the rollers of the cage are in line with the teeth of the smallest sprocket.

    What this step rests on
    • exact The top screw and what it lines up: record 75149, page 1. The sheet gives both screws the one number, 2979.
    • derived That the top screw is the outer stop. The sheet says what it lines up; the drawing shows the stop as a bar of travel.

    Connect the cable

    Thread the cable through the hole at the top of the gear and fit the end of the outer casing into the hollow provided. Unscrew cable screw 2639 and lay the cable between its washers.

    Pull the end of the cable tight and tighten 2639 firmly. Leave enough of a loop in the outer casing for the mechanism to move freely.

    What this step rests on
    • exact The hole, the hollow, screw 2639 and its washers, the pull, the loop: record 75149, page 1.
    • not stated How long a loop, or how firm is firmly.

    Set the bottom screw

    Unscrew the bottom adjuster screw, 2979. Work the lever to move the cage to the largest sprocket and line the roller up with its teeth.

    Hold the mechanism there and screw the bottom screw in as far as it will go, without forcing it and without moving the cage.

    What this step rests on
    • exact Unscrewing first, the lever, lining up, holding, screwing in without force: record 75149, page 1.
    • derived That the bottom screw is the inner stop, drawn as the other end of the bar of travel.

    Put the chain on

    Turn the cage by hand a third of a turn, until it is horizontal. Insert the chain between the rollers from the top down, then let the cage go.

    Put the chain on the largest sprocket and the larger chainring.

    What this step rests on
    • exact A third of a turn, horizontal, the chain in from the top, the largest sprocket and the larger chainring: record 75149, page 1.
    • schematic The cage’s resting angle and how the chain wraps the rollers.

    Size the chain and rivet it

    Pull the ends of the chain firmly toward each other, which pulls the mechanism forward, and note the length of chain at that point. Add three links: that is the correct length.

    Rivet the chain. Simplex is plain that the chain must be riveted and never joined with a spring link.

    What this step rests on
    • exact The ends pulled together, the mechanism pulled forward, three links added, the chain riveted, no spring link: record 75149, page 1.
    • not stated Whether a link means one half-inch pitch or an inner and outer pair, and what tool rivets the chain. The drawing adds three pitches; that is a choice of the drawing, not the sheet’s.

    Try every gear

    Work the gear through every speed with the lever and make any last adjustment to the two screws 2979.

    The sheet marks one check as most important: with the lever pulled fully toward you, the cage lines up with the largest sprocket and “will go no further”.

    What this step rests on
    • exact Every speed, the final adjustment and the most important check: record 75149, page 1.
    • schematic The cage’s swing on each sprocket. Once the chain is riveted, the drawing keeps it at one length.

    Keeping it working. Keep the gear clean, and now and then oil every moving part with cycle oil: the roller axles, and between the friction washers of the lever. The sheet’s maintenance note, in full.

    What goes wrong

    Each of these is the sheet’s own warning, except the last, which is what it leaves out.

    • A gear out of line The fork end is out of line, so the gear is too. Straighten the fork end first.
    • A broken gear Used as a lever on a bent fork end: the gear breaks and the fork end stays bent.
    • Springs disturbed The tension springs are set correctly at the works; leave them alone.
    • A spring link The chain must be riveted.
    • A gear that will not move freely A sharp bend in the outer casing, or too short a loop at the gear.
    • A cage past the largest sprocket With the lever pulled fully back, the cage must stop in line with the largest sprocket.

    Screws too tight or too loose The sheet gives no tightness for screw 503 or cable screw 2639, only “firmly”. This page does not either.

    How other makers told it

    Five more fitting sheets are in the archive. They agree on the stops and differ on the chain.

    Huret Jubilee: the chain goes on first

    Huret’s sheet, in French, puts the chain on the small sprocket and the big chainring before anything is set. Screw C then sets the outer stop with the wheel turning, so the chain does not leave the small sprocket. The cable is clamped with the lever on its forward stop and no noticeable play. Screw D stops the chain from jumping off the largest sprocket toward the spokes. The chain is cut to the shortest length that passes easily over the largest teeth, but no shorter: the top of the cage must stay facing the links. After several changes, correct the cable and cut it 10 mm past its clamp. Huret Jubilee sheet, record 75129; Ebykr’s summary.

    Campagnolo Gran Sport and Record: five steps

    Both sheets: the gear in line with the chainwheel (the Record adds: central, on a double), with screw 166 very tight; a chain long enough for the largest chainwheel with the largest sprocket; the two screws 99 set so the chain cannot jump off the outside sprockets; spacing ring 651 if the freewheel is too near the spokes; more or less chain tension by moving the spring end to another hole. Gran Sport, about 1960, record 75021; Record, about 1963, record 75027.

    Cyclo Benelux: three pins in line

    The Benelux comes set at point D for the recommended freewheel sizes, and the folder says not to disturb it. Its chain rule works in bottom gear: lengthen or shorten the chain until the tension pulley pin, the jockey sprocket pin and the cable stop line up. The cable goes on in bottom gear, not tight. Cyclo Benelux folder, record 80923.

    Where the sheets disagree

    • How long a chain. Simplex: the largest gears pulled tight, plus three links. Campagnolo: long enough for the largest chainwheel and sprocket. Huret: the shortest that passes the largest teeth easily. Benelux: three pins in line, in bottom gear.
    • How to join it. Simplex: riveted, never a spring link. Benelux: a spring link, with riveting recommended for 3/32 in. chain.
    • In what order. Simplex sets both stops before the chain goes on; Huret puts the chain on first.

    Sources

    Every record opens in the Ebykr archive. Each step above names the page it rests on.
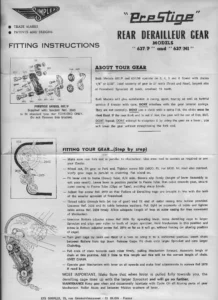
    Record 75149, page 1Simplex Prestige 637: fitting instructionsEvery step on this page, the parts and the warnings.
    Record 75149, page 2Simplex Prestige 637/NI and the front changersThe other model’s fitting, and the AV 223 and AV 323.
    Record 75129Huret Jubilee fitting instructionsIn French, English and German; the chain goes on first.
    Records 75021 and 75027Campagnolo Gran Sport and Record sheetsAbout 1960 and about 1963: five steps each.
    Record 80923Cyclo Benelux folderFitting in five steps, the pin rule for chain length.

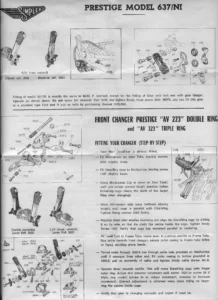
    Simplex printed this sheet in English, with its Dijon address. This page puts its method in Ebykr’s own words and quotes nothing at length.

    Exact, derived and schematic

    • exactEvery step, part number and figure: the fork end parallel to the chainwheel, screws 503, 2979 and 2639, bracket 2645, the lever on the right of the down tube, a third of a turn, three links, riveted; three to six speeds, 1/8 or 3/32 in. chain, 37 teeth, 13 to 28 teeth. Record 75149, page 1.
    • derivedThat the top and bottom screws are the outer and inner stops. The sheet says what each lines up.
    • schematicBoth drawings: the frame, the gear’s shape, the sprocket and chainwheel sizes, the steel tool, the rivet press and all motion. Once riveted, the drawn chain keeps one length. They are Ebykr’s own drawings, not tracings of Simplex’s.
    • not statedHow tight screws 503 and 2639 go, how long a loop to leave, what a link is and any tool but the steel tool.

    The Ebykr Digest

    A monthly letter on classic lightweight bicycles

    New articles, timelines, catalog finds and registry activity — assembled from the archive once a month. Your address is never shared.

    Double opt-in. One email per month. Unsubscribe at any time with one click.