About Ebykr
Ebykr celebrates classic and vintage lightweight bicycles through provocative imagery and opinion. Ride along with us.
About Ebykr
Ebykr celebrates classic and vintage lightweight bicycles through provocative imagery and opinion. Ride along with us.

How two handbooks of 1913 and 1916 looked after a pedal: the pin tested square to the crank, paraffin squirted into the bearings, the pedal taken apart over a box to catch the balls, worn rubbers renewed, and a loose pin glued into a hot crank. Every instruction is from the Ebykr archive; the drawing is Ebykr’s own.
This page shows how period sources looked after a pedal, step by step, in their own words and figures. It does not test or guarantee any repair. A pedal that comes loose or off while you ride can throw you, so a pin must be tight and the crank true before you ride. Paraffin and the heat of a blowpipe or flame are fire risks: keep the two well apart. If you are not sure, ask a bicycle shop to check it.
On this page The drawing Tools and parts The steps in words What goes wrong Another way Sources
Your system asks for reduced motion, so each step is a still drawing. Play moves from still to still.
In the sources’ own terms; every item is named in them. Tick each one off as you gather it.
A new set of rubber blocks, if the old are worn (Henry).
The whole job, readable and printable without the drawing. Each step says what it rests on, and can take you back up to its drawing.
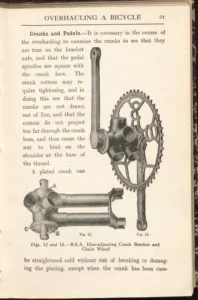
Cassell says that in overhauling the cranks should be examined to see that they are true on the bracket axle and that the pedal spindles are square with the crank face. The crank cotters may want tightening, but the cranks must not be drawn out of line, and the cotters must not stand too far through the crank boss, or the nut binds on the shoulder at the base of the thread. A plated crank can be straightened cold, held between lead clamps in the vice and bent with a twisting wrench lined with sheet brass; one that is case-hardened is first heated with a blowpipe, but not enough to discolor the plating. The method for the cranks is on its own page: Remove a Cottered Crank and Rebuild the Bottom Bracket.
Henry advises removing the pedals now and again to give them a thorough cleaning, but says they can be cleaned more or less by squirting paraffin into the bearings. It is a quick clean for a pedal that has gone stiff, not a service.
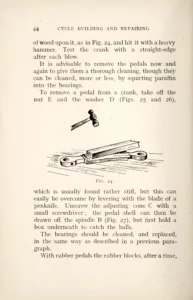
Take off the nut and the washer, which is usually found rather stiff; this can be overcome by levering it with the blade of a penknife. Unscrew the adjusting cone with a small screwdriver. The pedal shell can then be drawn off the spindle, but first hold a box underneath to catch the balls. Henry labels the parts in his figures: the shell, the spindle, the adjusting cone, the washer, the nut and the dust cap.
Henry says the bearings are cleaned and replaced in the same way as in a previous paragraph; the nearest is the hub, on its own page: Check and Adjust Hub Cones. A rubber pedal wears out its blocks after a time, and a set of new blocks should be bought and fitted. A rat-trap pedal has none. Cassell suggests that the position of the pedal spindles might be moved in the crank ends by fitting a very thin washer behind the pin shoulder, which brings a fresh part of the bearing into wear.
In all machines of recent make, Cassell says, the right-hand pedal pin has a right-hand thread and the left-hand pin a left-hand thread, so both tend to tighten up when riding. Hundreds of old machines have both pins right-handed, and various locking devices were used to stop them unscrewing; if the thread is a slack fit, the left pin of an old machine will unscrew in riding unless the lock is very good. To remedy this, take out the pin, heat the crank end and the thread until too hot to touch, smear them well with Prout’s elastic glue, then screw the pin tight while hot and lock it securely. The pin is then fixed tightly and cannot be unscrewed unless heated.
Each of these is a source’s own warning, except the last, which is what the sources leave out.
Taking a pin out of a crank Neither book says how to take a pedal pin out of a crank, which way each thread turns for removal, or how tight to screw it. Henry describes only the shell and the bearings; Cassell only the glue.
A cottered crank taken off and the bracket rebuilt: Remove a Cottered Crank and Rebuild the Bottom Bracket.
Henry finds rubber pedals give a better footing unless toe-clips are used, and rat-trap pedals are lighter. Henry 1913, pages 44 and 45.
Every record opens in the Ebykr archive. Each step above names the page it rests on.
Henry’s book is the Library of Congress copy on the Internet Archive; Cassell’s is DTU Library’s copy (Danmarks Tekniske Kulturarv). Both are public domain, and the archive carries their page images in full with Ebykr’s own reading of the print. The two give different halves of the job: Henry takes the pedal apart and Cassell fixes a loose pin, so each of those steps rests on one book, and the page says so. This page puts the sources in Ebykr’s own words and quotes nothing at length.
The Ebykr Digest
New articles, timelines, catalog finds and registry activity — assembled from the archive once a month. Your address is never shared.
Double opt-in. One email per month. Unsubscribe at any time with one click.