Repair Workshop Gears, chains and freewheels Freewheel

Repair · Gears, chains and freewheels

Test, Flush and Fit a Freewheel

How two handbooks of 1913 and 1916 dealt with a freewheel that slipped: the clutch tested by turning it back and pressing forward, flushed through its oil holes with paraffin or petrol, oiled with something thin, and, when that fails, a new one screwed on until it locks against the shoulder of the hub. Every instruction is from the Ebykr archive; the drawings are Ebykr’s own.

DifficultyModeratePatience and a heavy hand (Ebykr’s estimate)
StepsSixFrom Henry, 1913, and Cassell, 1916
You will needFive tools, three materialsThe list, in the sources’ terms
SourceHenry 1913 and Cassell 1916Records 94435 and 94257

Before you start

This page shows how period sources tested, cleaned and fitted a freewheel, step by step, in their own words and figures. It does not test or guarantee any repair. A freewheel that slips or comes loose under load is a safety hazard: both books say a clutch that flushing does not cure has to be taken to pieces or replaced, and neither says how to take one to pieces. The paraffin (kerosene) and petrol these sources use are flammable: keep any flame away. If you are not sure of the work, ask a bicycle shop to check it before you ride.

On this page The drawing Tools and parts The steps in words What goes wrong Another way Sources

Escape also leaves this view.
    Drawing key
    Workbench view: one step at a time in large type, for a phone or tablet on the bench.

    Tools and parts

    In the sources’ own terms; every item is named in them. Tick each one off as you gather it.

    Tools

    • A heavy hammer and a punch For a stiff freewheel (Henry) and a lock ring (Henry, Cassell)
    • A pin spanner For the pin holes in the lock nut (Cassell)
    • An oil can with a fine spout For paraffin or petrol and for the oil (Henry, Cassell)
    • A vise Or the frame and the pedals, to turn off a chain wheel (Henry)
    • A chain-ring remover Or a punch, for the chain ring (Cassell)

    Neither book names a freewheel remover; Henry knocks the freewheel off with a punch and a hammer.

    Parts and materials

    • Paraffin or petrol To flush the clutch (Henry, Cassell)
    • Thin oil A little colza with paraffin (Henry), or good oil (Cassell)
    • A new freewheel of the same size The same barrel diameter and threads to the inch as the old one (Cassell, Henry)

    The steps in words

    The whole job, readable and printable without the drawing. Each step says what it rests on, and can take you back up to its drawing.

    Test the clutch

    If something slips when you press hard on the pedals, as on a hill, the clutch is probably at fault. To test a freewheel clutch, turn the freewheel back a little with the pedals and then press forward. Do this several times: a clutch that is working locks every time and does not slip. Cassell says that if a clutch slips when you pedal forward, no outside adjustment will cure it.

    What this step rests on
    • exact Something slipping under extra pressure on the pedals, as on a hill, the clutch probably at fault; the freewheel turned back a little with the pedals and pressed forward, repeated a number of times; a clutch that works locks every time and does not slip: Henry 1913, page 47.
    • exact A clutch slipping when pedaling forward not curable by outside adjustment: Cassell 1916, page 20.

    Flush it with paraffin or petrol

    A slipping clutch has most likely been over-oiled, Henry says, and Cassell that the oil has clogged and so stopped the light springs from working. Lay the machine over on its side and squirt paraffin (kerosene) liberally in through the oil holes; Cassell uses petrol or paraffin. Turn the freewheel round several times, or revolve the wheel rapidly, as Cassell does, and let all the liquid drain out.

    What this step rests on
    • exact A slipping clutch most likely over-oiled; the machine laid on its side, paraffin squirted liberally in through the oil holes, the freewheel turned round several times: Henry 1913, page 47.
    • exact Oil clogged and rendering the light springs inoperative; petrol or paraffin squirted through the free-wheel before the cycle is taken to pieces, the machine on its side, the wheel revolved rapidly and all the liquid let drain out: Cassell 1916, page 20.

    Oil it thinly and try it again

    Lubricate it with a thin oil: Henry says not to use a thick oil, and that a little colza oil with paraffin will do; Cassell says good oil. Then test the clutch again as before. After flushing it will most likely be found to work satisfactorily, Henry says.

    What this step rests on
    • exact No thick oil for lubricating, a little colza with paraffin suitable; the clutch tried again and most likely found to work: Henry 1913, page 47.
    • exact The liquid drained out and then lubricated with good oil: Cassell 1916, page 20.
    • not stated How much oil: neither book says.

    If it still slips, it must come to pieces

    If flushing and oiling do not cure it, Cassell says the clutch must be taken to pieces and the cause found. It may be a worn-out clutch, oil clogged so that the light springs cannot work, or weak springs. Send to the makers for any new parts. Gummed-up oil and wear are frequent causes of trouble.

    What this step rests on
    • exact A clutch that will not be cured by flushing taken to pieces to find the cause: a worn-out clutch, oil clogged, or weak springs; new parts from the makers; gummed oil and wear frequent causes: Cassell 1916, page 20.
    • not stated Neither book says how to take a freewheel to pieces, so this page does not either; this step rests on Cassell alone.

    Take the old one off

    Take the chain off and the back wheel out. A freewheel can be removed with a punch and a hammer, Henry says, and since they are usually very stiff it takes a heavy blow. If what is on the hub is an old fixed chain wheel, take off its lock ring first: the ring has a left-handed thread and unscrews to the right. Henry unscrews it with a punch and a hammer; Cassell uses a pin spanner that fits the pin holes in the nut, or knocks it round with a hammer and a small punch. Then take off the chain wheel with a punch or a chain-ring remover; Henry puts it in a vise and turns the wheel round to the left, or, with the wheel in the frame, chain on and both spindle nuts tight, holds the machine so that the wheel cannot turn and turns the chain backward with the pedals.

    What this step rests on
    • exact A freewheel removed with a punch and a hammer, usually very stiff, a heavy blow wanted; a fixed cog with a lock ring that unscrews to the right (left-handed thread), unscrewed with a punch and a hammer; the cog removed in a vise turning the wheel round to the left, or in the frame with the chain on and both spindle nuts tight, the wheel held and the chain turned backward by the pedals: Henry 1913, pages 46 and 47.
    • exact The chain removed and the back wheel taken out; the lock ring (left-handed thread, unscrewing to the right) taken off with a pin spanner in its pin holes or knocked round with a hammer and small punch; the chain ring removed with a punch or a chain-ring remover: Cassell 1916, page 19.
    • not stated Henry alone says how to take a freewheel off, with a punch and a hammer; neither book names a freewheel remover.

    Screw the new one on until it locks

    Take the old freewheel to the shop to get one of the same size, Henry says: Cassell measures the diameter of the hub barrel and the number of threads to the inch, since the freewheel must agree with the old one in both. Screw the freewheel on the hub as far as it will go, put the wheel and chain back and turn the crank until the freewheel is locked tightly against the shoulder of the hub barrel. Henry says a freewheel is fitted in the same manner as a fixed cog, with the wheel or the chain turned in the opposite direction.

    What this step rests on
    • exact The diameter of the hub barrel and the threads to the inch measured, the freewheel agreeing with the old one; the freewheel screwed on the hub as far as it will go, the wheel and chain replaced and the crank turned until the freewheel is locked tightly against the shoulder of the hub barrel: Cassell 1916, page 19.
    • exact The old freewheel taken to the shop to get the size, so that no changing is needed; a freewheel fitted in the same manner as a fixed cog, with the wheel or the chain turned the opposite way: Henry 1913, page 47.
    • not stated Which way Henry means by “the opposite direction” is not spelled out, and neither book says how tight to screw the freewheel beyond “locked tightly”.

    What goes wrong

    Each of these is a source’s own warning, except the last, which is what the sources leave out.

    • Too much thick oil A slipping clutch has most likely been over-oiled, and a thick oil should not be used (Henry); gummed-up oil is a frequent cause of trouble (Cassell).
    • A clutch that slips after flushing It cannot be mended from outside and must be taken to pieces (Cassell).
    • The wrong size The new freewheel must agree with the old one in barrel diameter and threads to the inch; take the old one to the shop (Cassell, Henry).
    • Turning the lock ring the wrong way The lock ring of a fixed chain wheel has a left-handed thread and unscrews to the right (Cassell, Henry).
    • A freewheel not locked home Turn the crank until the freewheel is locked tightly against the shoulder of the hub barrel (Cassell).

    Taking one apart Neither book says how to take a freewheel to pieces, how to remove one without a punch and a hammer, or how tight is tight beyond “locked tightly”. Cassell treats hubs with the clutch built in, and coaster hubs, in a chapter of their own.

    Related jobs

    A hub too small for the freewheel

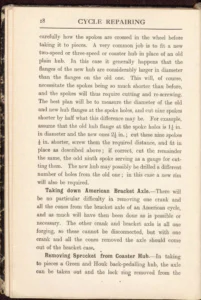
    When a hub is too small and the freewheel drops in loosely, Cassell winds brass, copper or tinned iron wire in the thread, fastened to a spoke at one end, and solders it fast. An old fixed sprocket of the same size and bore is screwed on next and taken off again, after which the freewheel screws on quite easily. Cassell says the method “does not appear to be exactly a workshop method”, though its reliability has been proved. This page does not give it as a step. Cassell 1916, page 20.

    A coaster hub

    Cassell takes down and adjusts several coaster hubs of the time in the chapter on free wheels and coaster hubs, and removes the sprocket of a Green and Houk hub with a special clamp or a sprocket remover; Henry says there are too many makes to give their adjustments and tells a reader in difficulty to write to the maker for the pamphlet. Cassell 1916, pages 18 and 19.

    Sources

    Every record opens in the Ebykr archive. Each step above names the page it rests on.
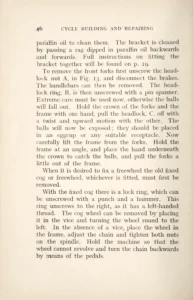
    Record 94435, pages 46 and 47Peter Henry, Cycle Building and Repairing, 1913A slipping freewheel tested by turning it back and pressing forward, flushed with paraffin through its oil holes, oiled thinly, and the old one knocked off with a punch and hammer.
    Record 94257, pages 18 to 20Cassell, Cycle Repairing and Adjusting, 1916 reprintA free-wheel fitted to a hub of the same diameter and thread, a slipping clutch flushed with petrol or paraffin, and the causes when that fails.

    Henry’s book is the Library of Congress copy on the Internet Archive; Cassell’s is DTU Library’s copy (Danmarks Tekniske Kulturarv). Both are public domain, and the archive carries their page images in full with Ebykr’s own reading of the print. The two agree that a slipping clutch is first flushed with paraffin and oiled thinly, and on how a chain wheel is taken off its hub. Henry alone gives the test and the punch-and-hammer removal; Cassell alone says what to do when flushing fails. This page puts the sources in Ebykr’s own words and quotes nothing at length.

    Exact, derived and schematic

    • exactThe turn-back-and-press test; flushing with paraffin or petrol through the oil holes; thin oil; a clutch that still slips taken to pieces; the punch-and-hammer removal; the lock ring turning to the right; the new freewheel of the same barrel diameter and thread, screwed on as far as it goes and locked against the shoulder.
    • schematicThe drawings: the clutch, its teeth and pawls, the hub, the freewheel, the punch and the hammer; their sizes, the number of teeth and all motion. Ebykr’s own drawings.
    • not statedHow to take a freewheel to pieces, a freewheel remover, how tight to screw one on, and the freewheels of later years: a screw-on block is not described.

    The Ebykr Digest

    A monthly letter on classic lightweight bicycles

    New articles, timelines, catalog finds and registry activity — assembled from the archive once a month. Your address is never shared.

    Double opt-in. One email per month. Unsubscribe at any time with one click.