About Ebykr
Ebykr celebrates classic and vintage lightweight bicycles through provocative imagery and opinion. Ride along with us.
About Ebykr
Ebykr celebrates classic and vintage lightweight bicycles through provocative imagery and opinion. Ride along with us.

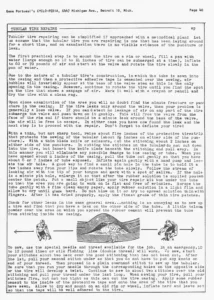
How a mail-order importer told its customers to find a slow leak in a sewn racing tire, open the casing, patch the tube and sew it shut again. Every figure is from the booklet of 1961 in the Ebykr archive; the drawings are Ebykr’s own.
This page shows how a period source mended a tubular, step by step, in that source’s words and figures. It does not test or guarantee any repair. A tire that comes off its rim can cause a fall: if you are not sure of the repair or of the rim bond, ask a bicycle shop to check it before you ride.
On this page The drawing Tools and materials The steps in words What goes wrong Another way Sources
Your system asks for reduced motion, so each step is a still drawing. Play moves from still to still.
In the booklet’s own terms; every item is named on its repair page or its tips page. Tick each one off as you gather it.
The whole repair, readable and printable without the drawing. Each step says what it rests on, and can take you back up to its drawing.
Mount the tire on a rim or a wheel and inflate it to 60 or 70 pounds. Fill a pan with enough water to cover 12 to 14 inches of the tire at a time. Start at the valve and turn the tire slowly through the water.
Expect bubbles at the base of the valve stem: the valve is the only opening in the casing. Keep turning until air seeps from another spot, mark that spot with a crayon or pencil and dry the tire with a clean rag.
If the tire leaks only around the valve, the valve is loose. If no leak shows at all, hold the valve under water and push down on it gently; that frees it from the face of the rim and lets a leak at its base show.
Let the air out first. With a thin tool that is not sharp, raise about five inches of the protective strip over the sewing: about two and a half inches on each side of the leak.
With a thin-bladed knife or scissors, cut the stitching about two inches on each side of the leak, so that about four inches of the casing open. Do not cut down into the tire. Slip the blade under the stitching and pull away from the tire, and neither the casing nor the tube is harmed.
Pull the tube out gently until six or seven inches of it show. Inflate it gently with a hand pump. Hold it a few inches from your lips and turn it slowly: the stream of escaping air shows where the hole is. Mark the spot.
If the hole is a pinhole, enlarge it, so that you can still center the patch once the rubber solution is on. Put a small flat object under the tube, such as the box of your tire repair kit, so that the area is flat and free of wrinkles.
Scrape the tube gently with fine, clean emery paper. Apply rubber solution in a light film and let it dry until it is glaze hard. Do not blow on it, and do not try to spread it thin with your fingers.
When the solution has dried properly, apply a thin tire patch of the finest grade. Check for other leaks in the same general area: there is nothing so annoying, the booklet says, as sewing a tire up and finding a leak on the other side of the tube.
Dust a little talcum powder over the area where you spread the rubber solution, so that the tube does not stick to the inside of the casing.
Ease the tube back into the casing. Use the special needle and thread sold for the job; in an emergency, 10 to 12 pound linen or silk fishing line, doubled, will do.
Start about two stitches back, over the good stitching you did not cut. After the first stitch, pull the second under it, so that the end of the thread needs no knot. Sew on with a plain overhand stitch, and always run the needle through the matching holes on the other side, or the tire will twist.
Finish about two stitches over the old stitching and pull the thread under the last loop. Pull each stitch firm but not too tight: a tight stitch can cut the casing.
Spread rubber cement on the inside of the protective strip and on the sewn area of the tire and let it dry. Press the strip down. Mount the tire on an old rim or wheel, inflate it hard and leave it to set, so that the strip sticks well to the tire.
The same booklet says a tubular should be held on its rim by double-sided sticky rim tape or by special rim shellac. It warns against black rim cement on tubulars with open sidewalls or with no rim strip: the cement rots the cotton sidewalls and the stitching.
The booklet gives no method, drying time or test for fitting a tubular to a rim, and this page does not invent one.
Each of these is the booklet’s own warning, except the last, which is what it leaves out.
A tire that rolls off the rim The booklet does not say how to glue a tubular to a rim, or how to test the bond. This page does not either.
Wolber made a tubular with no inner tube and no seam, and sold a kit to mend it without taking it off the rim: find the puncture, inject the glue, then inflate at once to full pressure. The kit held a tube of rubber solution, an injection needle and directions for use. Wolber folder, record 84846. That is a different tire, so it would be a different repair page.
Every record opens in the Ebykr archive. Each step above names the page it rests on.
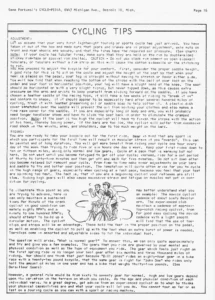
The Cyclo-pedia was the catalog of Gene Portuesi, an importer of lightweights in Detroit. This page puts its method in Ebykr’s own words and quotes nothing at length.
The Ebykr Digest
New articles, timelines, catalog finds and registry activity — assembled from the archive once a month. Your address is never shared.
Double opt-in. One email per month. Unsubscribe at any time with one click.