About Ebykr
Ebykr celebrates classic and vintage lightweight bicycles through provocative imagery and opinion. Ride along with us.
About Ebykr
Ebykr celebrates classic and vintage lightweight bicycles through provocative imagery and opinion. Ride along with us.

Source: Ebykr archive.
| Type | Catalog |
|---|---|
| Year | 1961 |
| Publisher | Gene Portuesi's Cyclo-pedia |
| Country | United States |
| Language | English |
| Pages | 14 |
| Source | Ebykr archive. |
| Credit | Ebykr archive |
| Transcription | Transcribed by eye |
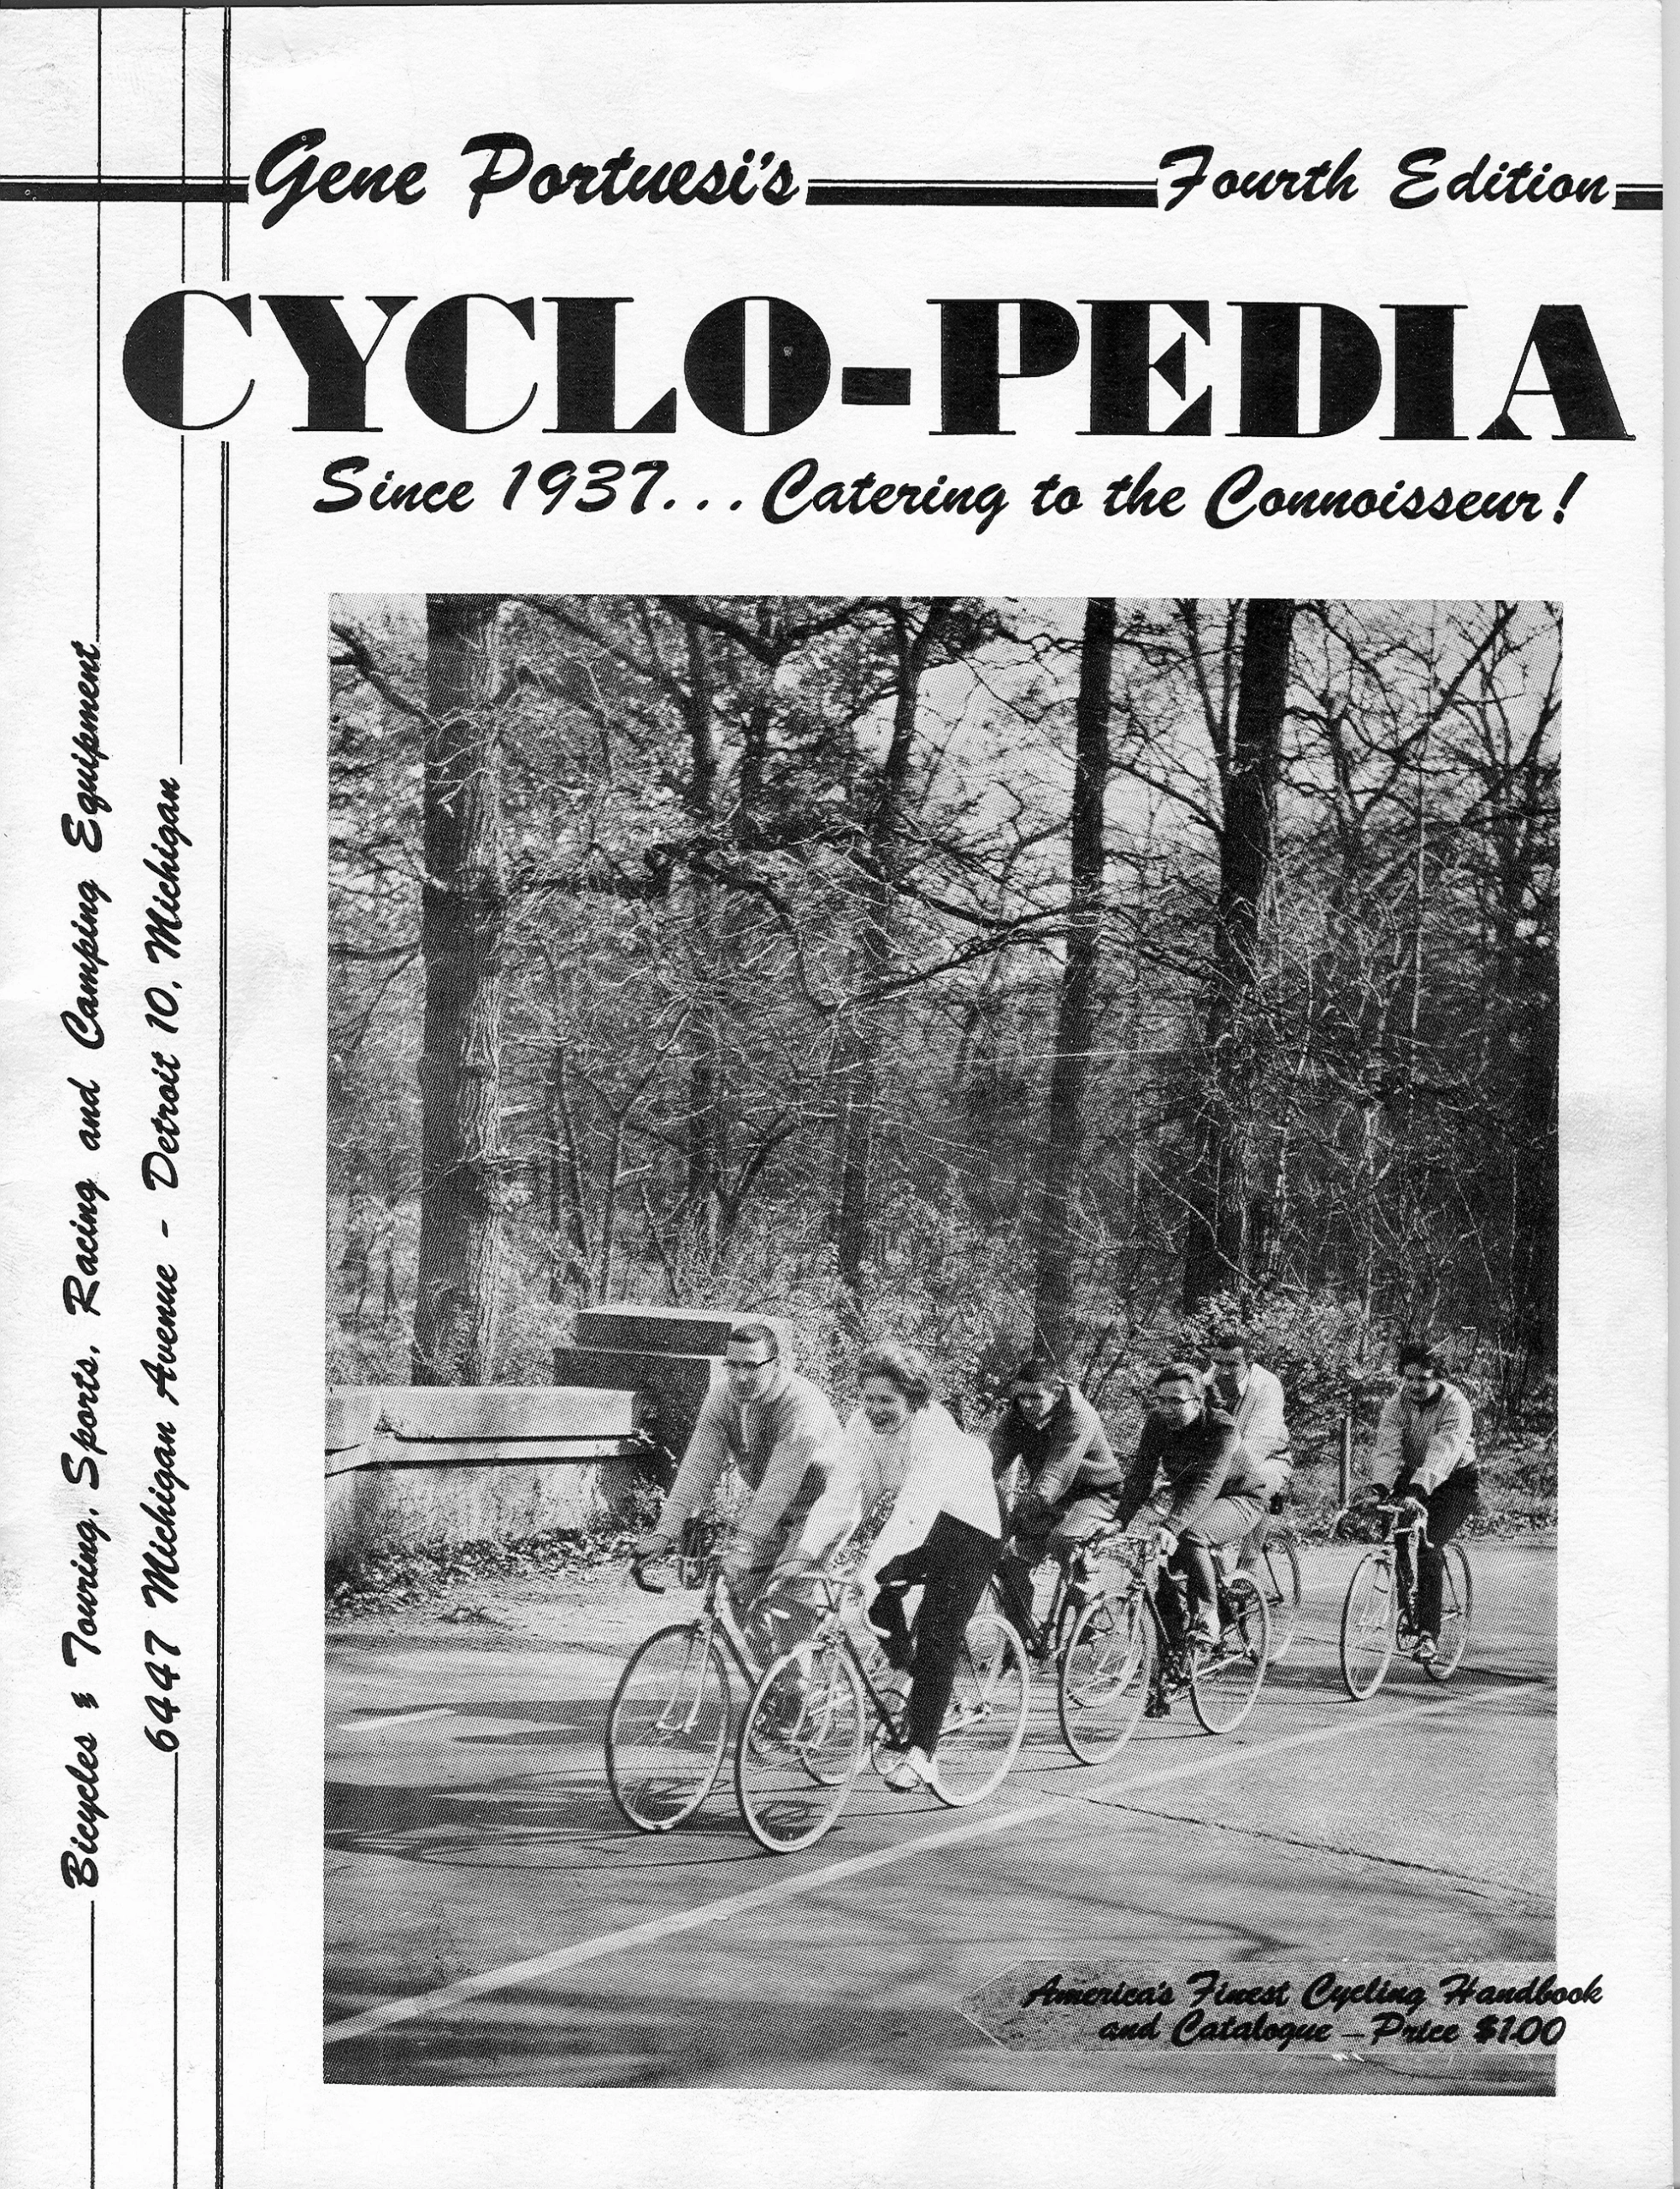
Gene Portuesi's Fourth Edition CYCLO-PEDIA Since 1937... Catering to the Connoisseur! Bicycles & Touring, Sports, Racing and Camping Equipment 6447 Michigan Avenue - Detroit 10, Michigan America's Finest Cycling Handbook and Catalogue - Price $1.00 Gene Portuesi's CYCLO-PEDIA, 6447 Michigan Ave., Detroit 10, Mich. Page 1 Gene Portuesi's Cyclo-Pedia America's Finest Cycling Handbook and Catalogue …
— Front cover —
Gene Portuesi’s
Fourth Edition
CYCLO-PEDIA
Since 1937… Catering to the Connoisseur!
Bicycles & Touring, Sports, Racing and Camping Equipment
6447 Michigan Avenue – Detroit 10, Michigan
America’s Finest Cycling Handbook and Catalogue – Price $1.00
[The front cover shows six cyclists riding lightweight bicycles in a loose line along a paved road past a low stone parapet, with bare woodland behind them. The title is hand-lettered in script and heavy display capitals between ruled bars, the two address lines run up the left margin between vertical rules and the price is lettered on a pointed panel set into the lower right of the photograph.]
— Page 1 —
Gene Portuesi’s CYCLO-PEDIA, 6447 Michigan Ave., Detroit 10, Mich.
Page 1
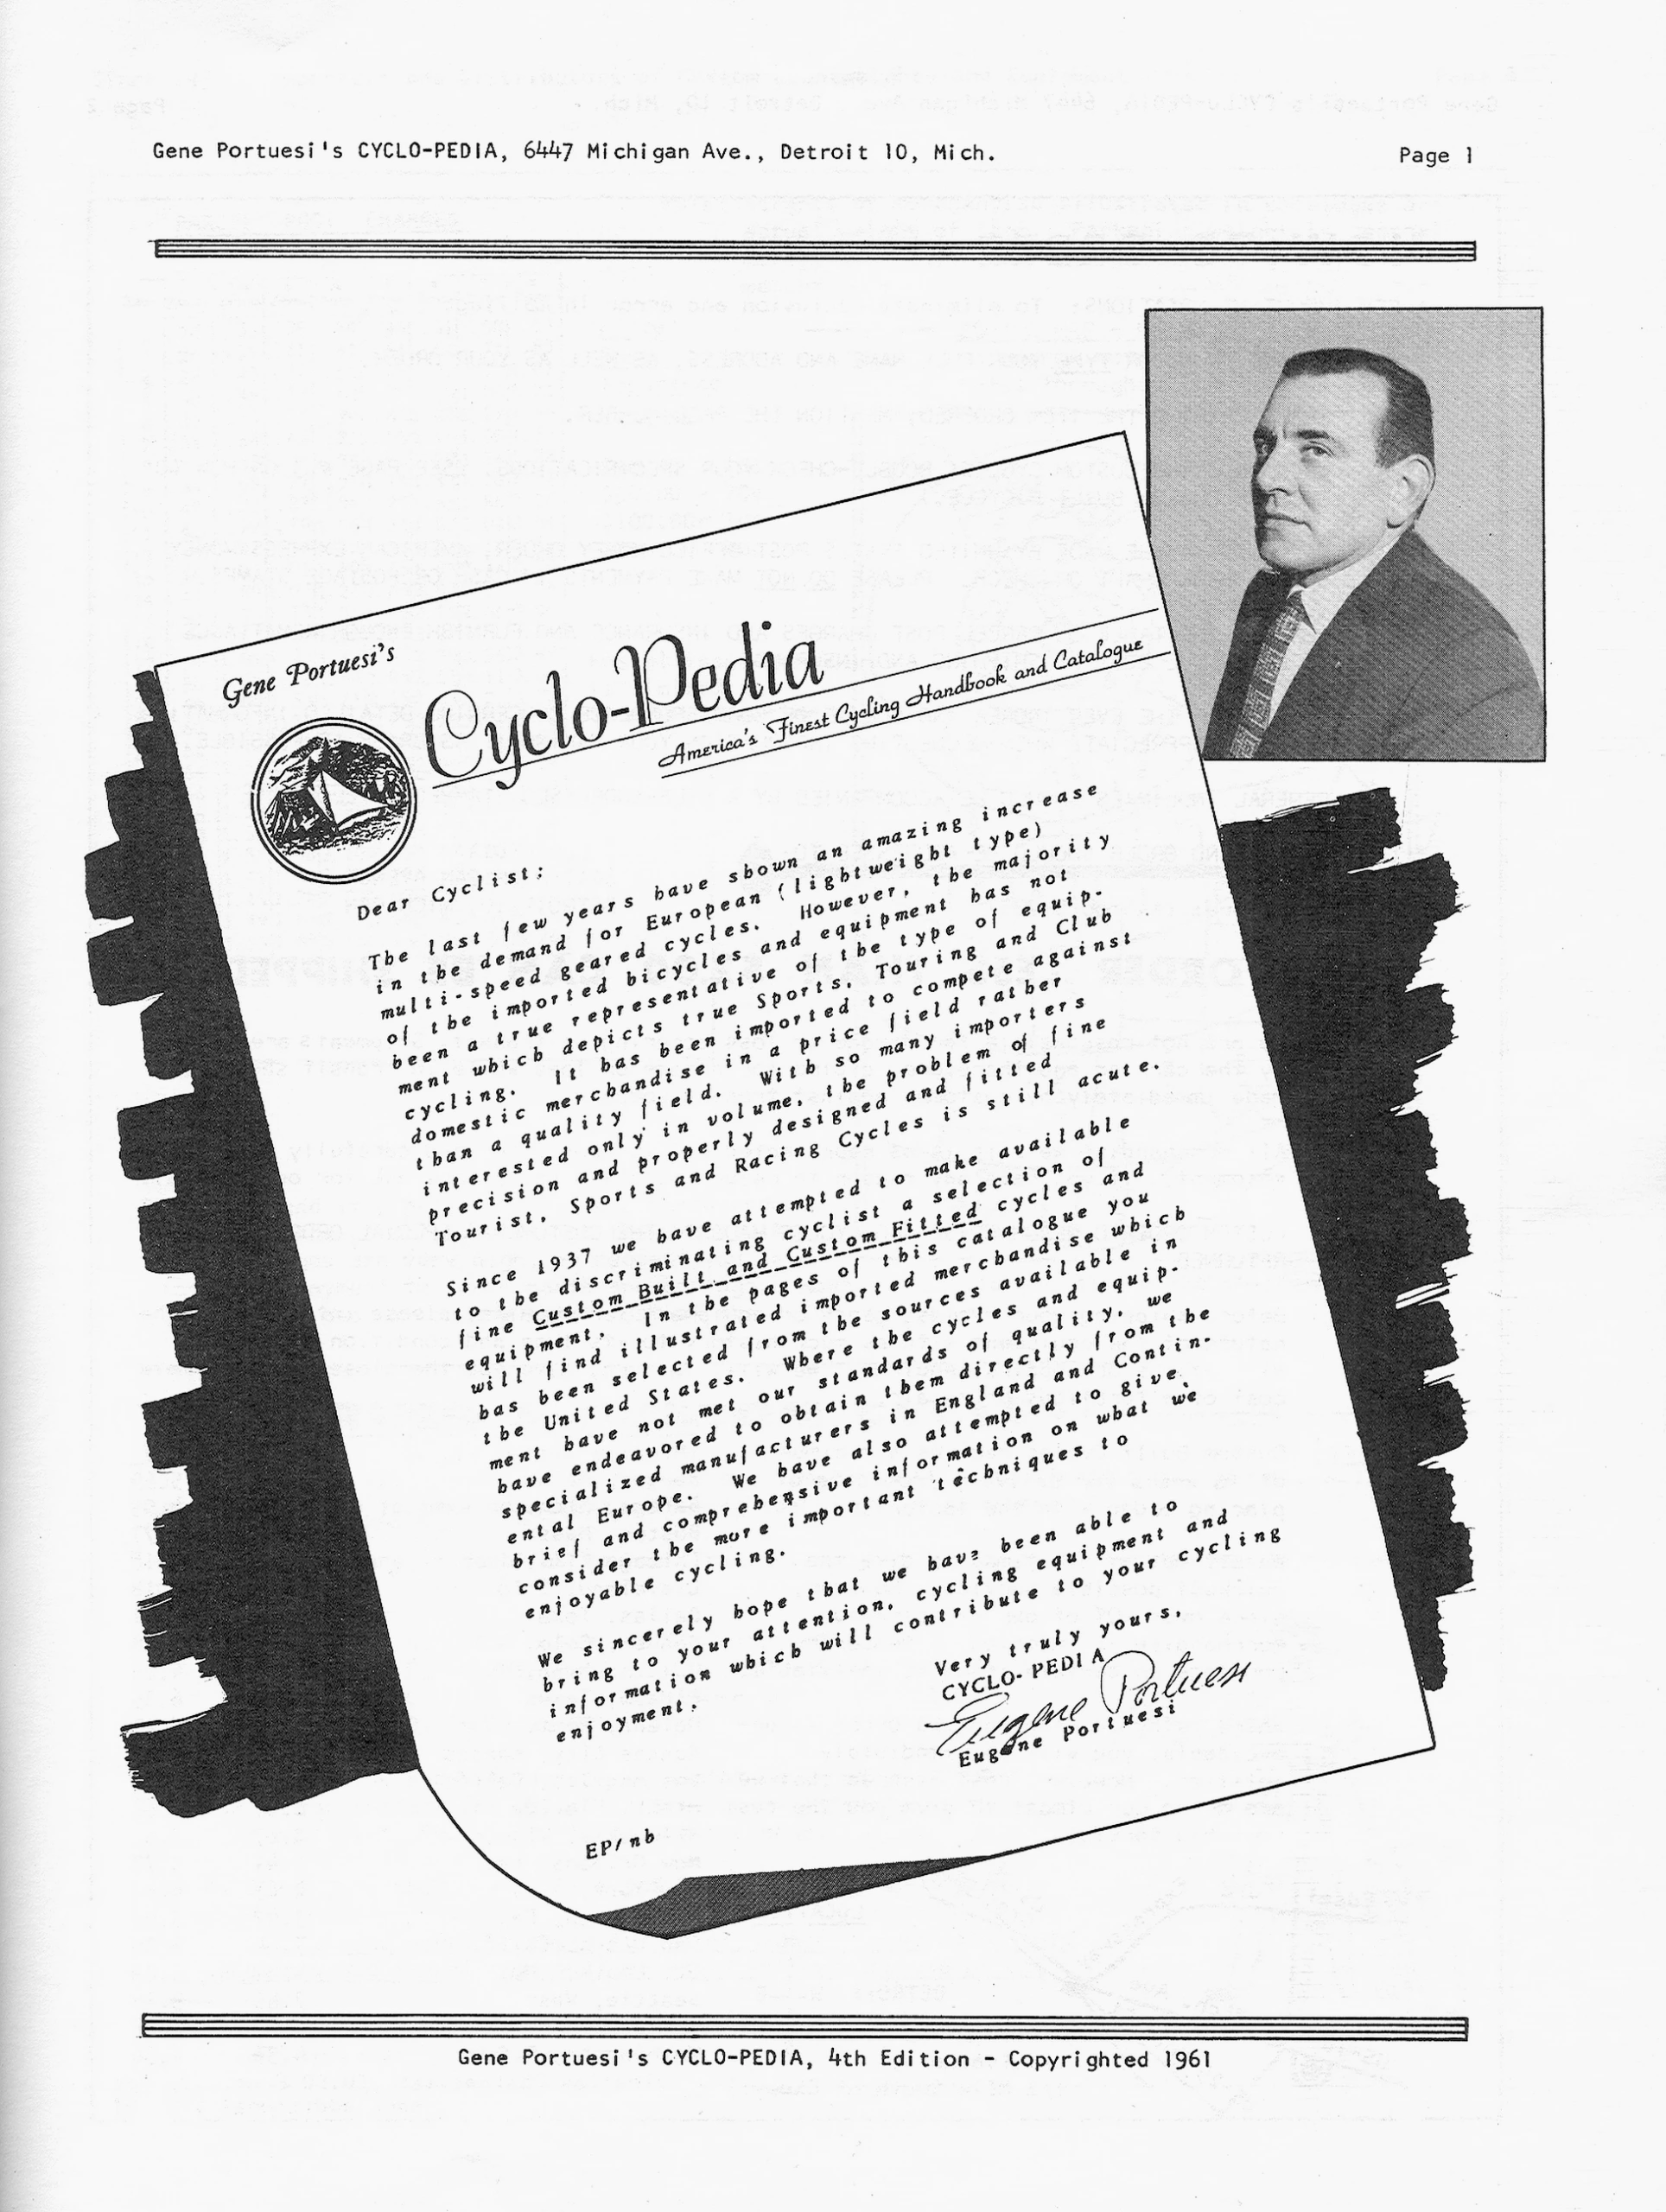
Gene Portuesi’s
Cyclo-Pedia
America’s Finest Cycling Handbook and Catalogue
Dear Cyclist:
The last few years have shown an amazing increase in the demand for European (lightweight type) multi-speed geared cycles. However, the majority of the imported bicycles and equipment has not been a true representative of the type of equipment which depicts true Sports, Touring and Club cycling. It has been imported to compete against domestic merchandise in a price field rather than a quality field. With so many importers interested only in volume, the problem of fine precision and properly designed and fitted Tourist, Sports and Racing Cycles is still acute.
Since 1937 we have attempted to make available to the discriminating cyclist a selection of fine Custom Built and Custom Fitted cycles and equipment. In the pages of this catalogue you will find illustrated imported merchandise which has been selected from the sources available in the United States. Where the cycles and equipment have not met our standards of quality, we have endeavored to obtain them directly from the specialized manufacturers in England and Continental Europe. We have also attempted to give, [?] brief and comprehensive information on what we consider the more important techniques to enjoyable cycling.
We sincerely hope that we have been able to bring to your attention, cycling equipment and information which will contribute to your cycling enjoyment.
Very truly yours,
CYCLO-PEDIA
Eugene Portuesi
Eugene Portuesi
EP/nb
Gene Portuesi’s CYCLO-PEDIA, 4th Edition – Copyrighted 1961
[A typed letter on a drawn Cyclo-Pedia letterhead is set at an angle across a ragged black brush-stroke ground, its lower corner curling, with a small round vignette of a tent below pine trees and mountains beside the masthead and a reproduced ink signature above the typed name. A portrait photograph of a man in a dark suit and patterned tie sits at the upper right, and triple rules frame the page under the running head and above the footer.]
— Page 4 —
Gene Portuesi’s CYCLO-PEDIA, 6447 Michigan Ave., Detroit 10, Mich.
Page 4
“North, South, East and Westward –Ho!”
n w e s
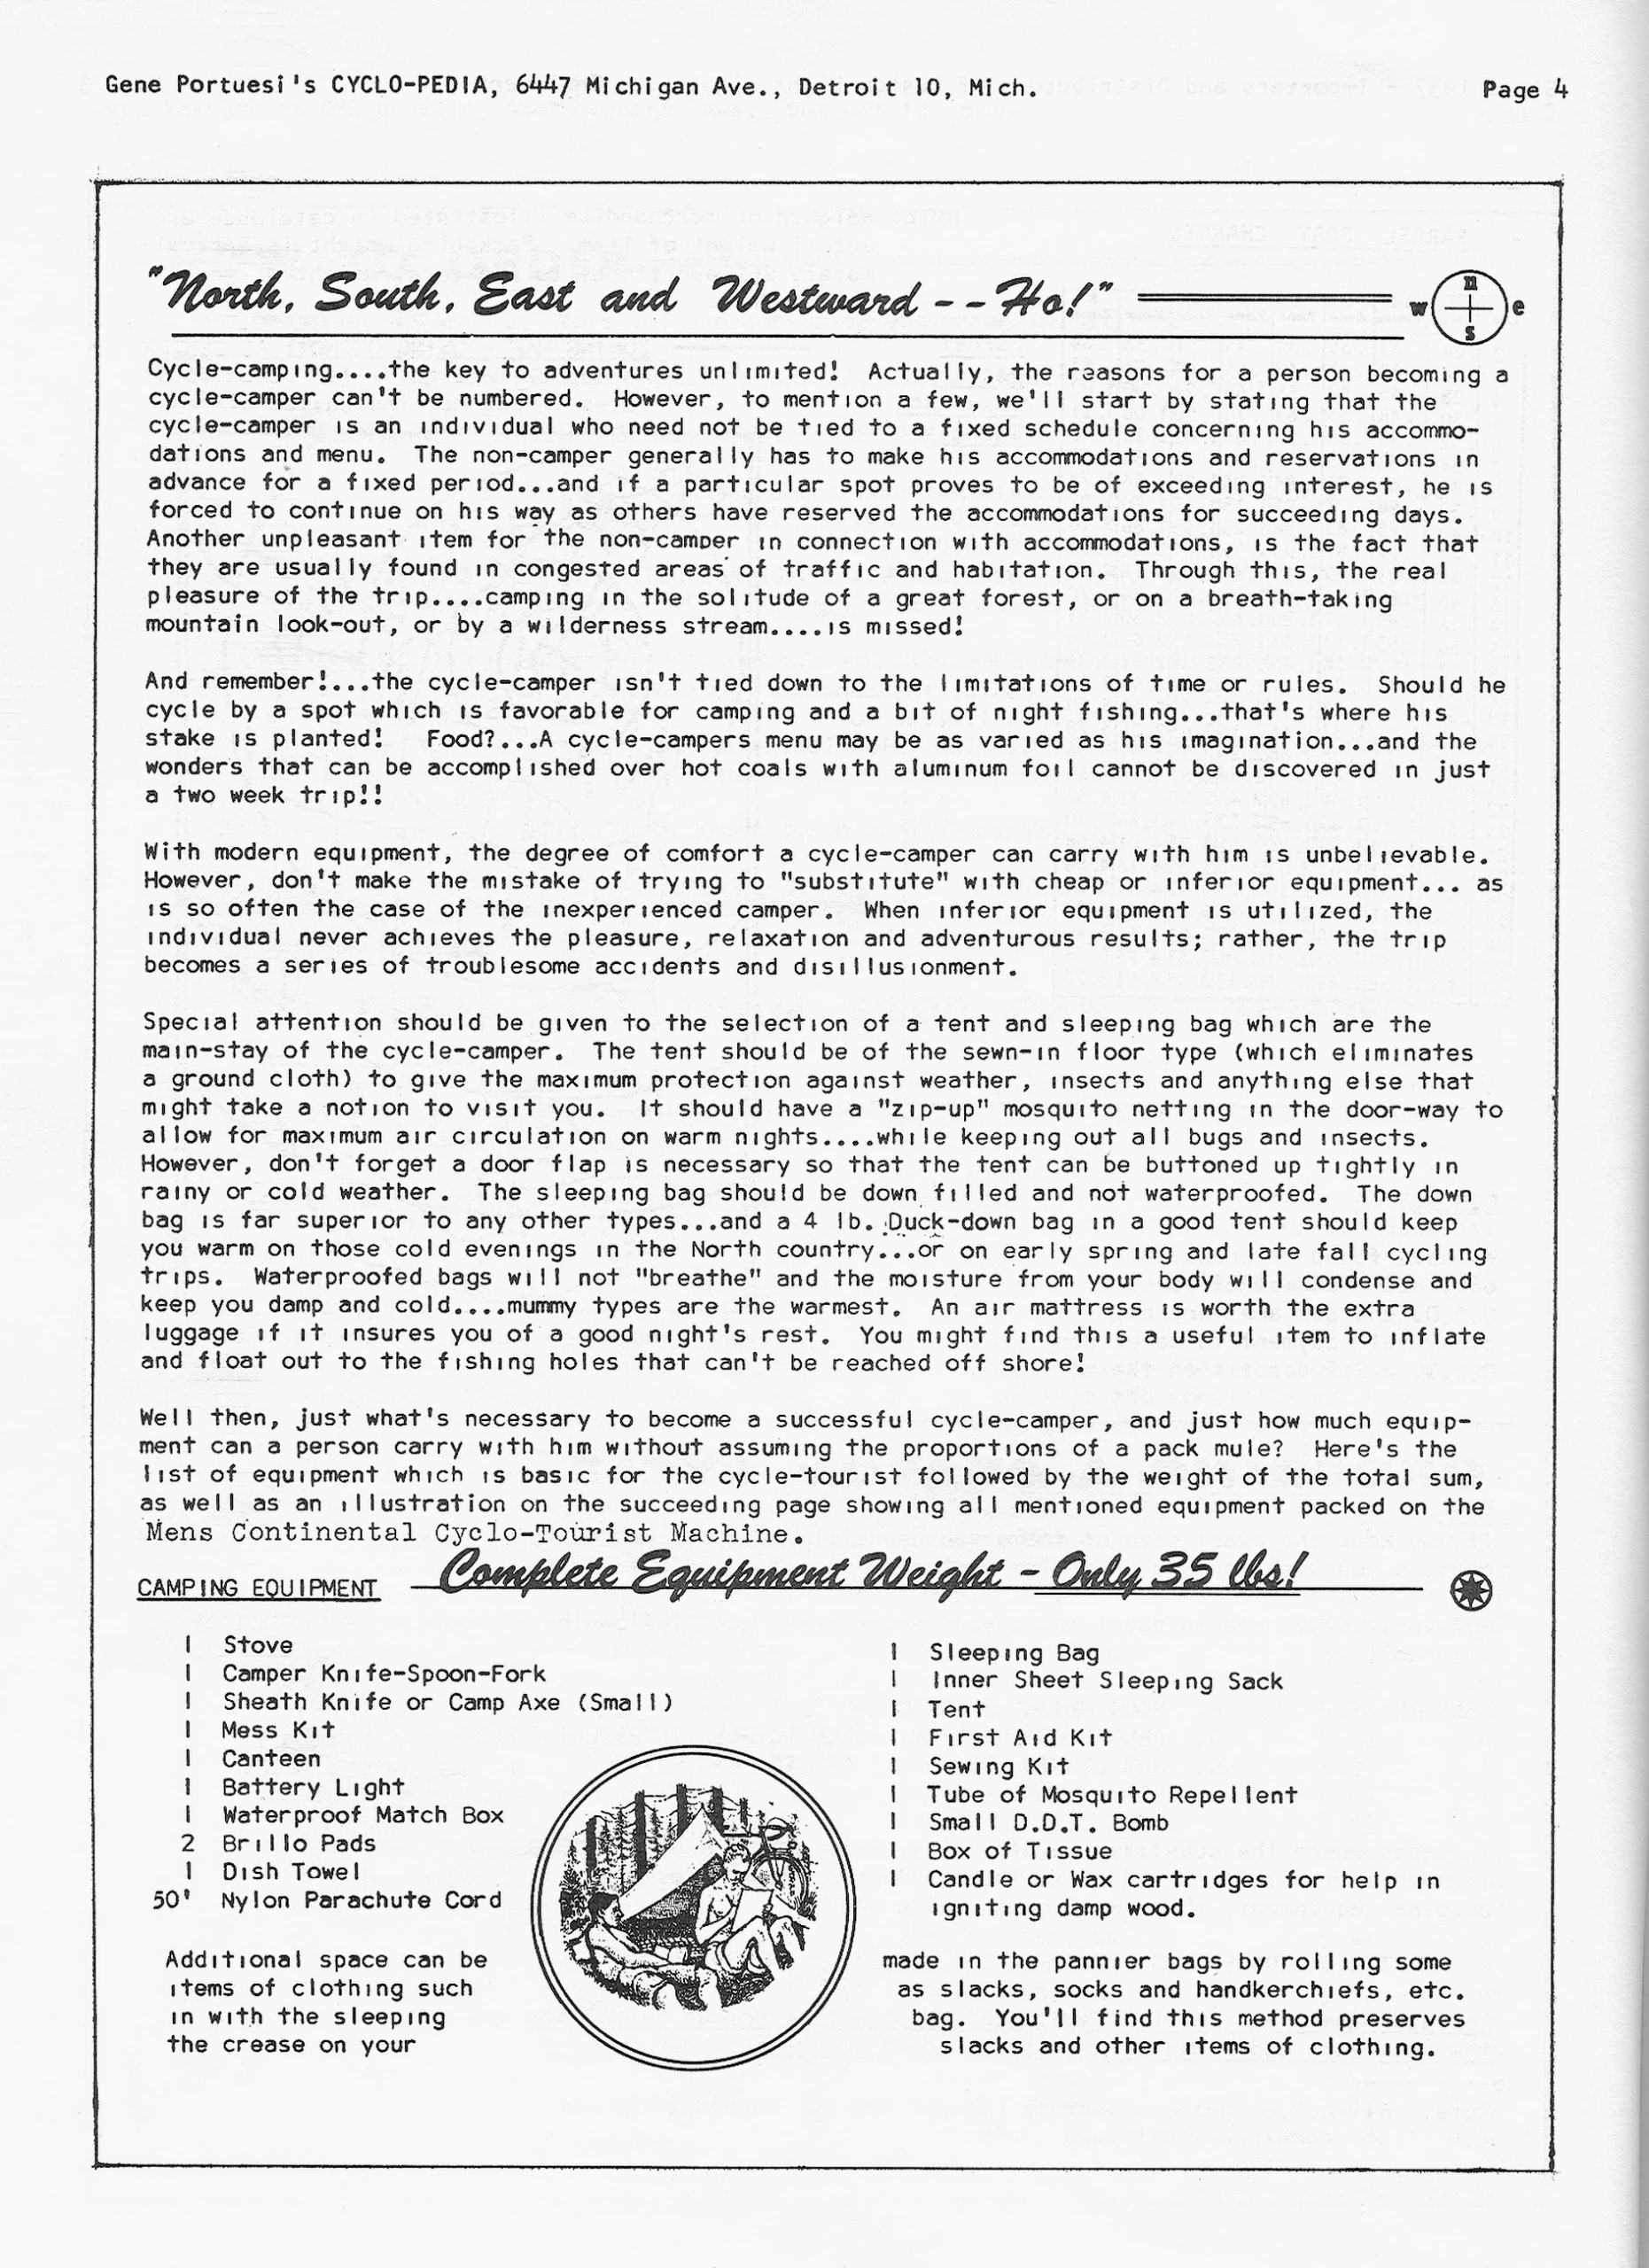
Cycle-camping….the key to adventures unlimited! Actually, the reasons for a person becoming a cycle-camper can’t be numbered. However, to mention a few, we’ll start by stating that the cycle-camper is an individual who need not be tied to a fixed schedule concerning his accommodations and menu. The non-camper generally has to make his accommodations and reservations in advance for a fixed period…and if a particular spot proves to be of exceeding interest, he is forced to continue on his way as others have reserved the accommodations for succeeding days. Another unpleasant item for the non-camper in connection with accommodations, is the fact that they are usually found in congested areas of traffic and habitation. Through this, the real pleasure of the trip….camping in the solitude of a great forest, or on a breath-taking mountain look-out, or by a wilderness stream….is missed!
And remember!…the cycle-camper isn’t tied down to the limitations of time or rules. Should he cycle by a spot which is favorable for camping and a bit of night fishing…that’s where his stake is planted! Food?…A cycle-campers menu may be as varied as his imagination…and the wonders that can be accomplished over hot coals with aluminum foil cannot be discovered in just a two week trip!!
With modern equipment, the degree of comfort a cycle-camper can carry with him is unbelievable. However, don’t make the mistake of trying to “substitute” with cheap or inferior equipment… as is so often the case of the inexperienced camper. When inferior equipment is utilized, the individual never achieves the pleasure, relaxation and adventurous results; rather, the trip becomes a series of troublesome accidents and disillusionment.
Special attention should be given to the selection of a tent and sleeping bag which are the main-stay of the cycle-camper. The tent should be of the sewn-in floor type (which eliminates a ground cloth) to give the maximum protection against weather, insects and anything else that might take a notion to visit you. It should have a “zip-up” mosquito netting in the door-way to allow for maximum air circulation on warm nights….while keeping out all bugs and insects. However, don’t forget a door flap is necessary so that the tent can be buttoned up tightly in rainy or cold weather. The sleeping bag should be down filled and not waterproofed. The down bag is far superior to any other types…and a 4 lb. Duck-down bag in a good tent should keep you warm on those cold evenings in the North country…or on early spring and late fall cycling trips. Waterproofed bags will not “breathe” and the moisture from your body will condense and keep you damp and cold….mummy types are the warmest. An air mattress is worth the extra luggage if it insures you of a good night’s rest. You might find this a useful item to inflate and float out to the fishing holes that can’t be reached off shore!
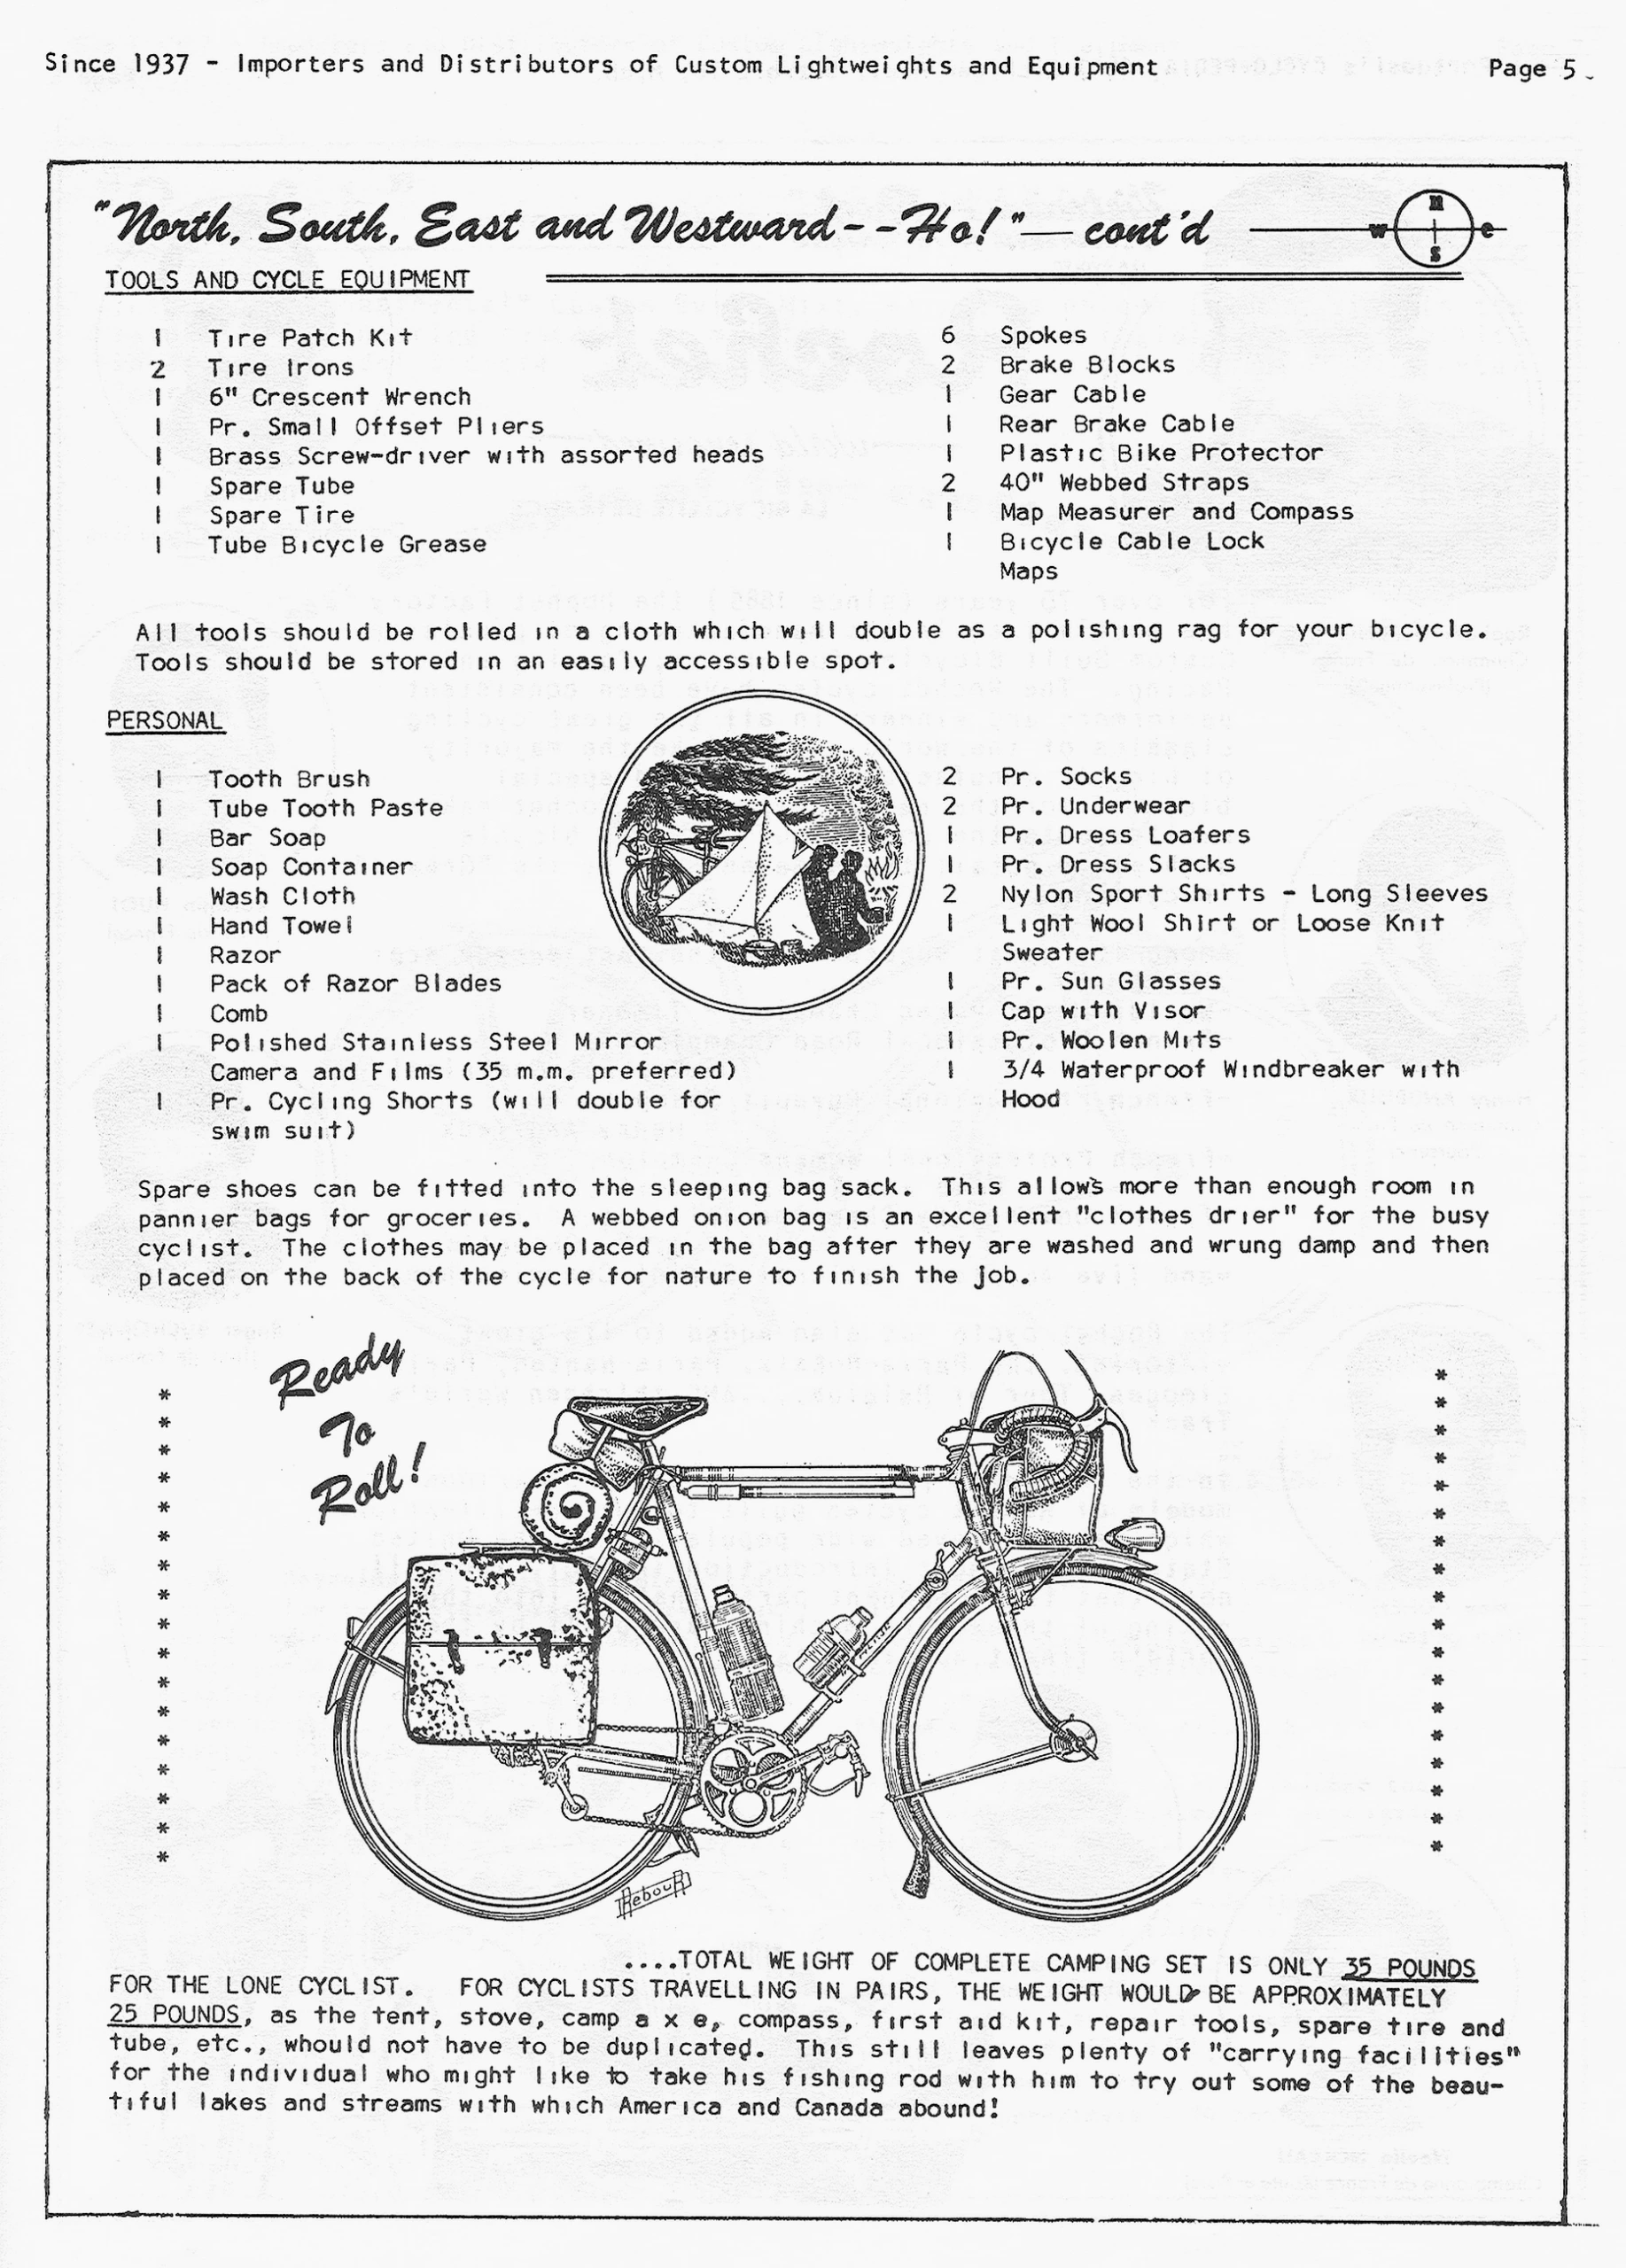
Well then, just what’s necessary to become a successful cycle-camper, and just how much equipment can a person carry with him without assuming the proportions of a pack mule? Here’s the list of equipment which is basic for the cycle-tourist followed by the weight of the total sum, as well as an illustration on the succeeding page showing all mentioned equipment packed on the Mens Continental Cyclo-Tourist Machine.
CAMPING EQUIPMENT
Complete Equipment Weight – Only 35 lbs!
1 Stove
1 Camper Knife-Spoon-Fork
1 Sheath Knife or Camp Axe (Small)
1 Mess Kit
1 Canteen
1 Battery Light
1 Waterproof Match Box
2 Brillo Pads
1 Dish Towel
50′ Nylon Parachute Cord
1 Sleeping Bag
1 Inner Sheet Sleeping Sack
1 Tent
1 First Aid Kit
1 Sewing Kit
1 Tube of Mosquito Repellent
1 Small D.D.T. Bomb
1 Box of Tissue
1 Candle or Wax cartridges for help in igniting damp wood.
Additional space can be made in the pannier bags by rolling some items of clothing such as slacks, socks and handkerchiefs, etc. in with the sleeping bag. You’ll find this method preserves the crease on your slacks and other items of clothing.
[A typed essay on cycle-camping fills a ruled box under a hand-lettered script heading that ends in a small compass rose. Below it a two-column equipment list and a closing paragraph wrap around a round vignette drawing of two shirtless campers resting before a tent among pine trees, one reading a sheet of paper, with a bicycle leaning behind them.]
— Page 5 —
Since 1937 – Importers and Distributors of Custom Lightweights and Equipment
Page 5
“North, South, East and Westward–Ho!”— cont’d
n w e s
TOOLS AND CYCLE EQUIPMENT
1 Tire Patch Kit
2 Tire Irons
1 6″ Crescent Wrench
1 Pr. Small Offset Pliers
1 Brass Screw-driver with assorted heads
1 Spare Tube
1 Spare Tire
1 Tube Bicycle Grease
6 Spokes
2 Brake Blocks
1 Gear Cable
1 Rear Brake Cable
1 Plastic Bike Protector
2 40” Webbed Straps
1 Map Measurer and Compass
1 Bicycle Cable Lock
Maps
All tools should be rolled in a cloth which will double as a polishing rag for your bicycle. Tools should be stored in an easily accessible spot.
PERSONAL
1 Tooth Brush
1 Tube Tooth Paste
1 Bar Soap
1 Soap Container
1 Wash Cloth
1 Hand Towel
1 Razor
1 Pack of Razor Blades
1 Comb
1 Polished Stainless Steel Mirror
Camera and Films (35 m.m. preferred)
1 Pr. Cycling Shorts (will double for swim suit)
2 Pr. Socks
2 Pr. Underwear
1 Pr. Dress Loafers
1 Pr. Dress Slacks
2 Nylon Sport Shirts – Long Sleeves
1 Light Wool Shirt or Loose Knit Sweater
1 Pr. Sun Glasses
1 Cap with Visor
1 Pr. Woolen Mits
1 3/4 Waterproof Windbreaker with Hood
Spare shoes can be fitted into the sleeping bag sack. This allows more than enough room in pannier bags for groceries. A webbed onion bag is an excellent “clothes drier” for the busy cyclist. The clothes may be placed in the bag after they are washed and wrung damp and then placed on the back of the cycle for nature to finish the job.
Ready To Roll!
Rebour
…TOTAL WEIGHT OF COMPLETE CAMPING SET IS ONLY 35 POUNDS FOR THE LONE CYCLIST. FOR CYCLISTS TRAVELLING IN PAIRS, THE WEIGHT WOULD BE APPROXIMATELY 25 POUNDS, as the tent, stove, camp a x e, compass, first aid kit, repair tools, spare tire and tube, etc., whould not have to be duplicated. This still leaves plenty of “carrying facilities” for the individual who might like to take his fishing rod with him to try out some of the beautiful lakes and streams with which America and Canada abound!
[A pen drawing signed by Rebour shows a loaded touring bicycle in side view, with a leather saddle, dropped handlebars, a front bag and lamp, a rolled bundle behind the saddle, a large rear pannier, two bottles, a pump along the top tube and full fenders, between two vertical columns of asterisks. Above it the equipment lists flank a small round vignette of two figures at a campfire beside a tent and a parked bicycle under a wind-bent tree, all inside a ruled box headed in script with a small compass rose.]
— Page 16 —
Gene Portuesi’s CYCLO-PEDIA, 6447 Michigan Ave., Detroit 10, Mich.
Page 16
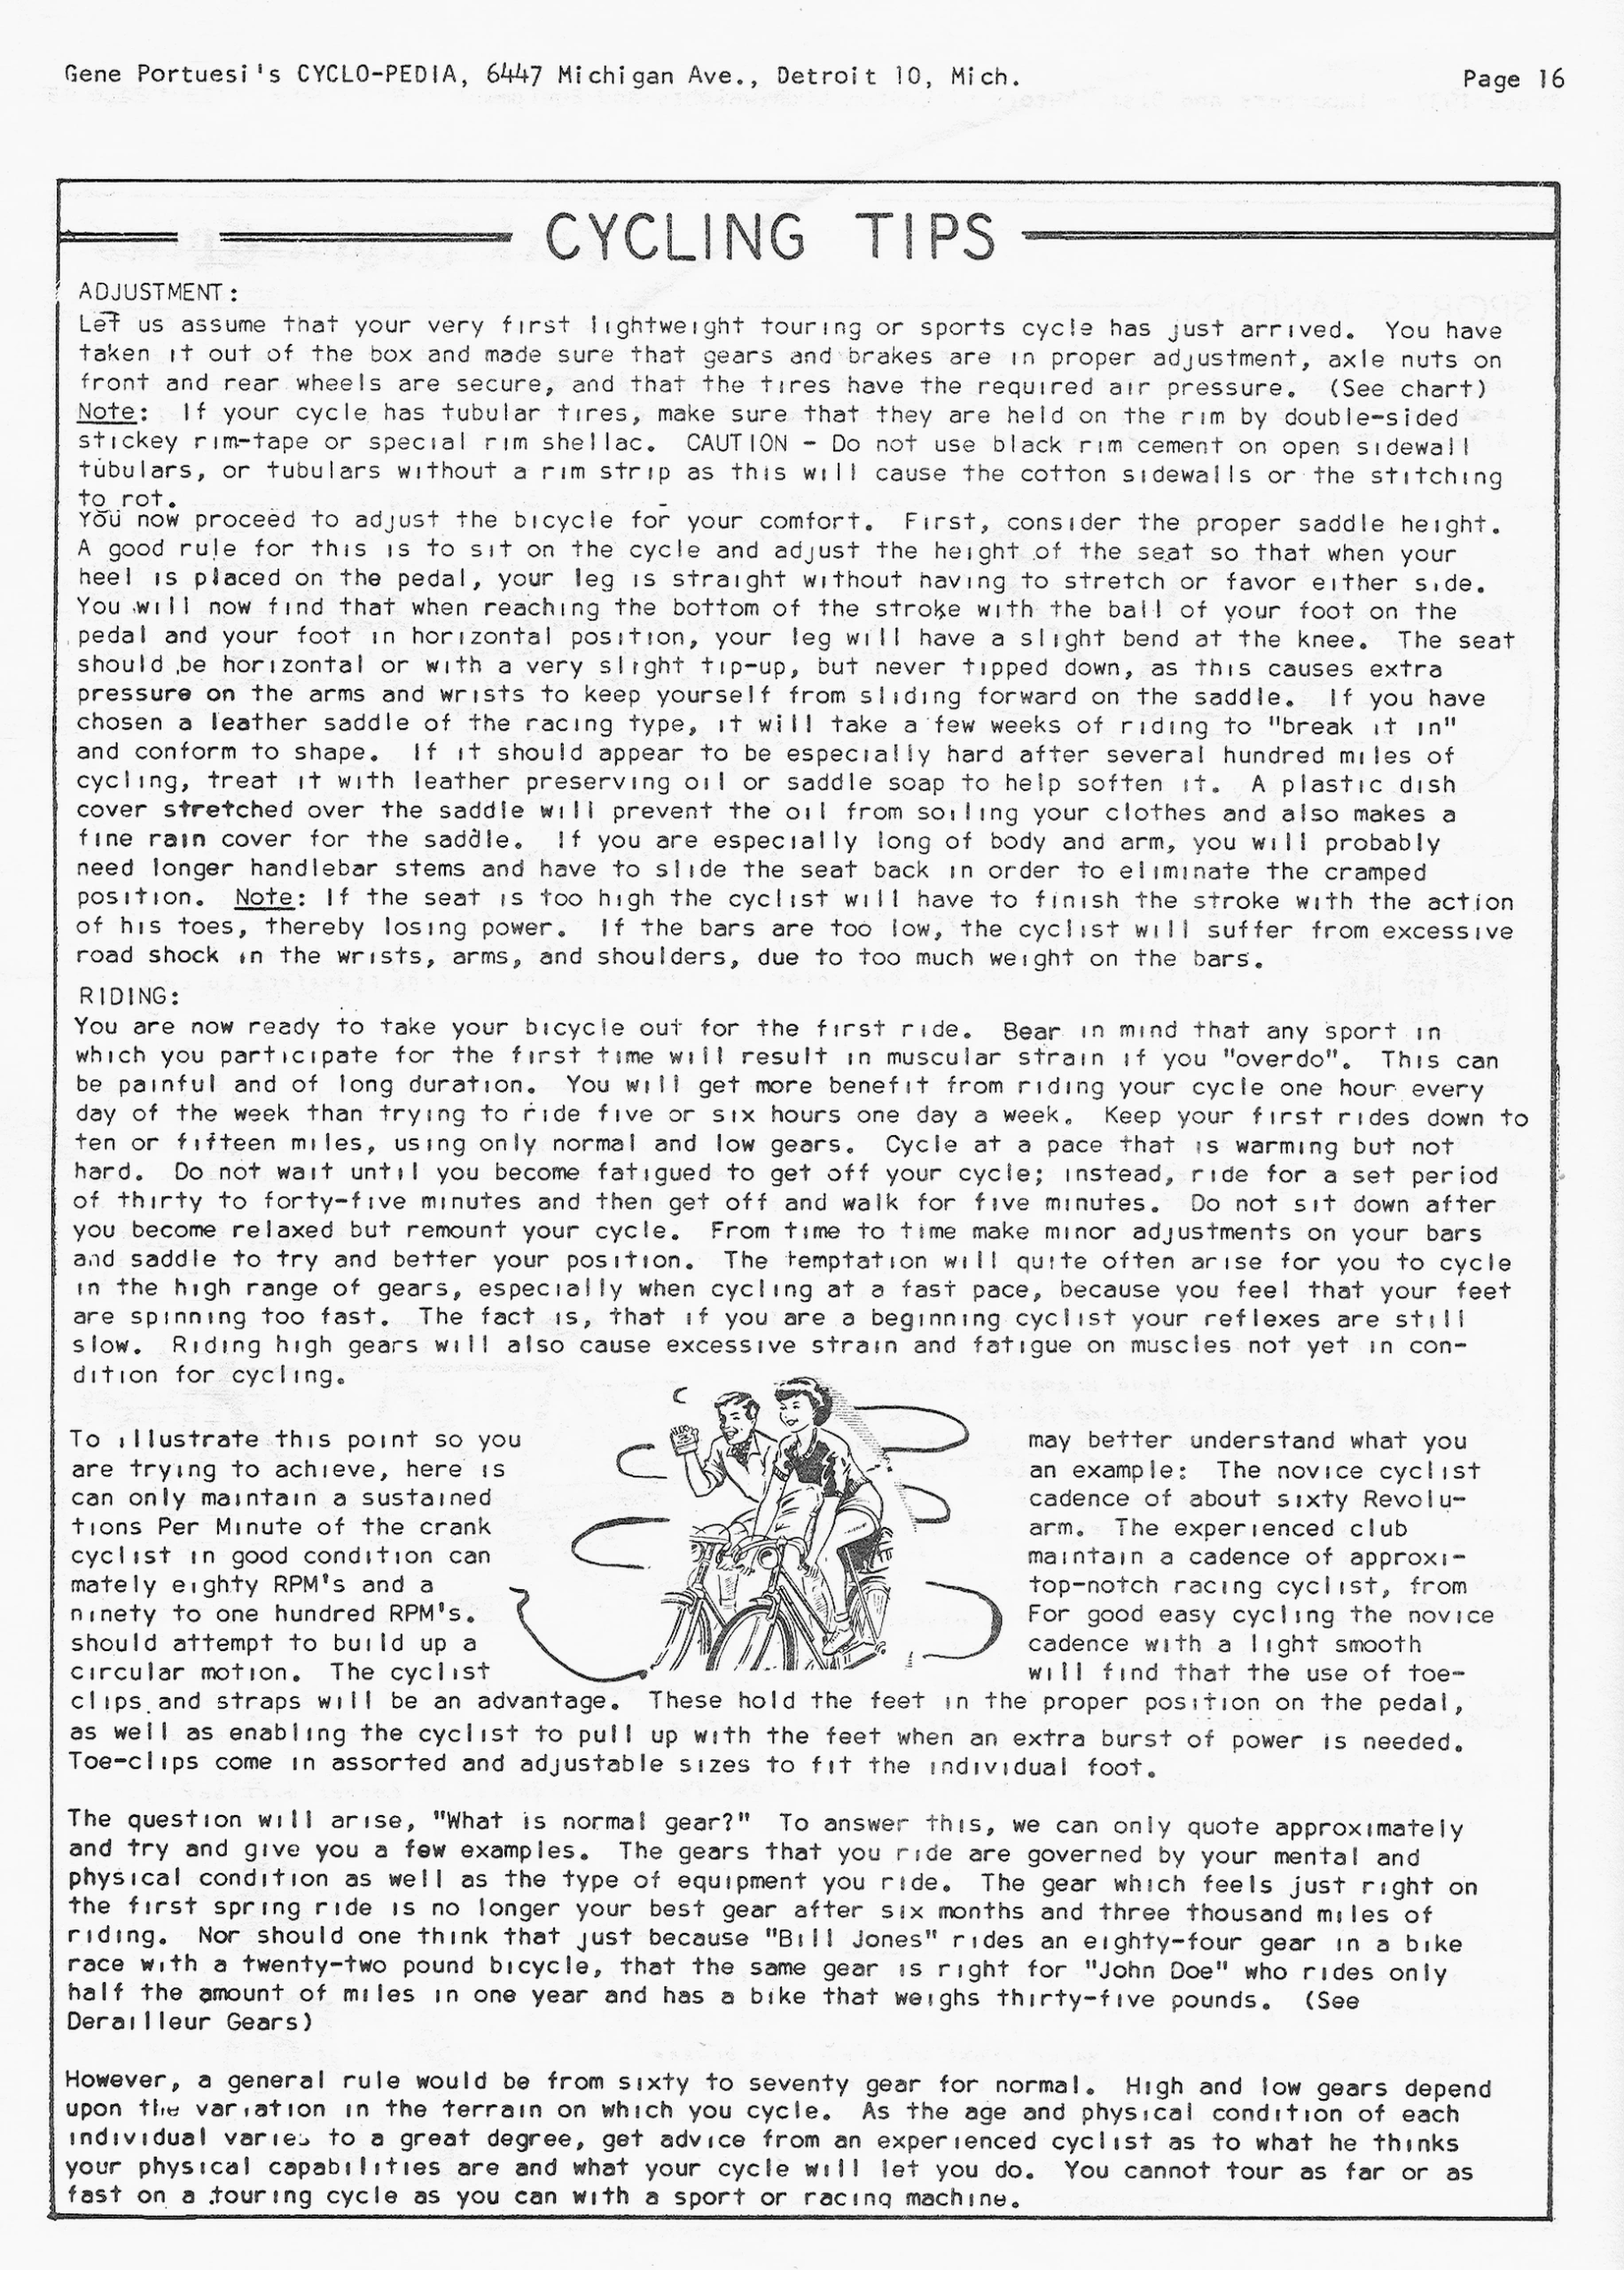
CYCLING TIPS
ADJUSTMENT:
Let us assume that your very first lightweight touring or sports cycle has just arrived. You have taken it out of the box and made sure that gears and brakes are in proper adjustment, axle nuts on front and rear wheels are secure, and that the tires have the required air pressure. (See chart)
Note: If your cycle has tubular tires, make sure that they are held on the rim by double-sided stickey rim-tape or special rim shellac. CAUTION – Do not use black rim cement on open sidewall tubulars, or tubulars without a rim strip as this will cause the cotton sidewalls or the stitching to rot.
You now proceed to adjust the bicycle for your comfort. First, consider the proper saddle height. A good rule for this is to sit on the cycle and adjust the height of the seat so that when your heel is placed on the pedal, your leg is straight without having to stretch or favor either side. You will now find that when reaching the bottom of the stroke with the ball of your foot on the pedal and your foot in horizontal position, your leg will have a slight bend at the knee. The seat should be horizontal or with a very slight tip-up, but never tipped down, as this causes extra pressure on the arms and wrists to keep yourself from sliding forward on the saddle. If you have chosen a leather saddle of the racing type, it will take a few weeks of riding to “break it in” and conform to shape. If it should appear to be especially hard after several hundred miles of cycling, treat it with leather preserving oil or saddle soap to help soften it. A plastic dish cover stretched over the saddle will prevent the oil from soiling your clothes and also makes a fine rain cover for the saddle. If you are especially long of body and arm, you will probably need longer handlebar stems and have to slide the seat back in order to eliminate the cramped position. Note: If the seat is too high the cyclist will have to finish the stroke with the action of his toes, thereby losing power. If the bars are too low, the cyclist will suffer from excessive road shock in the wrists, arms, and shoulders, due to too much weight on the bars.
RIDING:
You are now ready to take your bicycle out for the first ride. Bear in mind that any sport in which you participate for the first time will result in muscular strain if you “overdo”. This can be painful and of long duration. You will get more benefit from riding your cycle one hour every day of the week than trying to ride five or six hours one day a week. Keep your first rides down to ten or fifteen miles, using only normal and low gears. Cycle at a pace that is warming but not hard. Do not wait until you become fatigued to get off your cycle; instead, ride for a set period of thirty to forty-five minutes and then get off and walk for five minutes. Do not sit down after you become relaxed but remount your cycle. From time to time make minor adjustments on your bars and saddle to try and better your position. The temptation will quite often arise for you to cycle in the high range of gears, especially when cycling at a fast pace, because you feel that your feet are spinning too fast. The fact is, that if you are a beginning cyclist your reflexes are still slow. Riding high gears will also cause excessive strain and fatigue on muscles not yet in condition for cycling.
To illustrate this point so you may better understand what you are trying to achieve, here is an example: The novice cyclist can only maintain a sustained cadence of about sixty Revolutions Per Minute of the crank arm. The experienced club cyclist in good condition can maintain a cadence of approximately eighty RPM’s and a top-notch racing cyclist, from ninety to one hundred RPM’s. For good easy cycling the novice should attempt to build up a cadence with a light smooth circular motion. The cyclist will find that the use of toe-clips and straps will be an advantage. These hold the feet in the proper position on the pedal, as well as enabling the cyclist to pull up with the feet when an extra burst of power is needed. Toe-clips come in assorted and adjustable sizes to fit the individual foot.
The question will arise, “What is normal gear?” To answer this, we can only quote approximately and try and give you a few examples. The gears that you ride are governed by your mental and physical condition as well as the type of equipment you ride. The gear which feels just right on the first spring ride is no longer your best gear after six months and three thousand miles of riding. Nor should one think that just because “Bill Jones” rides an eighty-four gear in a bike race with a twenty-two pound bicycle, that the same gear is right for “John Doe” who rides only half the amount of miles in one year and has a bike that weighs thirty-five pounds. (See Derailleur Gears)
However, a general rule would be from sixty to seventy gear for normal. High and low gears depend upon the variation in the terrain on which you cycle. As the age and physical condition of each individual varies to a great degree, get advice from an experienced cyclist as to what he thinks your physical capabilities are and what your cycle will let you do. You cannot tour as far or as fast on a touring cycle as you can with a sport or racing machine.
[A ruled box of typewritten cycling advice under the display heading “Cycling Tips,” with sections on adjustment and riding. A small drawing set into the text shows a smiling young man and woman riding bicycles side by side, the man waving a gloved hand, framed by swirling motion lines.]
— Page 20 —
Gene Portuesi’s CYCLO-PEDIA, 6447 Michigan Ave., Detroit 10, Mich.
Page 20
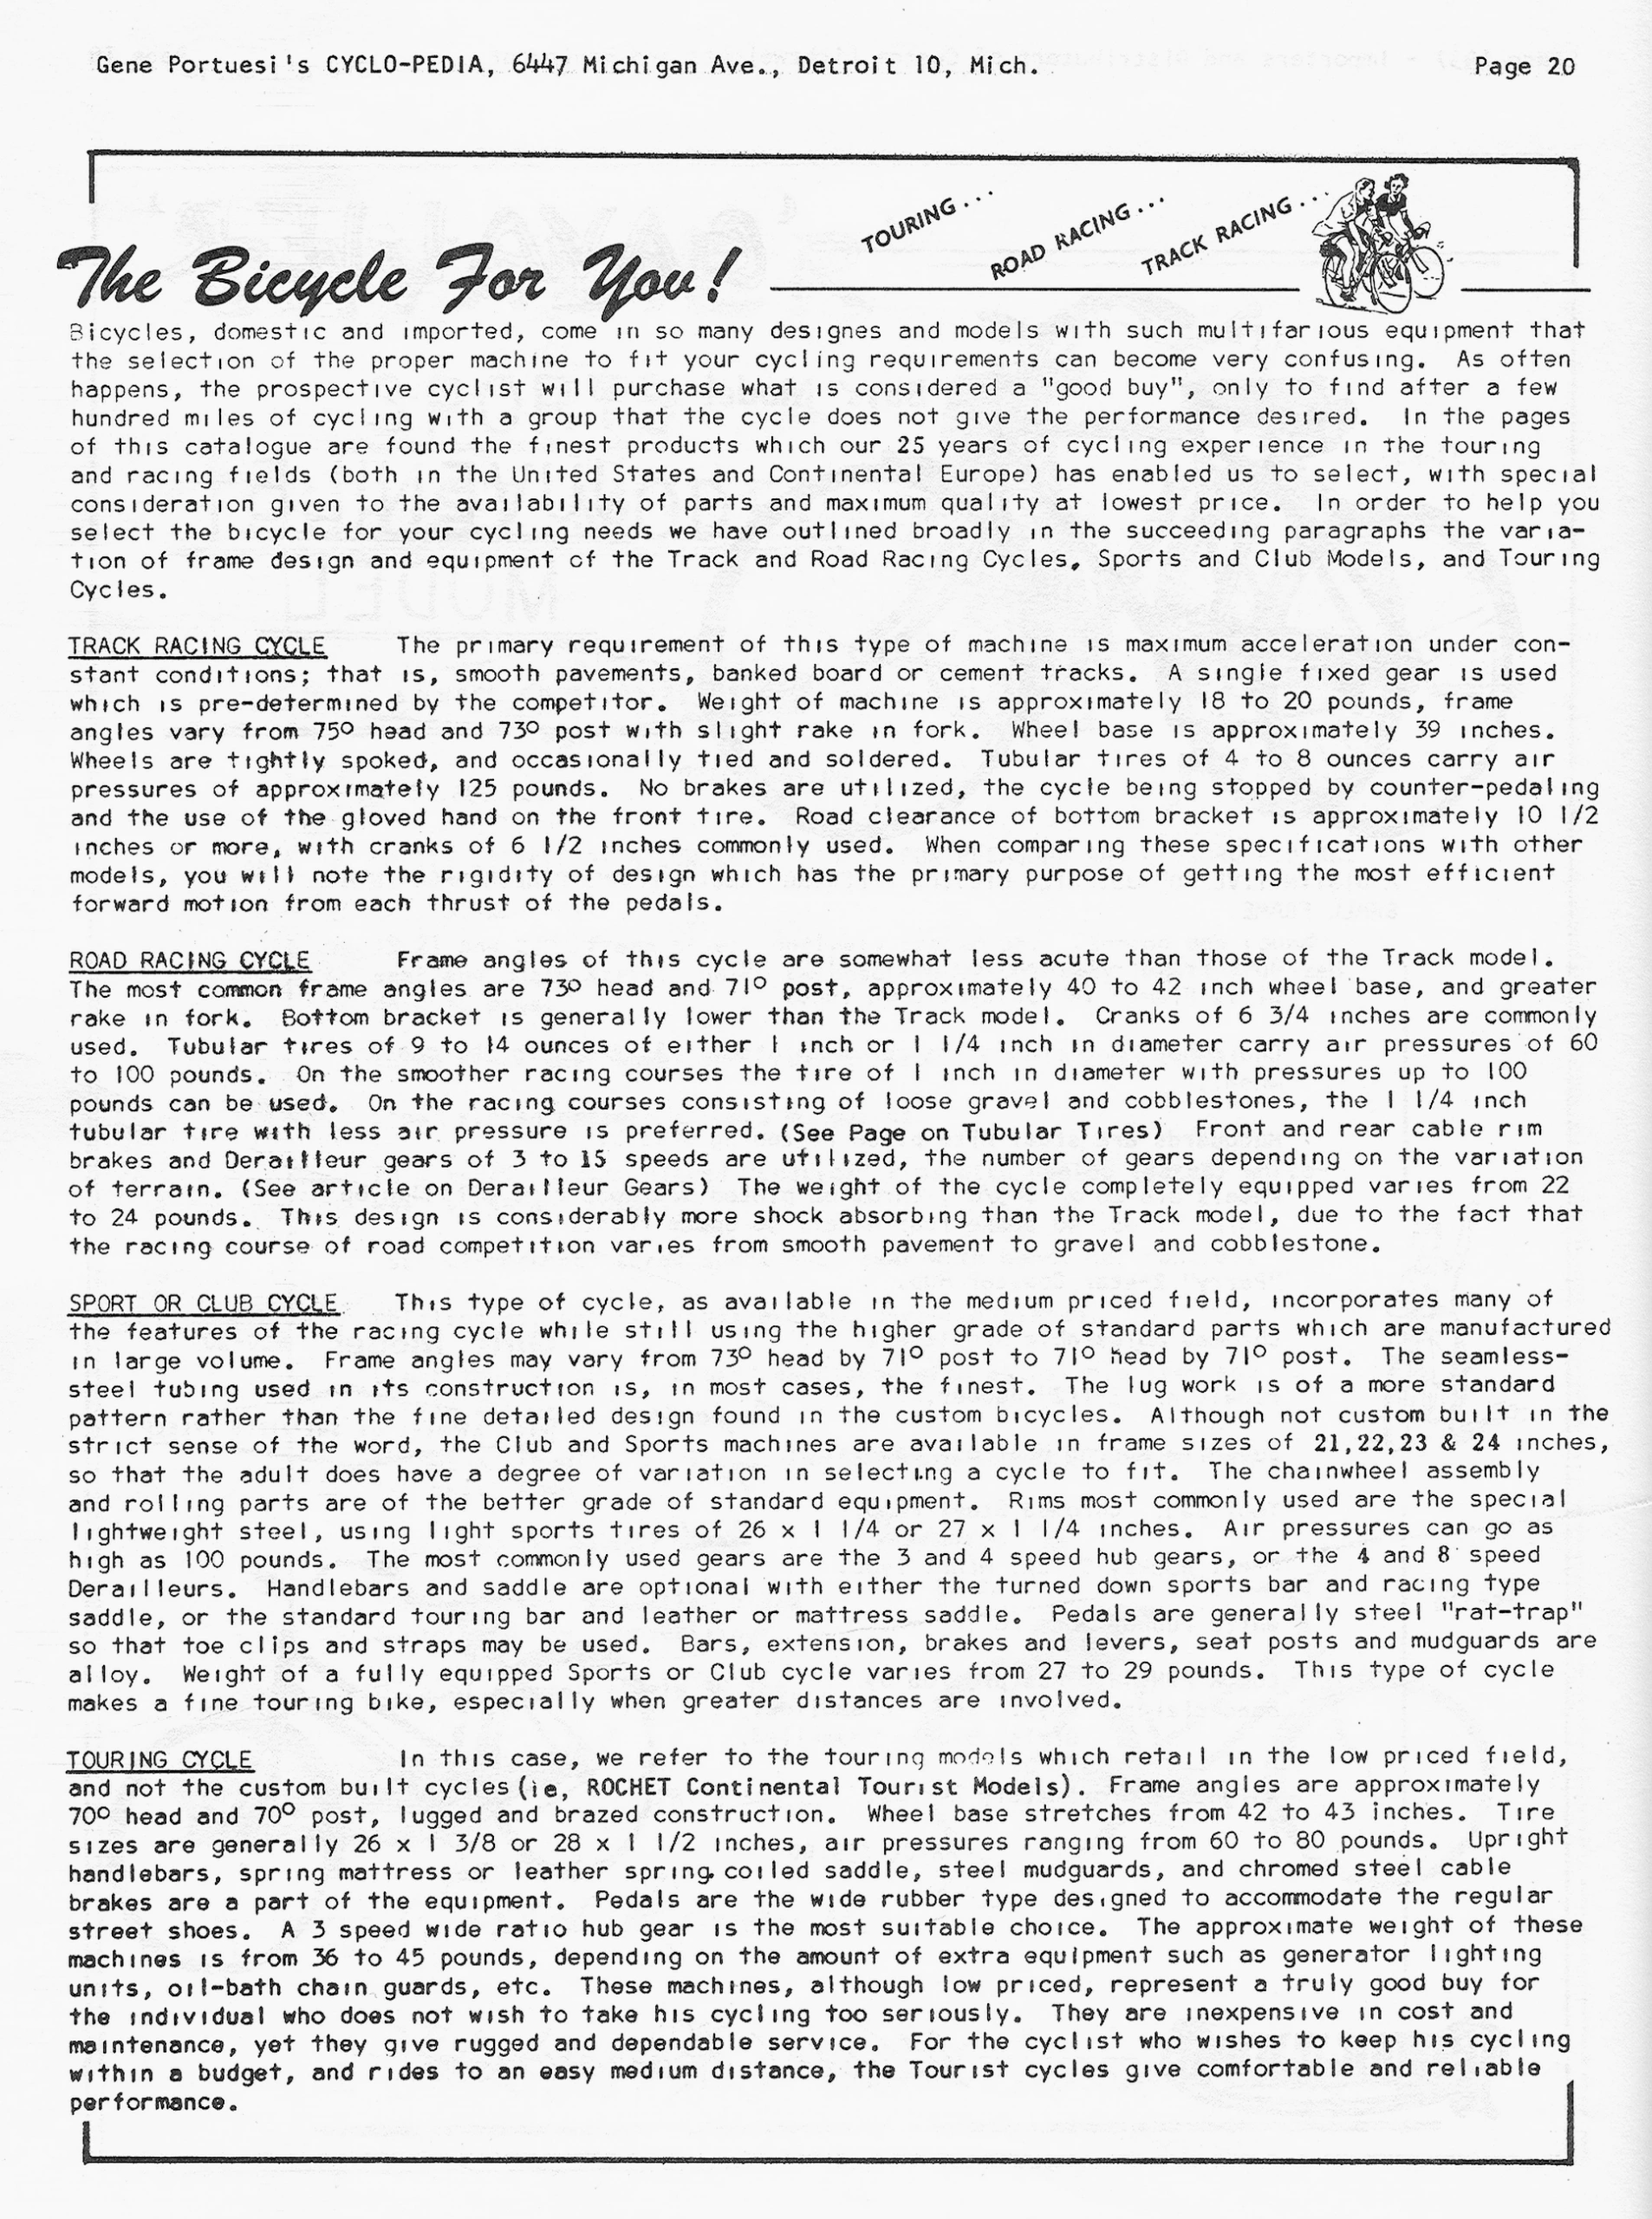
The Bicycle For You!
TOURING . . .
ROAD RACING . . .
TRACK RACING . . .
Bicycles, domestic and imported, come in so many designes and models with such multifarious equipment that the selection of the proper machine to fit your cycling requirements can become very confusing. As often happens, the prospective cyclist will purchase what is considered a “good buy”, only to find after a few hundred miles of cycling with a group that the cycle does not give the performance desired. In the pages of this catalogue are found the finest products which our 25 years of cycling experience in the touring and racing fields (both in the United States and Continental Europe) has enabled us to select, with special consideration given to the availability of parts and maximum quality at lowest price. In order to help you select the bicycle for your cycling needs we have outlined broadly in the succeeding paragraphs the variation of frame design and equipment of the Track and Road Racing Cycles, Sports and Club Models, and Touring Cycles.
TRACK RACING CYCLE
The primary requirement of this type of machine is maximum acceleration under constant conditions; that is, smooth pavements, banked board or cement tracks. A single fixed gear is used which is pre-determined by the competitor. Weight of machine is approximately 18 to 20 pounds, frame angles vary from 75° head and 73° post with slight rake in fork. Wheel base is approximately 39 inches. Wheels are tightly spoked, and occasionally tied and soldered. Tubular tires of 4 to 8 ounces carry air pressures of approximately 125 pounds. No brakes are utilized, the cycle being stopped by counter-pedaling and the use of the gloved hand on the front tire. Road clearance of bottom bracket is approximately 10 1/2 inches or more, with cranks of 6 1/2 inches commonly used. When comparing these specifications with other models, you will note the rigidity of design which has the primary purpose of getting the most efficient forward motion from each thrust of the pedals.
ROAD RACING CYCLE
Frame angles of this cycle are somewhat less acute than those of the Track model. The most common frame angles are 73° head and 71° post, approximately 40 to 42 inch wheel base, and greater rake in fork. Bottom bracket is generally lower than the Track model. Cranks of 6 3/4 inches are commonly used. Tubular tires of 9 to 14 ounces of either 1 inch or 1 1/4 inch in diameter carry air pressures of 60 to 100 pounds. On the smoother racing courses the tire of 1 inch in diameter with pressures up to 100 pounds can be used. On the racing courses consisting of loose gravel and cobblestones, the 1 1/4 inch tubular tire with less air pressure is preferred. (See Page on Tubular Tires) Front and rear cable rim brakes and Derailleur gears of 3 to 15 speeds are utilized, the number of gears depending on the variation of terrain. (See article on Derailleur Gears) The weight of the cycle completely equipped varies from 22 to 24 pounds. This design is considerably more shock absorbing than the Track model, due to the fact that the racing course of road competition varies from smooth pavement to gravel and cobblestone.
SPORT OR CLUB CYCLE
This type of cycle, as available in the medium priced field, incorporates many of the features of the racing cycle while still using the higher grade of standard parts which are manufactured in large volume. Frame angles may vary from 73° head by 71° post to 71° head by 71° post. The seamless-steel tubing used in its construction is, in most cases, the finest. The lug work is of a more standard pattern rather than the fine detailed design found in the custom bicycles. Although not custom built in the strict sense of the word, the Club and Sports machines are available in frame sizes of 21,22,23 & 24 inches, so that the adult does have a degree of variation in selecting a cycle to fit. The chainwheel assembly and rolling parts are of the better grade of standard equipment. Rims most commonly used are the special lightweight steel, using light sports tires of 26 x 1 1/4 or 27 x 1 1/4 inches. Air pressures can go as high as 100 pounds. The most commonly used gears are the 3 and 4 speed hub gears, or the 4 and 8 speed Derailleurs. Handlebars and saddle are optional with either the turned down sports bar and racing type saddle, or the standard touring bar and leather or mattress saddle. Pedals are generally steel “rat-trap” so that toe clips and straps may be used. Bars, extension, brakes and levers, seat posts and mudguards are alloy. Weight of a fully equipped Sports or Club cycle varies from 27 to 29 pounds. This type of cycle makes a fine touring bike, especially when greater distances are involved.
TOURING CYCLE
In this case, we refer to the touring models which retail in the low priced field, and not the custom built cycles(ie, ROCHET Continental Tourist Models). Frame angles are approximately 70° head and 70° post, lugged and brazed construction. Wheel base stretches from 42 to 43 inches. Tire sizes are generally 26 x 1 3/8 or 28 x 1 1/2 inches, air pressures ranging from 60 to 80 pounds. Upright handlebars, spring mattress or leather spring.coiled [?] saddle, steel mudguards, and chromed steel cable brakes are a part of the equipment. Pedals are the wide rubber type designed to accommodate the regular street shoes. A 3 speed wide ratio hub gear is the most suitable choice. The approximate weight of these machines is from 36 to 45 pounds, depending on the amount of extra equipment such as generator lighting units, oil-bath chain guards, etc. These machines, although low priced, represent a truly good buy for the individual who does not wish to take his cycling too seriously. They are inexpensive in cost and maintenance, yet they give rugged and dependable service. For the cyclist who wishes to keep his cycling within a budget, and rides to an easy medium distance, the Tourist cycles give comfortable and reliable performance.
[A ruled box of typewritten advice on choosing a bicycle under the script heading “The Bicycle For You!”, with sections on the track racing, road racing, sport or club and touring cycles. Beside the heading a small drawing shows a man and a woman riding bicycles side by side, with the words “Touring,” “Road Racing” and “Track Racing” lettered on a rising diagonal.]
— Page 33 —
Since 1937 – Importers and Distributors of Custom Lightweights and Equipment
Page 33
HOW TO MAINTAIN CYCLING PERFECTION
First of all…….
REGULAR CLEANING
Pride is an important factor in every day life. Pride of Achievement, Pride of Cleanliness, Pride in Possession – in the case of your own bicycle is doubly true. That is why we advise so strongly the habit of REGULAR CLEANING, and it need not be the seemingly thankless task many a cycle owner makes of it. Although many riders don’t bother, the best method is to do it methodically, cleaning a little each day, handle bars and brakes one day, wheels another day, etc. In this way you will find that your machine never gets really dirty and what is most important you will find that riding a well-cleaned and oiled machine will give an immense satisfaction and pride of ownership. Always remember – your cycle will last much longer if you take care of it. After cycling in wet weather be sure to wipe your machine dry, a few minutes spent thus is well worth while.
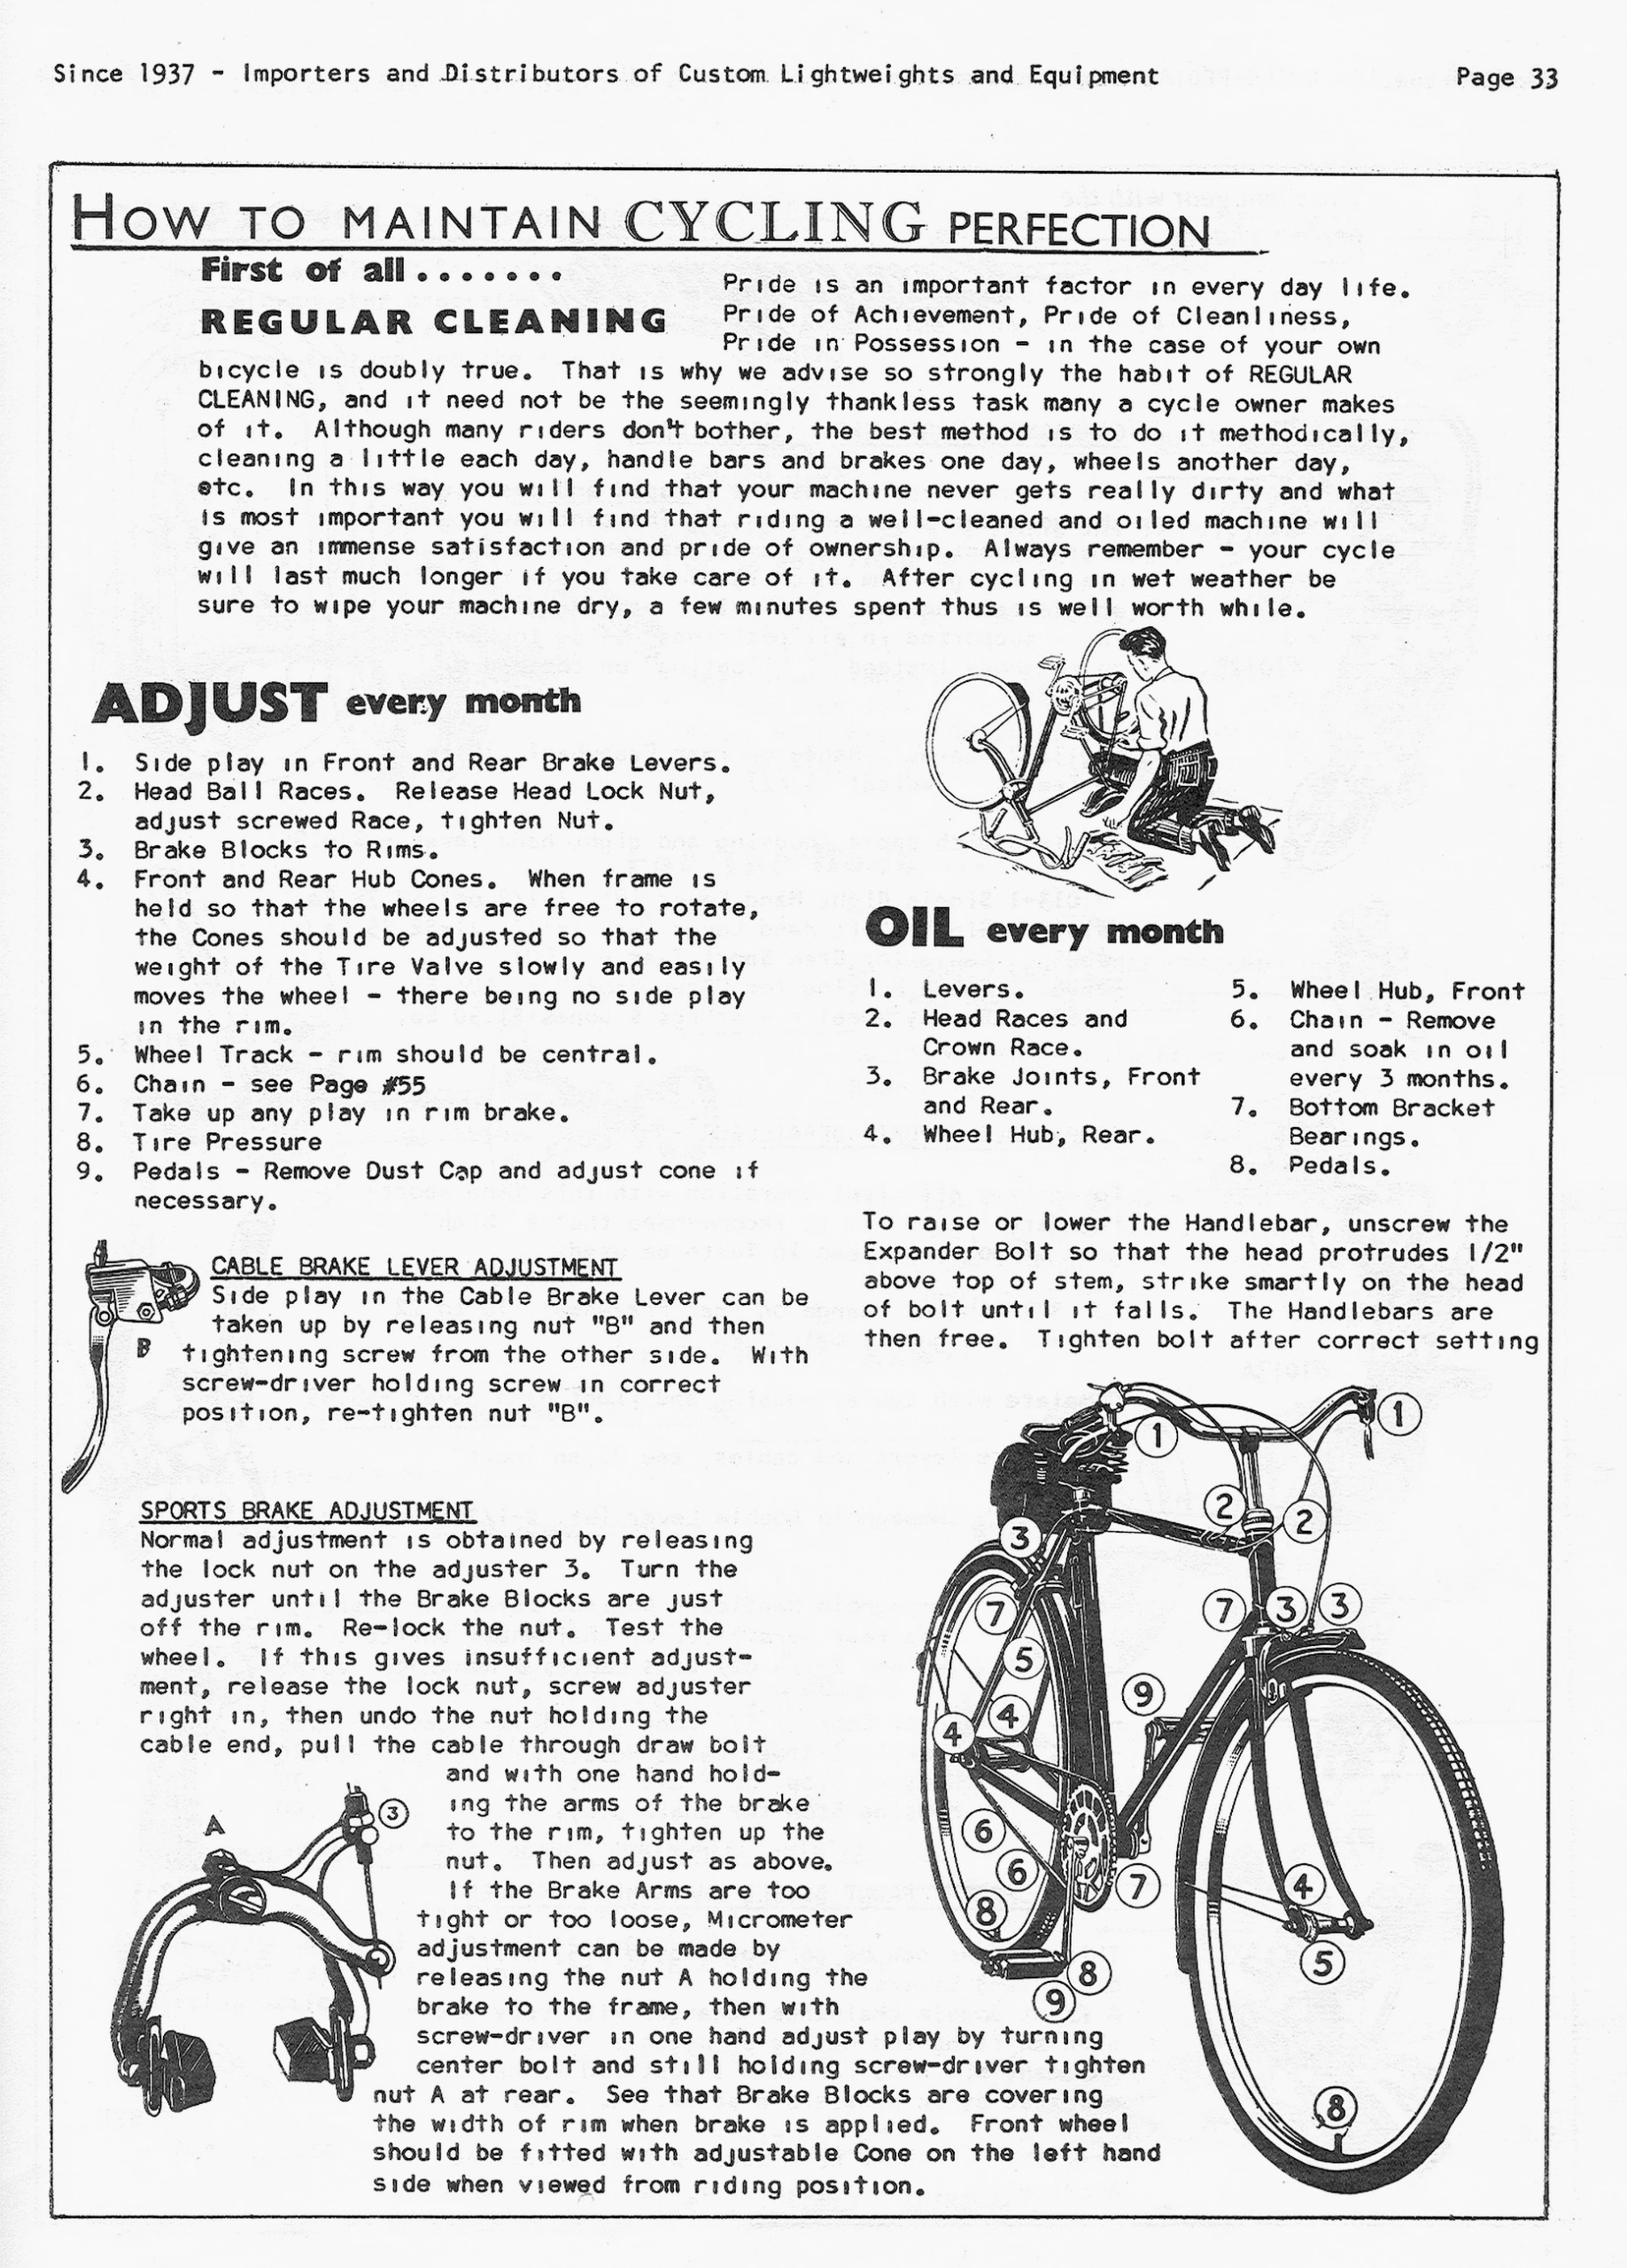
ADJUST every month
1. Side play in Front and Rear Brake Levers.
2. Head Ball Races. Release Head Lock Nut, adjust screwed Race, tighten Nut.
3. Brake Blocks to Rims.
4. Front and Rear Hub Cones. When frame is held so that the wheels are free to rotate, the Cones should be adjusted so that the weight of the Tire Valve slowly and easily moves the wheel – there being no side play in the rim.
5. Wheel Track – rim should be central.
6. Chain – see Page #55
7. Take up any play in rim brake.
8. Tire Pressure
9. Pedals – Remove Dust Cap and adjust cone if necessary.
CABLE BRAKE LEVER ADJUSTMENT
Side play in the Cable Brake Lever can be taken up by releasing nut “B” and then tightening screw from the other side. With screw-driver holding screw in correct position, re-tighten nut “B”.
B
SPORTS BRAKE ADJUSTMENT
Normal adjustment is obtained by releasing the lock nut on the adjuster 3. Turn the adjuster until the Brake Blocks are just off the rim. Re-lock the nut. Test the wheel. If this gives insufficient adjustment, release the lock nut, screw adjuster right in, then undo the nut holding the cable end, pull the cable through draw bolt and with one hand holding the arms of the brake to the rim, tighten up the nut. Then adjust as above. If the Brake Arms are too tight or too loose, Micrometer adjustment can be made by releasing the nut A holding the brake to the frame, then with screw-driver in one hand adjust play by turning center bolt and still holding screw-driver tighten nut A at rear. See that Brake Blocks are covering the width of rim when brake is applied. Front wheel should be fitted with adjustable Cone on the left hand side when viewed from riding position.
A
3
OIL every month
1. Levers.
2. Head Races and Crown Race.
3. Brake Joints, Front and Rear.
4. Wheel Hub, Rear.
5. Wheel Hub, Front
6. Chain – Remove and soak in oil every 3 months.
7. Bottom Bracket Bearings.
8. Pedals.
To raise or lower the Handlebar, unscrew the Expander Bolt so that the head protrudes 1/2″ above top of stem, strike smartly on the head of bolt until it falls. The Handlebars are then free. Tighten bolt after correct setting
1
1
2
2
3
7
7
3
3
5
9
4
4
6
6
7
4
8
8
5
9
8
[A boxed page of bicycle care instructions with four line drawings: a man kneeling beside an upturned bicycle with tools laid out on a cloth, a cable brake lever with its nut lettered B, a side-pull caliper brake lettered A with its adjuster marked 3 and a three-quarter front view of an upright roadster with fenders. Circled numbers one to nine on the roadster mark the points of the “ADJUST every month” list, among them the brake levers, head races, brake blocks, hub cones, chain, tire valve and pedals.]
— Page 37 —
Since 1937 – Importers and Distributors of Custom Lightweights and Equipment
Page 37
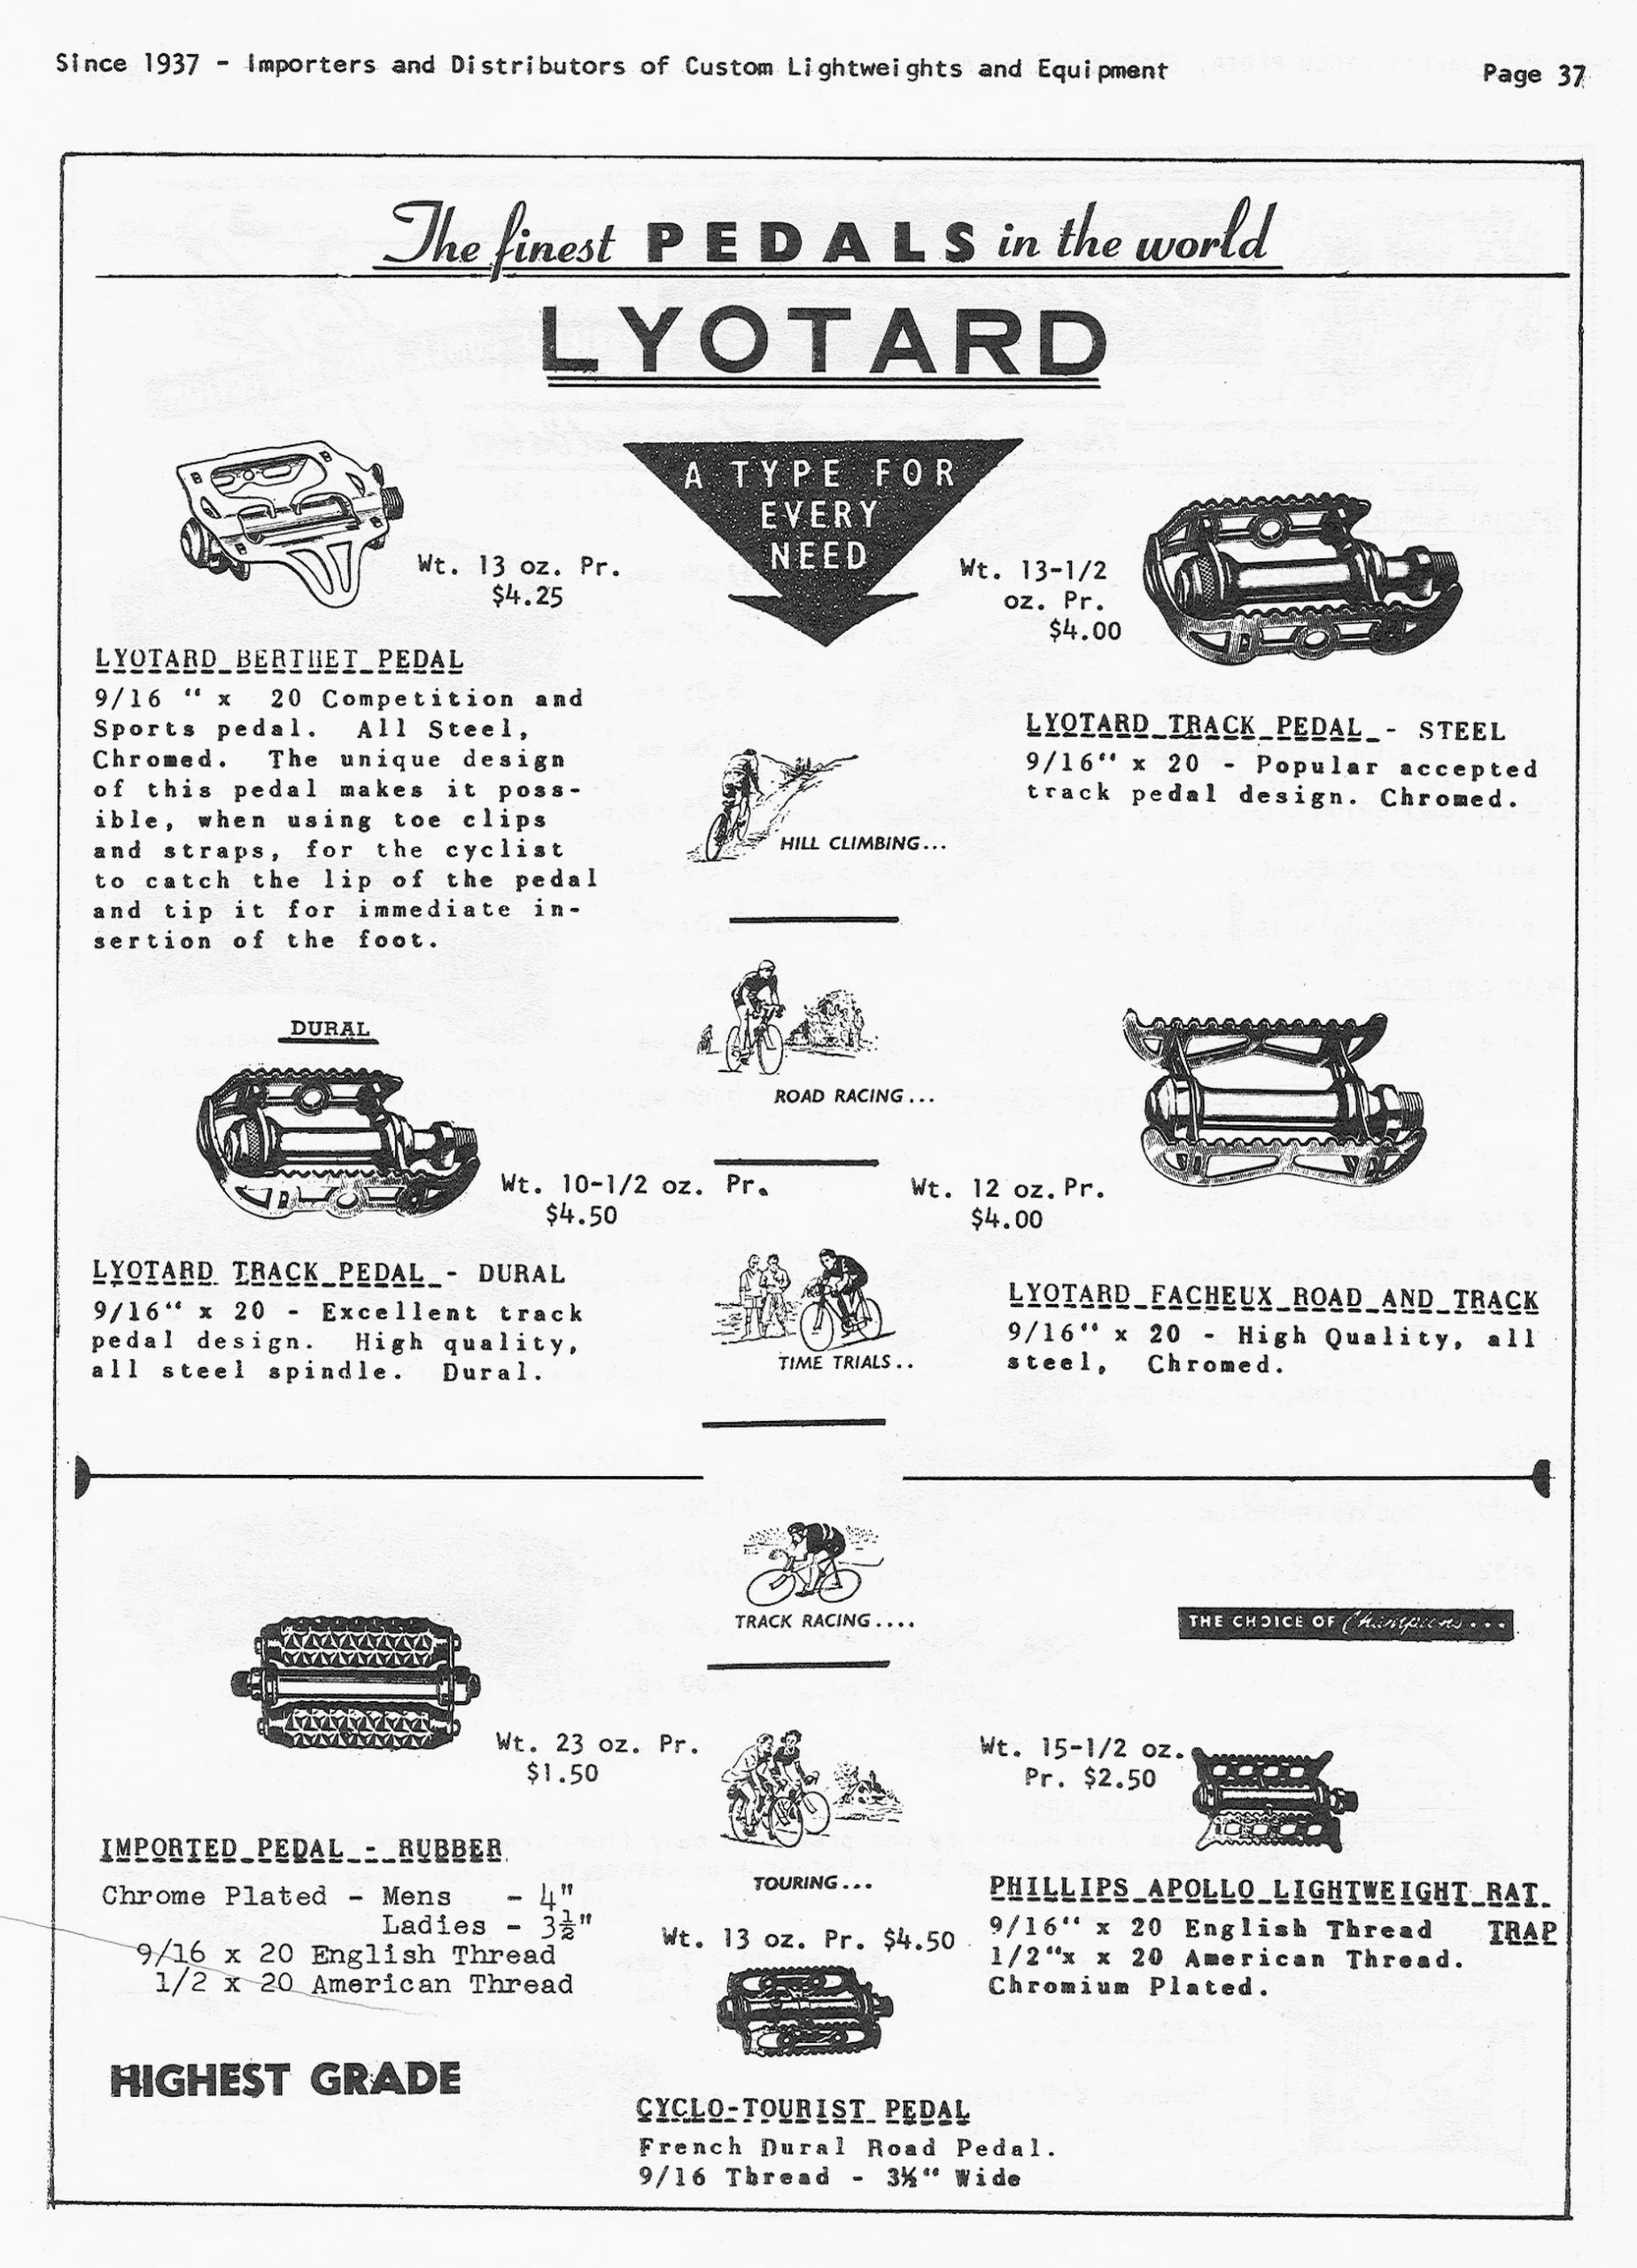
The finest PEDALS in the world
LYOTARD
A TYPE FOR EVERY NEED
HILL CLIMBING…
ROAD RACING…
TIME TRIALS..
TRACK RACING….
TOURING…
Wt. 13 oz. Pr. $4.25
LYOTARD BERTHET PEDAL
9/16 ” x 20 Competition and Sports pedal. All Steel, Chromed. The unique design of this pedal makes it possible, when using toe clips and straps, for the cyclist to catch the lip of the pedal and tip it for immediate insertion of the foot.
Wt. 13-1/2 oz. Pr. $4.00
LYOTARD TRACK PEDAL – STEEL
9/16″ x 20 – Popular accepted track pedal design. Chromed.
DURAL
Wt. 10-1/2 oz. Pr. $4.50
LYOTARD TRACK PEDAL – DURAL
9/16″ x 20 – Excellent track pedal design. High quality, all steel spindle. Dural.
Wt. 12 oz.Pr. $4.00
LYOTARD FACHEUX ROAD AND TRACK
9/16″ x 20 – High Quality, all steel, Chromed.
Wt. 23 oz. Pr. $1.50
IMPORTED PEDAL – RUBBER
Chrome Plated – Mens – 4″
Ladies – 3½”
9/16 x 20 English Thread
1/2 x 20 American Thread
HIGHEST GRADE
THE CHOICE OF Champions…
Wt. 15-1/2 oz. Pr. $2.50
PHILLIPS APOLLO LIGHTWEIGHT RAT TRAP
9/16″ x 20 English Thread
1/2″x x 20 American Thread.
Chromium Plated.
Wt. 13 oz. Pr. $4.50
CYCLO-TOURIST PEDAL
French Dural Road Pedal.
9/16 Thread – 3½” Wide
[A catalog page shows line drawings of seven pedals: the Lyotard Berthet platform pedal, steel and Dural track pedals, the Facheux road and track pedal, a rubber-block pedal, a Phillips rat-trap pedal and a Dural cyclo-touring pedal, with small vignettes of riders climbing, road racing, time trialing, track racing and touring down the center. The headings are typewritten and underlined.]
— Page 40 —
Gene Portuesi’s CYCLO-PEDIA, 6447 Michigan Ave., Detroit 10, Mich.
Page 40
TUBULAR TIRE REPAIRS
ep
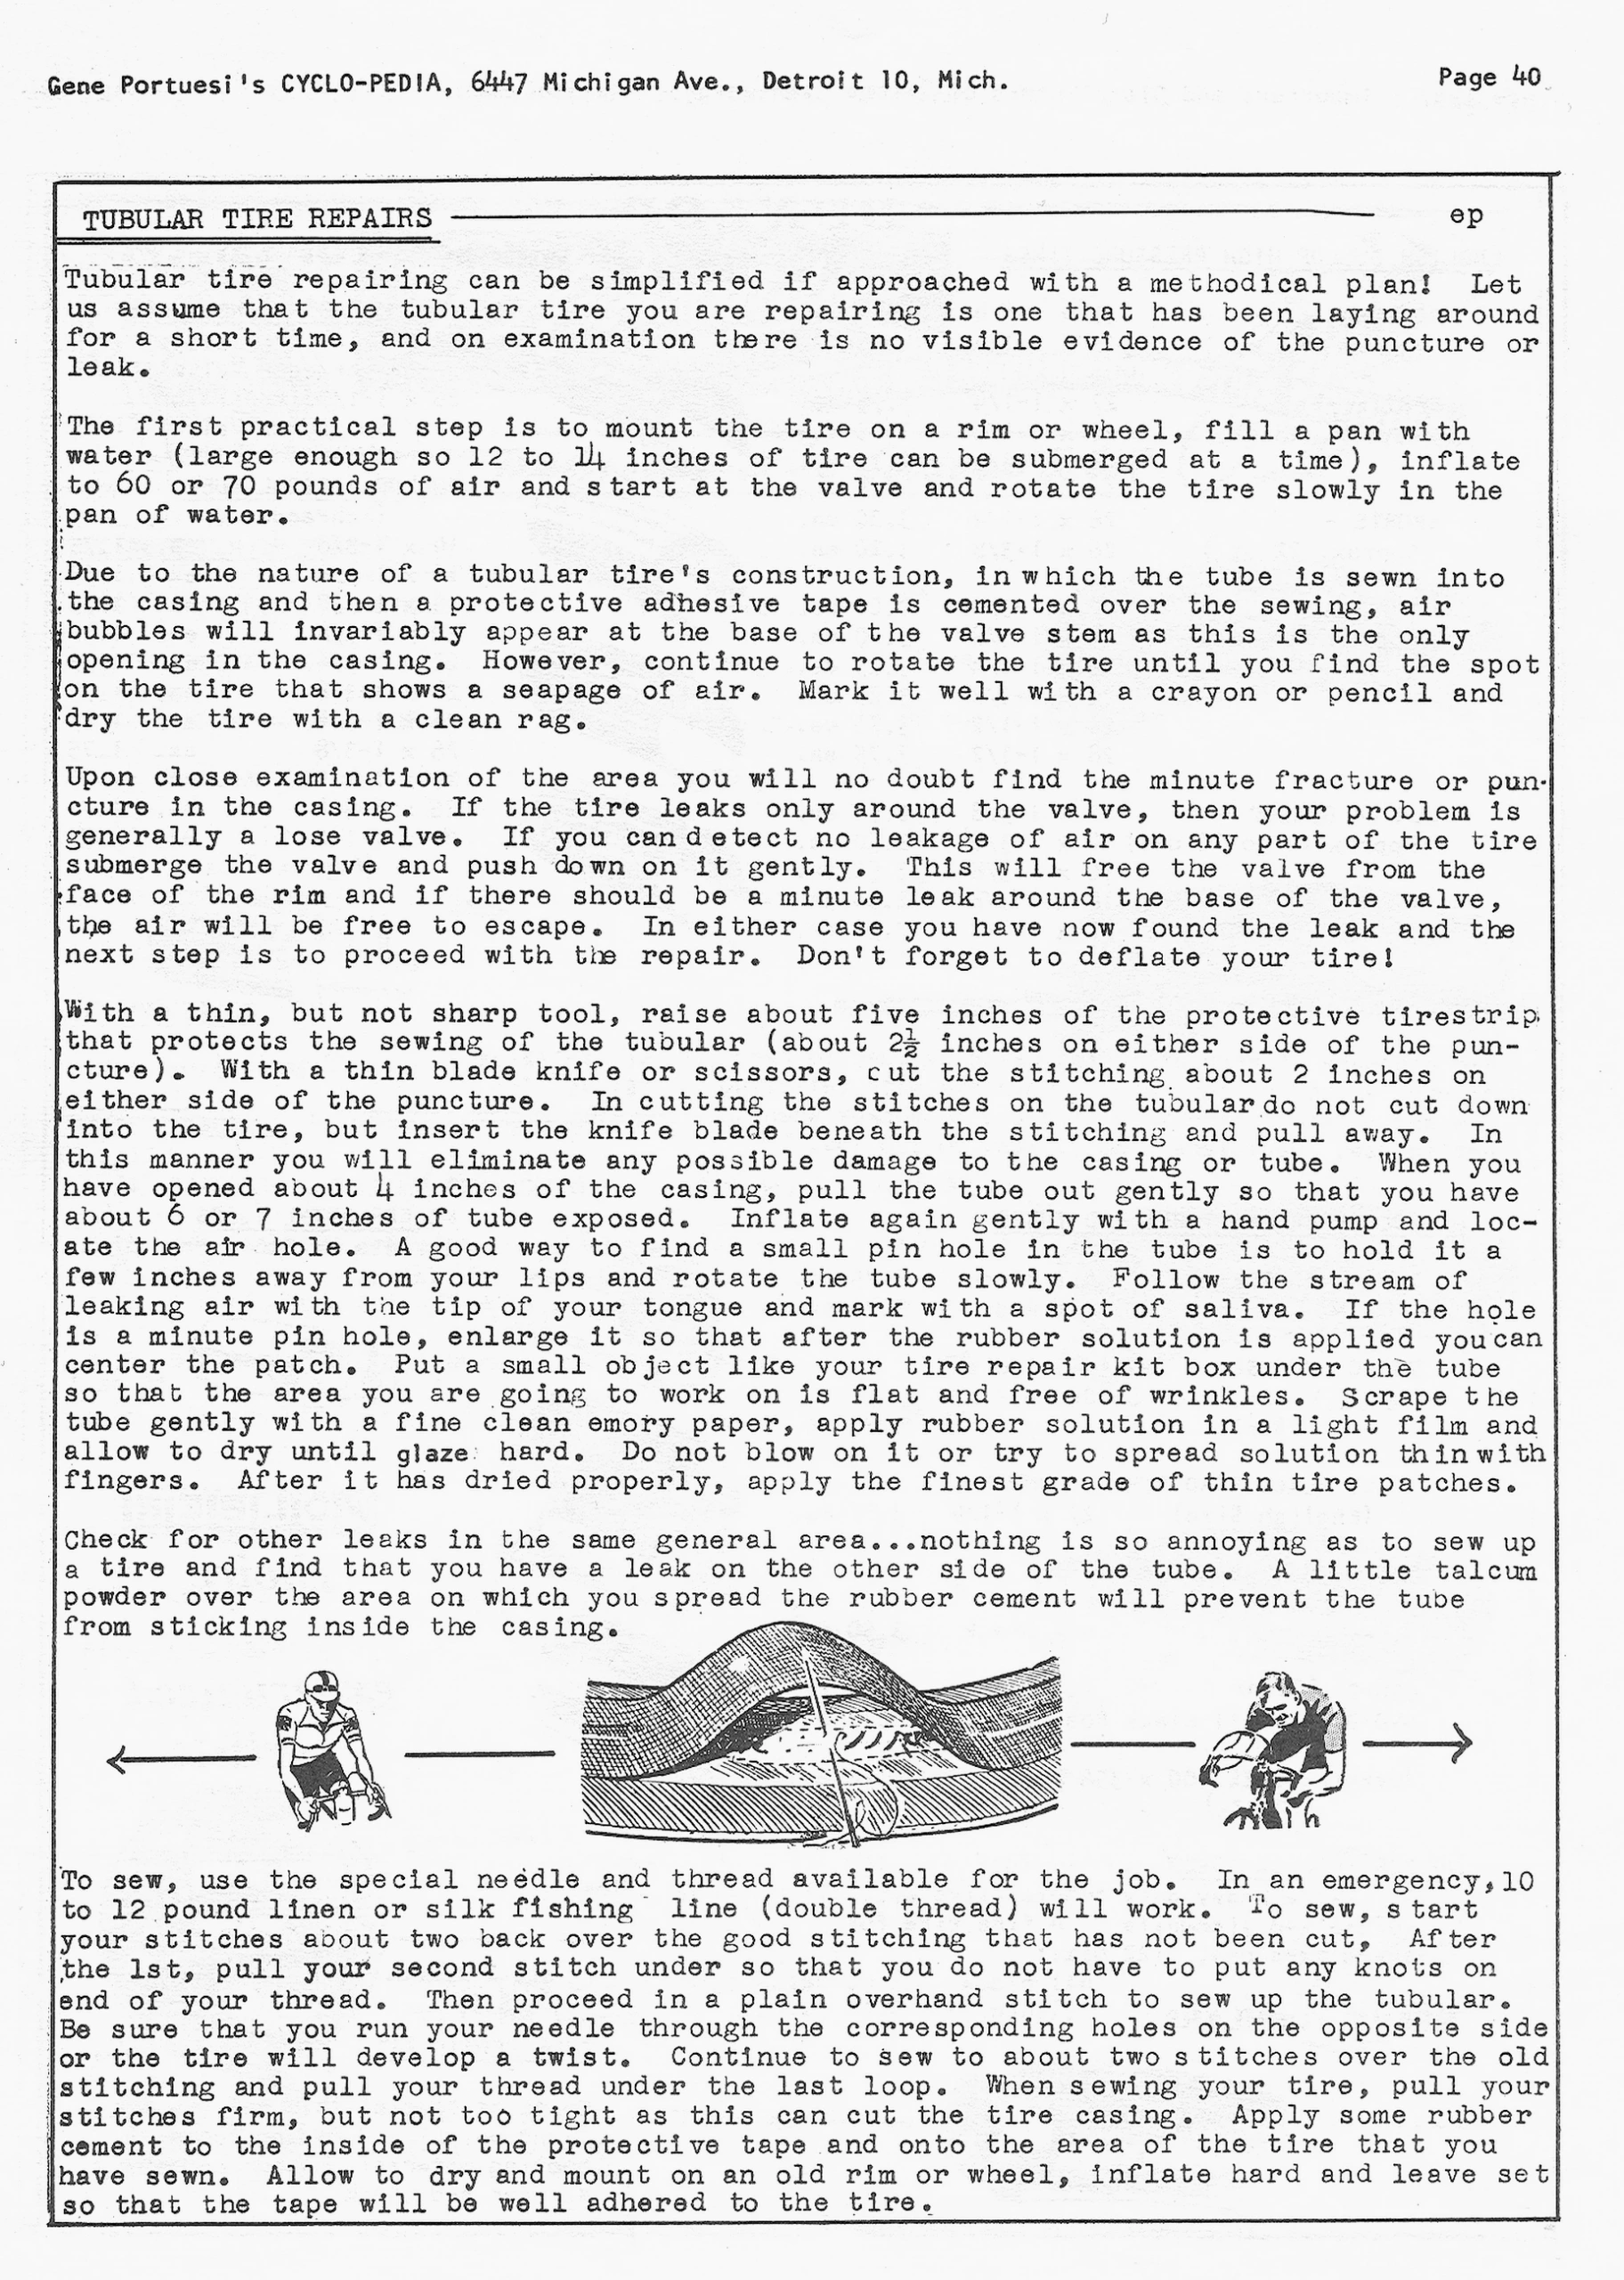
Tubular tire repairing can be simplified if approached with a methodical plan! Let us assume that the tubular tire you are repairing is one that has been laying around for a short time, and on examination there is no visible evidence of the puncture or leak.
The first practical step is to mount the tire on a rim or wheel, fill a pan with water (large enough so 12 to 14 inches of tire can be submerged at a time), inflate to 60 or 70 pounds of air and start at the valve and rotate the tire slowly in the pan of water.
Due to the nature of a tubular tire’s construction, in which the tube is sewn into the casing and then a protective adhesive tape is cemented over the sewing, air bubbles will invariably appear at the base of the valve stem as this is the only opening in the casing. However, continue to rotate the tire until you find the spot on the tire that shows a seapage of air. Mark it well with a crayon or pencil and dry the tire with a clean rag.
Upon close examination of the area you will no doubt find the minute fracture or puncture in the casing. If the tire leaks only around the valve, then your problem is generally a lose valve. If you can detect no leakage of air on any part of the tire submerge the valve and push down on it gently. This will free the valve from the face of the rim and if there should be a minute leak around the base of the valve, the air will be free to escape. In either case you have now found the leak and the next step is to proceed with the repair. Don’t forget to deflate your tire!
With a thin, but not sharp tool, raise about five inches of the protective tirestrip that protects the sewing of the tubular (about 2½ inches on either side of the puncture). With a thin blade knife or scissors, cut the stitching about 2 inches on either side of the puncture. In cutting the stitches on the tubular do not cut down into the tire, but insert the knife blade beneath the stitching and pull away. In this manner you will eliminate any possible damage to the casing or tube. When you have opened about 4 inches of the casing, pull the tube out gently so that you have about 6 or 7 inches of tube exposed. Inflate again gently with a hand pump and locate the air hole. A good way to find a small pin hole in the tube is to hold it a few inches away from your lips and rotate the tube slowly. Follow the stream of leaking air with the tip of your tongue and mark with a spot of saliva. If the hole is a minute pin hole, enlarge it so that after the rubber solution is applied you can center the patch. Put a small object like your tire repair kit box under the tube so that the area you are going to work on is flat and free of wrinkles. Scrape the tube gently with a fine clean emory paper, apply rubber solution in a light film and allow to dry until glaze hard. Do not blow on it or try to spread solution thin with fingers. After it has dried properly, apply the finest grade of thin tire patches.
Check for other leaks in the same general area…nothing is so annoying as to sew up a tire and find that you have a leak on the other side of the tube. A little talcum powder over the area on which you spread the rubber cement will prevent the tube from sticking inside the casing.
To sew, use the special needle and thread available for the job. In an emergency, 10 to 12 pound linen or silk fishing line (double thread) will work. To sew, start your stitches about two back over the good stitching that has not been cut, After the 1st, pull your second stitch under so that you do not have to put any knots on end of your thread. Then proceed in a plain overhand stitch to sew up the tubular. Be sure that you run your needle through the corresponding holes on the opposite side or the tire will develop a twist. Continue to sew to about two stitches over the old stitching and pull your thread under the last loop. When sewing your tire, pull your stitches firm, but not too tight as this can cut the tire casing. Apply some rubber cement to the inside of the protective tape and onto the area of the tire that you have sewn. Allow to dry and mount on an old rim or wheel, inflate hard and leave set so that the tape will be well adhered to the tire.
[A boxed page of typewritten instructions for finding and patching a puncture in a sewn tubular tire. A band of drawings across the lower third shows a cutaway of a tubular casing opened at the base tape, with the inner tube, the cut stitching and a needle and thread, between a racing cyclist in a cap and goggles on the left and a rider bent over his handlebars on the right, joined by rules and arrows pointing outward.]
— Page 46 —
Gene Portuesi’s CYCLO-PEDIA, 6447 Michigan Ave., Detroit 10, Michigan
Page 46
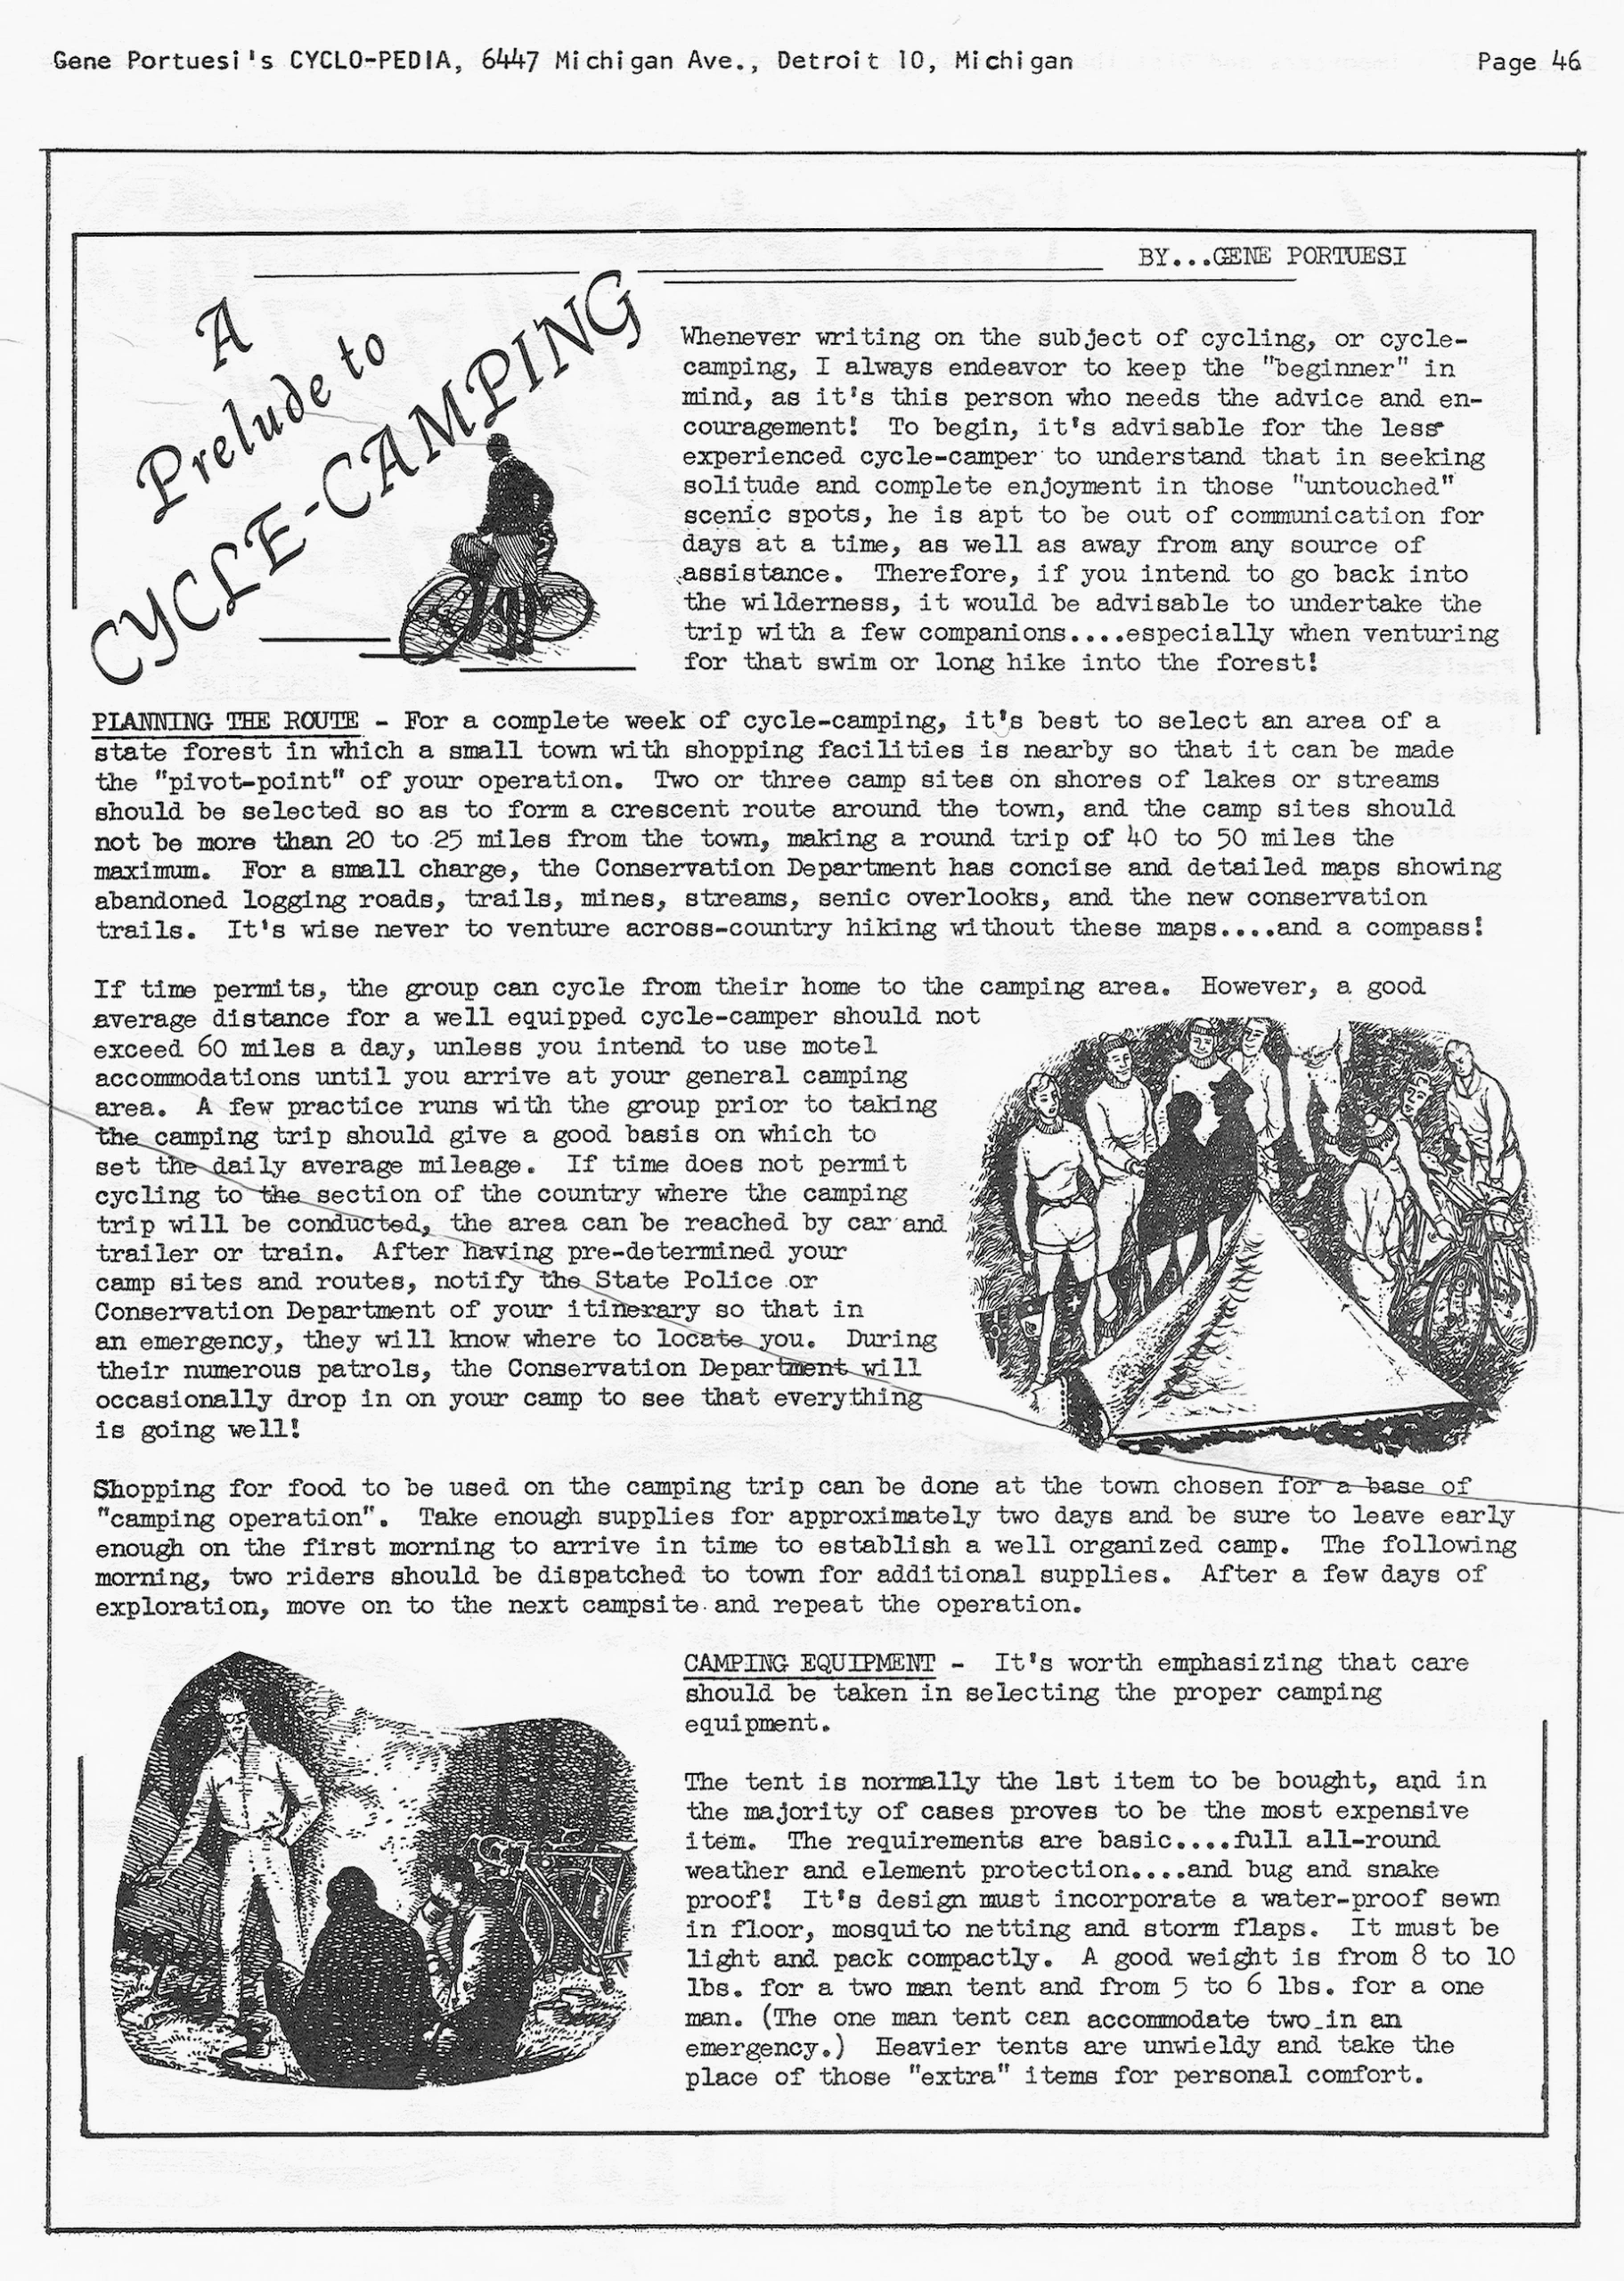
A Prelude to CYCLE-CAMPING
BY…GENE PORTUESI
Whenever writing on the subject of cycling, or cycle-camping, I always endeavor to keep the “beginner” in mind, as it’s this person who needs the advice and encouragement! To begin, it’s advisable for the less experienced cycle-camper to understand that in seeking solitude and complete enjoyment in those “untouched” scenic spots, he is apt to be out of communication for days at a time, as well as away from any source of assistance. Therefore, if you intend to go back into the wilderness, it would be advisable to undertake the trip with a few companions….especially when venturing for that swim or long hike into the forest!
PLANNING THE ROUTE – For a complete week of cycle-camping, it’s best to select an area of a state forest in which a small town with shopping facilities is nearby so that it can be made the “pivot-point” of your operation. Two or three camp sites on shores of lakes or streams should be selected so as to form a crescent route around the town, and the camp sites should not be more than 20 to 25 miles from the town, making a round trip of 40 to 50 miles the maximum. For a small charge, the Conservation Department has concise and detailed maps showing abandoned logging roads, trails, mines, streams, senic overlooks, and the new conservation trails. It’s wise never to venture across-country hiking without these maps….and a compass!
If time permits, the group can cycle from their home to the camping area. However, a good average distance for a well equipped cycle-camper should not exceed 60 miles a day, unless you intend to use motel accommodations until you arrive at your general camping area. A few practice runs with the group prior to taking the camping trip should give a good basis on which to set the daily average mileage. If time does not permit cycling to the section of the country where the camping trip will be conducted, the area can be reached by car and trailer or train. After having pre-determined your camp sites and routes, notify the State Police or Conservation Department of your itinerary so that in an emergency, they will know where to locate you. During their numerous patrols, the Conservation Department will occasionally drop in on your camp to see that everything is going well!
Shopping for food to be used on the camping trip can be done at the town chosen for a base of “camping operation”. Take enough supplies for approximately two days and be sure to leave early enough on the first morning to arrive in time to establish a well organized camp. The following morning, two riders should be dispatched to town for additional supplies. After a few days of exploration, move on to the next campsite and repeat the operation.
CAMPING EQUIPMENT – It’s worth emphasizing that care should be taken in selecting the proper camping equipment.
The tent is normally the 1st item to be bought, and in the majority of cases proves to be the most expensive item. The requirements are basic….full all-round weather and element protection….and bug and snake proof! It’s design must incorporate a water-proof sewn in floor, mosquito netting and storm flaps. It must be light and pack compactly. A good weight is from 8 to 10 lbs. for a two man tent and from 5 to 6 lbs. for a one man. (The one man tent can accommodate two in an emergency.) Heavier tents are unwieldy and take the place of those “extra” items for personal comfort.
[A boxed article page on planning a week of cycle-camping, with its title set in script lettering on a diagonal beside a drawing of a cyclist standing with a loaded bicycle. Two vignette drawings illustrate the text: a group of young campers and their bicycles seen from inside a tent through its open entrance, and a man in glasses standing over two seated companions at a camp at night with bicycles parked behind.]
— Page 54 —
Gene Portuesi’s CYCLO-PEDIA, 6447 Michigan Ave., Detroit 10, Mich.
Page 54
ALADDINS LAMP
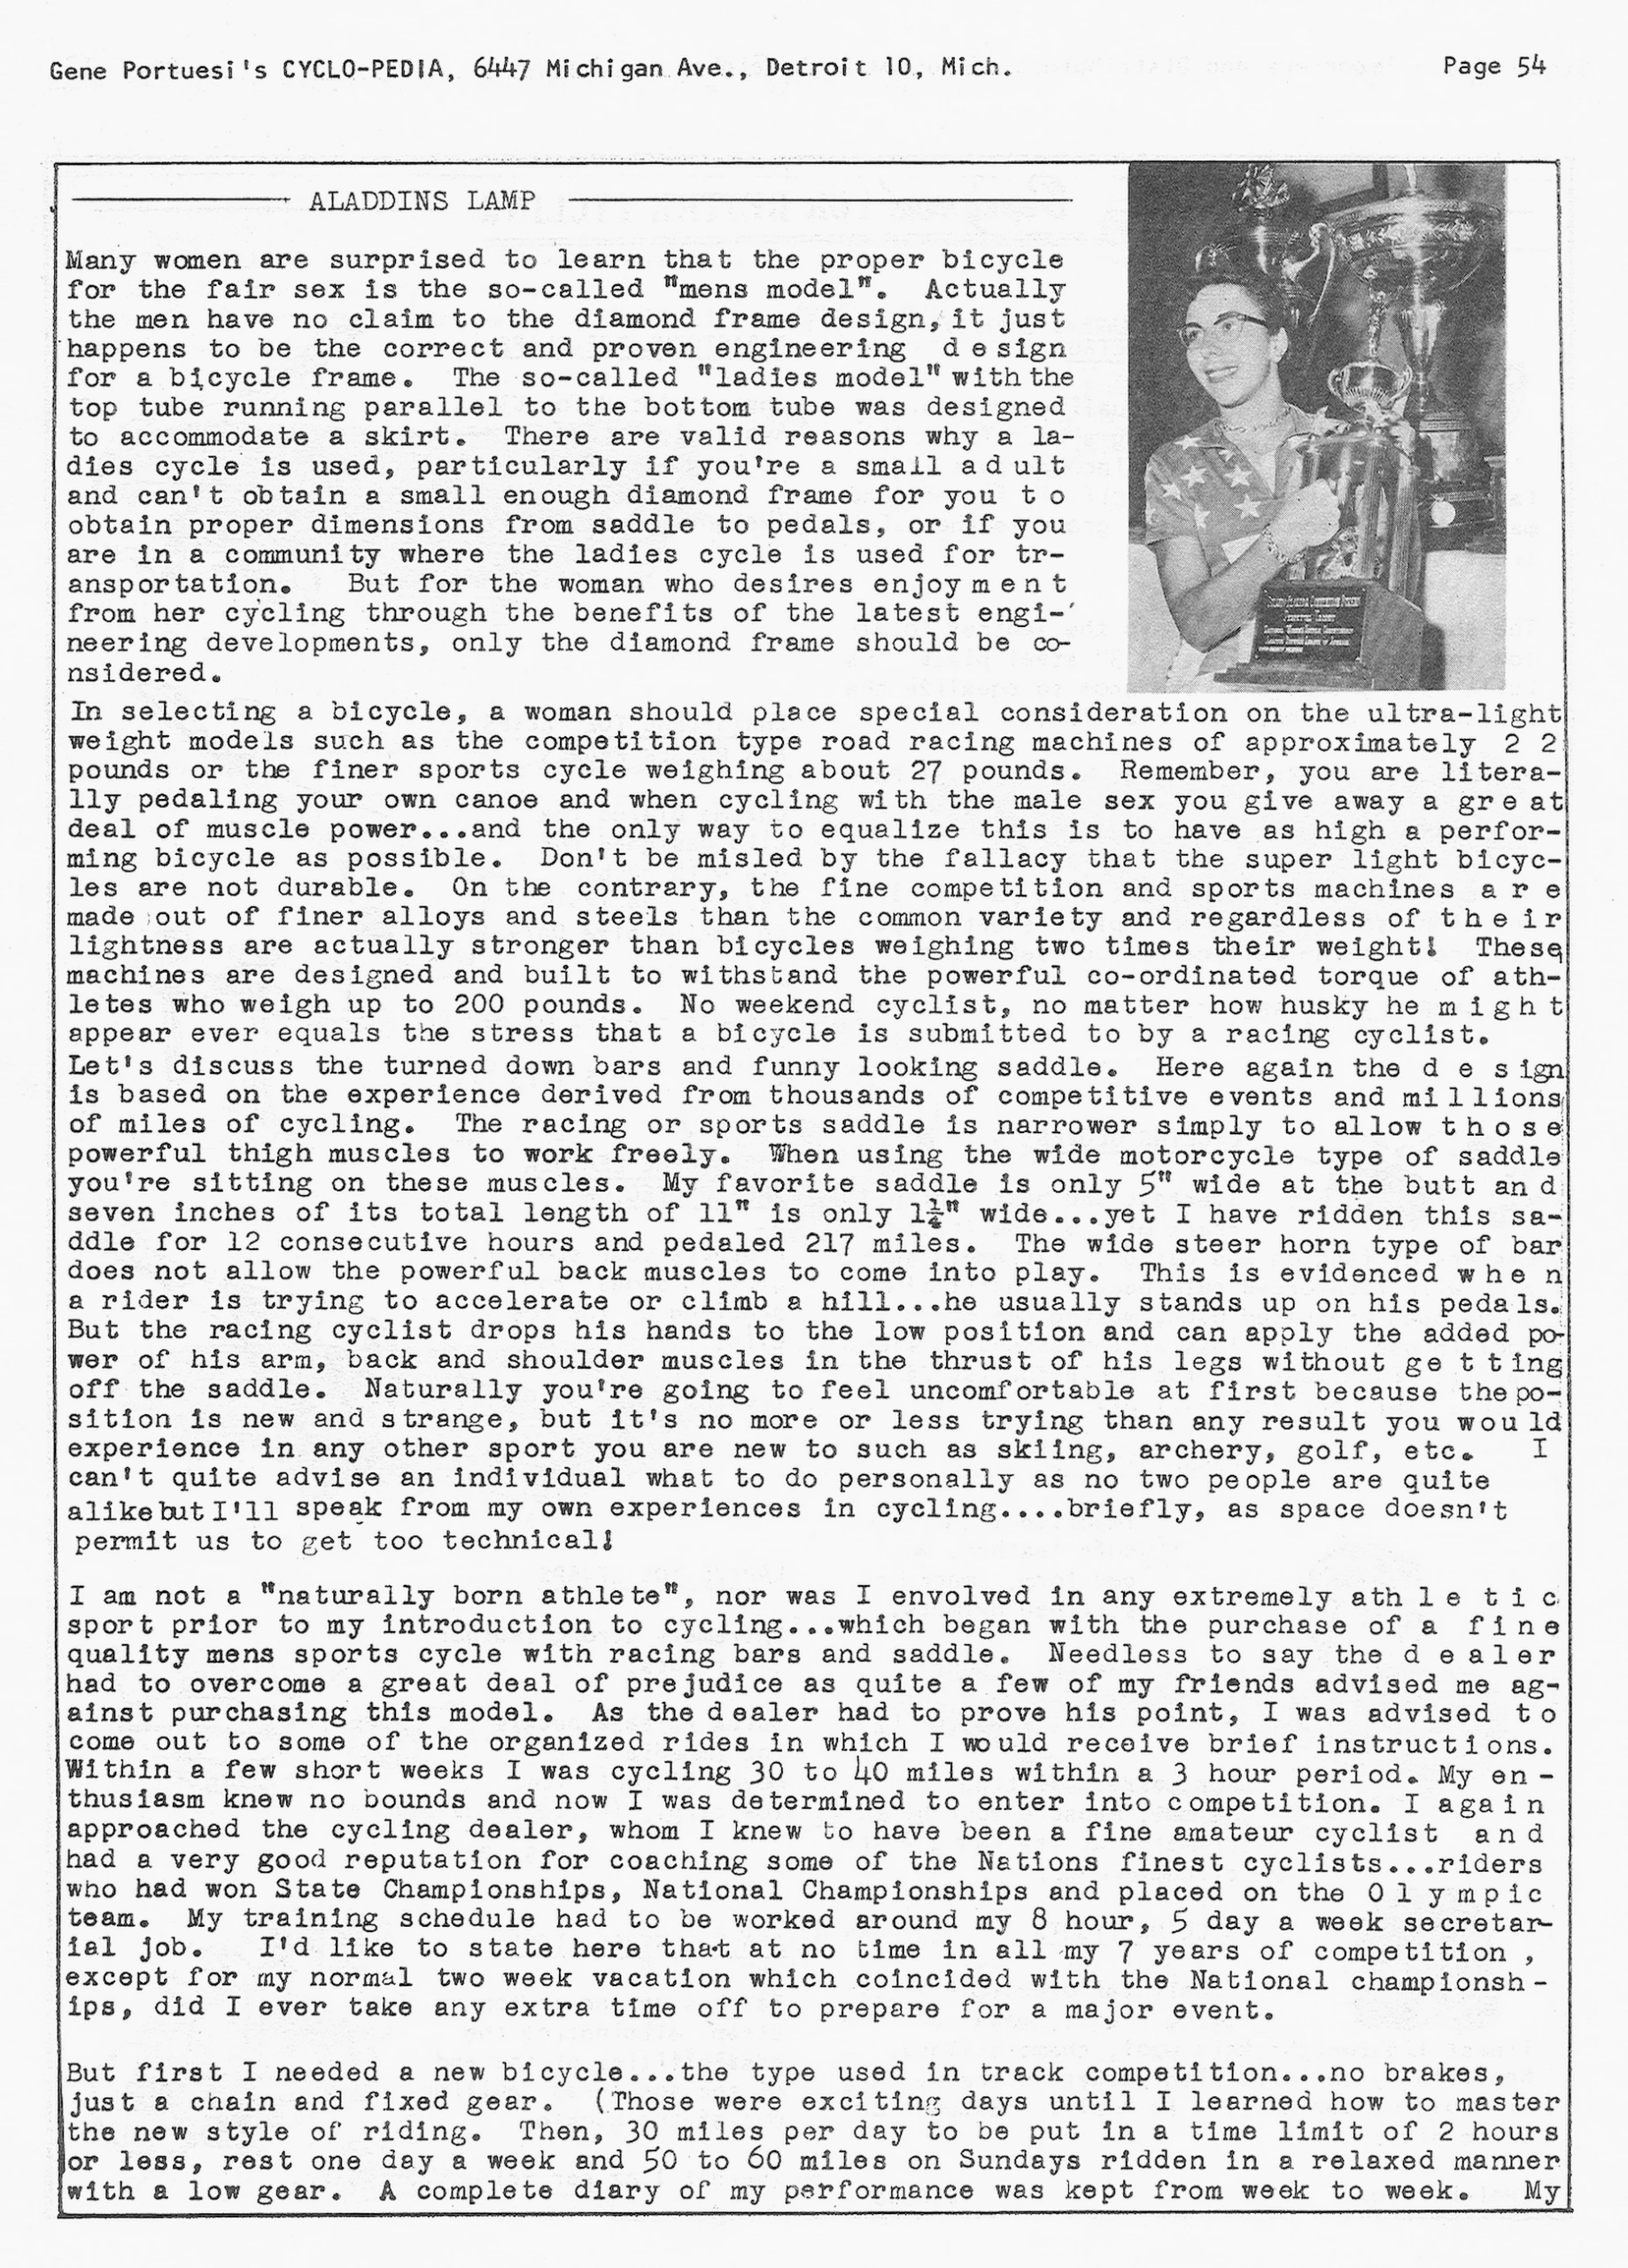
Many women are surprised to learn that the proper bicycle for the fair sex is the so-called “mens model”. Actually the men have no claim to the diamond frame design, it just happens to be the correct and proven engineering design for a bicycle frame. The so-called “ladies model” with the top tube running parallel to the bottom tube was designed to accommodate a skirt. There are valid reasons why a ladies cycle is used, particularly if you’re a small adult and can’t obtain a small enough diamond frame for you to obtain proper dimensions from saddle to pedals, or if you are in a community where the ladies cycle is used for transportation. But for the woman who desires enjoyment from her cycling through the benefits of the latest engineering developments, only the diamond frame should be considered.
In selecting a bicycle, a woman should place special consideration on the ultra-light weight models such as the competition type road racing machines of approximately 22 pounds or the finer sports cycle weighing about 27 pounds. Remember, you are literally pedaling your own canoe and when cycling with the male sex you give away a great deal of muscle power…and the only way to equalize this is to have as high a performing bicycle as possible. Don’t be misled by the fallacy that the super light bicycles are not durable. On the contrary, the fine competition and sports machines are made out of finer alloys and steels than the common variety and regardless of their lightness are actually stronger than bicycles weighing two times their weight! These machines are designed and built to withstand the powerful co-ordinated torque of athletes who weigh up to 200 pounds. No weekend cyclist, no matter how husky he might appear ever equals the stress that a bicycle is submitted to by a racing cyclist.
Let’s discuss the turned down bars and funny looking saddle. Here again the design is based on the experience derived from thousands of competitive events and millions of miles of cycling. The racing or sports saddle is narrower simply to allow those powerful thigh muscles to work freely. When using the wide motorcycle type of saddle you’re sitting on these muscles. My favorite saddle is only 5″ wide at the butt and seven inches of its total length of 11″ is only 1¼” wide…yet I have ridden this saddle for 12 consecutive hours and pedaled 217 miles. The wide steer horn type of bar does not allow the powerful back muscles to come into play. This is evidenced when a rider is trying to accelerate or climb a hill…he usually stands up on his pedals. But the racing cyclist drops his hands to the low position and can apply the added power of his arm, back and shoulder muscles in the thrust of his legs without getting off the saddle. Naturally you’re going to feel uncomfortable at first because the position is new and strange, but it’s no more or less trying than any result you would experience in any other sport you are new to such as skiing, archery, golf, etc. I can’t quite advise an individual what to do personally as no two people are quite alike but I’ll speak from my own experiences in cycling….briefly, as space doesn’t permit us to get too technical!
I am not a “naturally born athlete”, nor was I envolved in any extremely athletic sport prior to my introduction to cycling…which began with the purchase of a fine quality mens sports cycle with racing bars and saddle. Needless to say the dealer had to overcome a great deal of prejudice as quite a few of my friends advised me against purchasing this model. As the dealer had to prove his point, I was advised to come out to some of the organized rides in which I would receive brief instructions. Within a few short weeks I was cycling 30 to 40 miles within a 3 hour period. My enthusiasm knew no bounds and now I was determined to enter into competition. I again approached the cycling dealer, whom I knew to have been a fine amateur cyclist and had a very good reputation for coaching some of the Nations finest cyclists…riders who had won State Championships, National Championships and placed on the Olympic team. My training schedule had to be worked around my 8 hour, 5 day a week secretarial job. I’d like to state here that at no time in all my 7 years of competition , except for my normal two week vacation which coincided with the National championships, did I ever take any extra time off to prepare for a major event.
But first I needed a new bicycle…the type used in track competition…no brakes, just a chain and fixed gear. (Those were exciting days until I learned how to master the new style of riding. Then, 30 miles per day to be put in a time limit of 2 hours or less, rest one day a week and 50 to 60 miles on Sundays ridden in a relaxed manner with a low gear. A complete diary of my performance was kept from week to week. My
[A typewritten first-person account by a woman racing cyclist, set in a ruled box beside a photograph of a smiling woman in glasses and a star-patterned blouse holding a large trophy, with more cups and trophies behind her. The photograph has no caption, the plaque on the trophy is too small to read and the account runs on to page 55 mid-sentence.]
— Page 55 —
Since 1937 – Importers and Distributor of Custom Lightweights and Equipment
Page 55
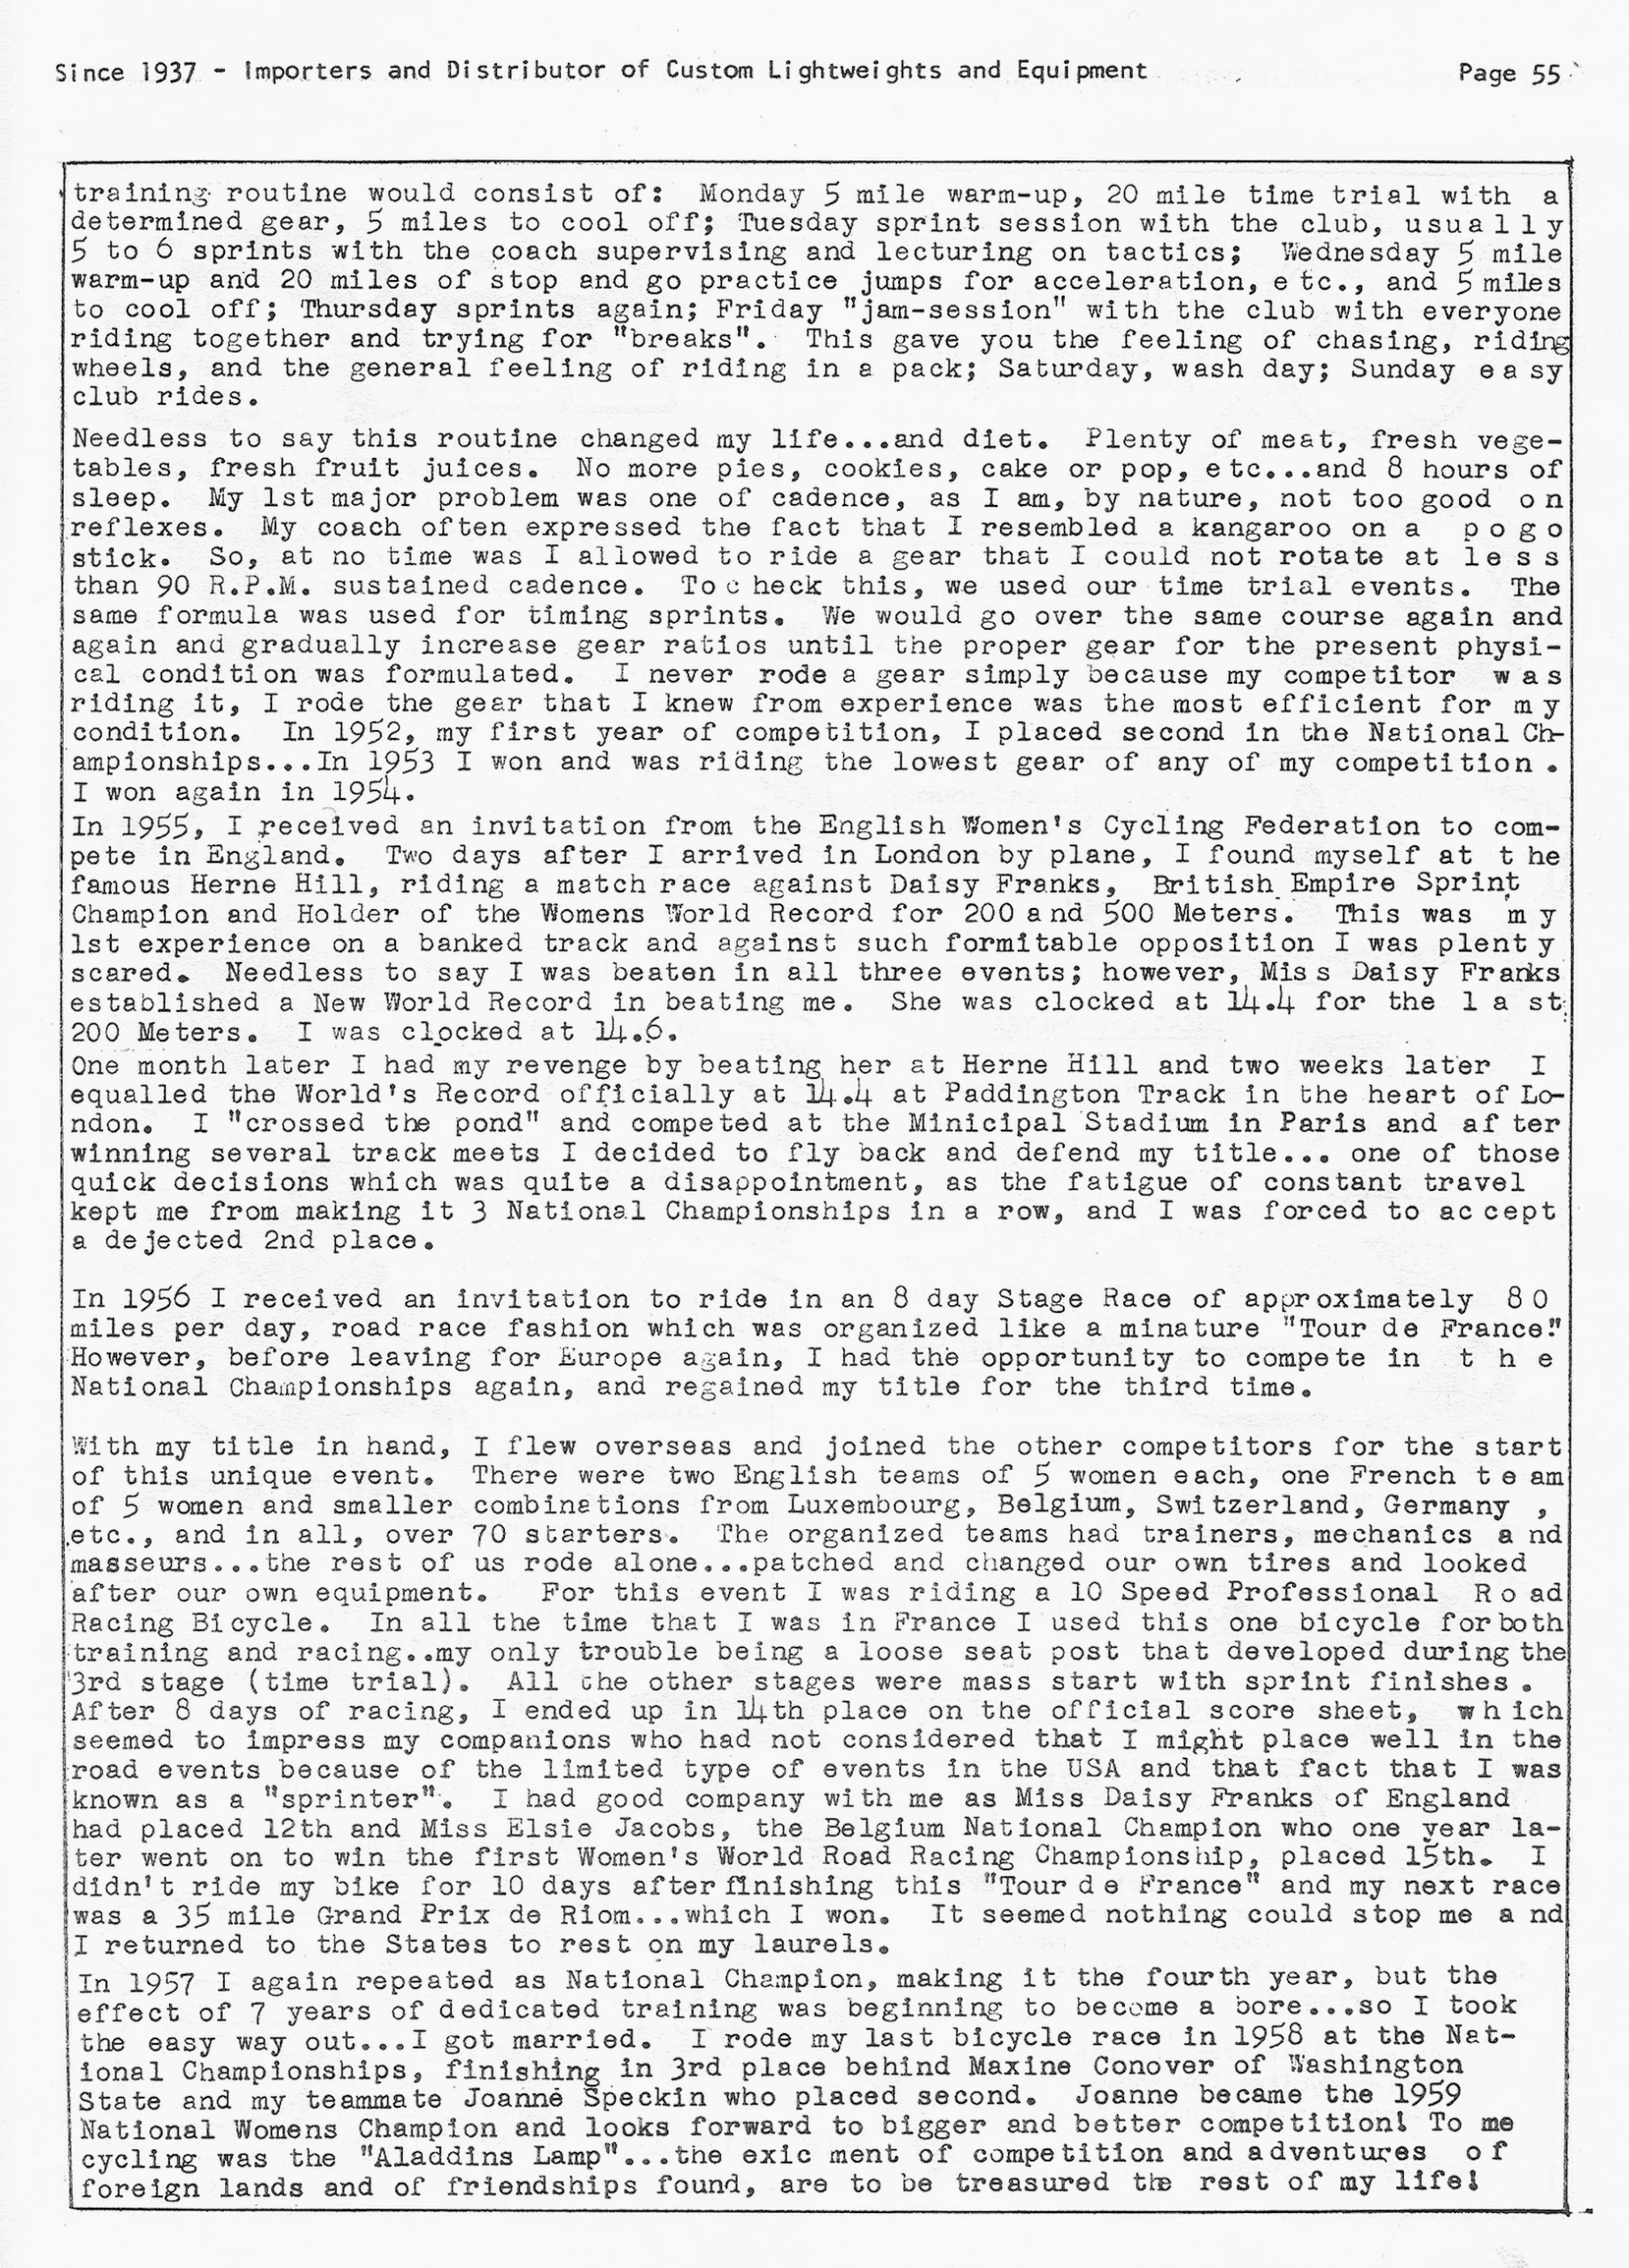
training routine would consist of: Monday 5 mile warm-up, 20 mile time trial with a determined gear, 5 miles to cool off; Tuesday sprint session with the club, usually 5 to 6 sprints with the coach supervising and lecturing on tactics; Wednesday 5 mile warm-up and 20 miles of stop and go practice jumps for acceleration, etc., and 5 miles to cool off; Thursday sprints again; Friday “jam-session” with the club with everyone riding together and trying for “breaks”. This gave you the feeling of chasing, riding wheels, and the general feeling of riding in a pack; Saturday, wash day; Sunday easy club rides.
Needless to say this routine changed my life…and diet. Plenty of meat, fresh vegetables, fresh fruit juices. No more pies, cookies, cake or pop, etc…and 8 hours of sleep. My 1st major problem was one of cadence, as I am, by nature, not too good on reflexes. My coach often expressed the fact that I resembled a kangaroo on a pogo stick. So, at no time was I allowed to ride a gear that I could not rotate at less than 90 R.P.M. sustained cadence. Toc heck this, we used our time trial events. The same formula was used for timing sprints. We would go over the same course again and again and gradually increase gear ratios until the proper gear for the present physical condition was formulated. I never rode a gear simply because my competitor was riding it, I rode the gear that I knew from experience was the most efficient for my condition. In 1952, my first year of competition, I placed second in the National Championships…In 1953 I won and was riding the lowest gear of any of my competition . I won again in 1954.
In 1955, I received an invitation from the English Women’s Cycling Federation to compete in England. Two days after I arrived in London by plane, I found myself at the famous Herne Hill, riding a match race against Daisy Franks, British Empire Sprint Champion and Holder of the Womens World Record for 200 and 500 Meters. This was my 1st experience on a banked track and against such formitable opposition I was plenty scared. Needless to say I was beaten in all three events; however, Miss Daisy Franks established a New World Record in beating me. She was clocked at 14.4 for the last 200 Meters. I was clocked at 14.6.
One month later I had my revenge by beating her at Herne Hill and two weeks later I equalled the World’s Record officially at 14.4 at Paddington Track in the heart of London. I “crossed the pond” and competed at the Minicipal Stadium in Paris and after winning several track meets I decided to fly back and defend my title… one of those quick decisions which was quite a disappointment, as the fatigue of constant travel kept me from making it 3 National Championships in a row, and I was forced to accept a dejected 2nd place.
In 1956 I received an invitation to ride in an 8 day Stage Race of approximately 80 miles per day, road race fashion which was organized like a minature “Tour de France.” However, before leaving for Europe again, I had the opportunity to compete in the National Championships again, and regained my title for the third time.
With my title in hand, I flew overseas and joined the other competitors for the start of this unique event. There were two English teams of 5 women each, one French team of 5 women and smaller combinations from Luxembourg, Belgium, Switzerland, Germany , etc., and in all, over 70 starters. The organized teams had trainers, mechanics and masseurs…the rest of us rode alone…patched and changed our own tires and looked after our own equipment. For this event I was riding a 10 Speed Professional Road Racing Bicycle. In all the time that I was in France I used this one bicycle for both training and racing..my only trouble being a loose seat post that developed during the 3rd stage (time trial). All the other stages were mass start with sprint finishes . After 8 days of racing, I ended up in 14th place on the official score sheet, which seemed to impress my companions who had not considered that I might place well in the road events because of the limited type of events in the USA and that fact that I was known as a “sprinter”. I had good company with me as Miss Daisy Franks of England had placed 12th and Miss Elsie Jacobs, the Belgium National Champion who one year later went on to win the first Women’s World Road Racing Championship, placed 15th. I didn’t ride my bike for 10 days after finishing this “Tour de France” and my next race was a 35 mile Grand Prix de Riom…which I won. It seemed nothing could stop me and I returned to the States to rest on my laurels.
In 1957 I again repeated as National Champion, making it the fourth year, but the effect of 7 years of dedicated training was beginning to become a bore…so I took the easy way out…I got married. I rode my last bicycle race in 1958 at the National Championships, finishing in 3rd place behind Maxine Conover of Washington State and my teammate Joanne Speckin who placed second. Joanne became the 1959 National Womens Champion and looks forward to bigger and better competition! To me cycling was the “Aladdins Lamp”…the exic ment of competition and adventures of foreign lands and of friendships found, are to be treasured the rest of my life!
[The typewritten first-person account by a woman racing cyclist continues from page 54 in a ruled box, without illustration, and closes the piece. Neither page prints the writer’s name.]
— Mileage chart —
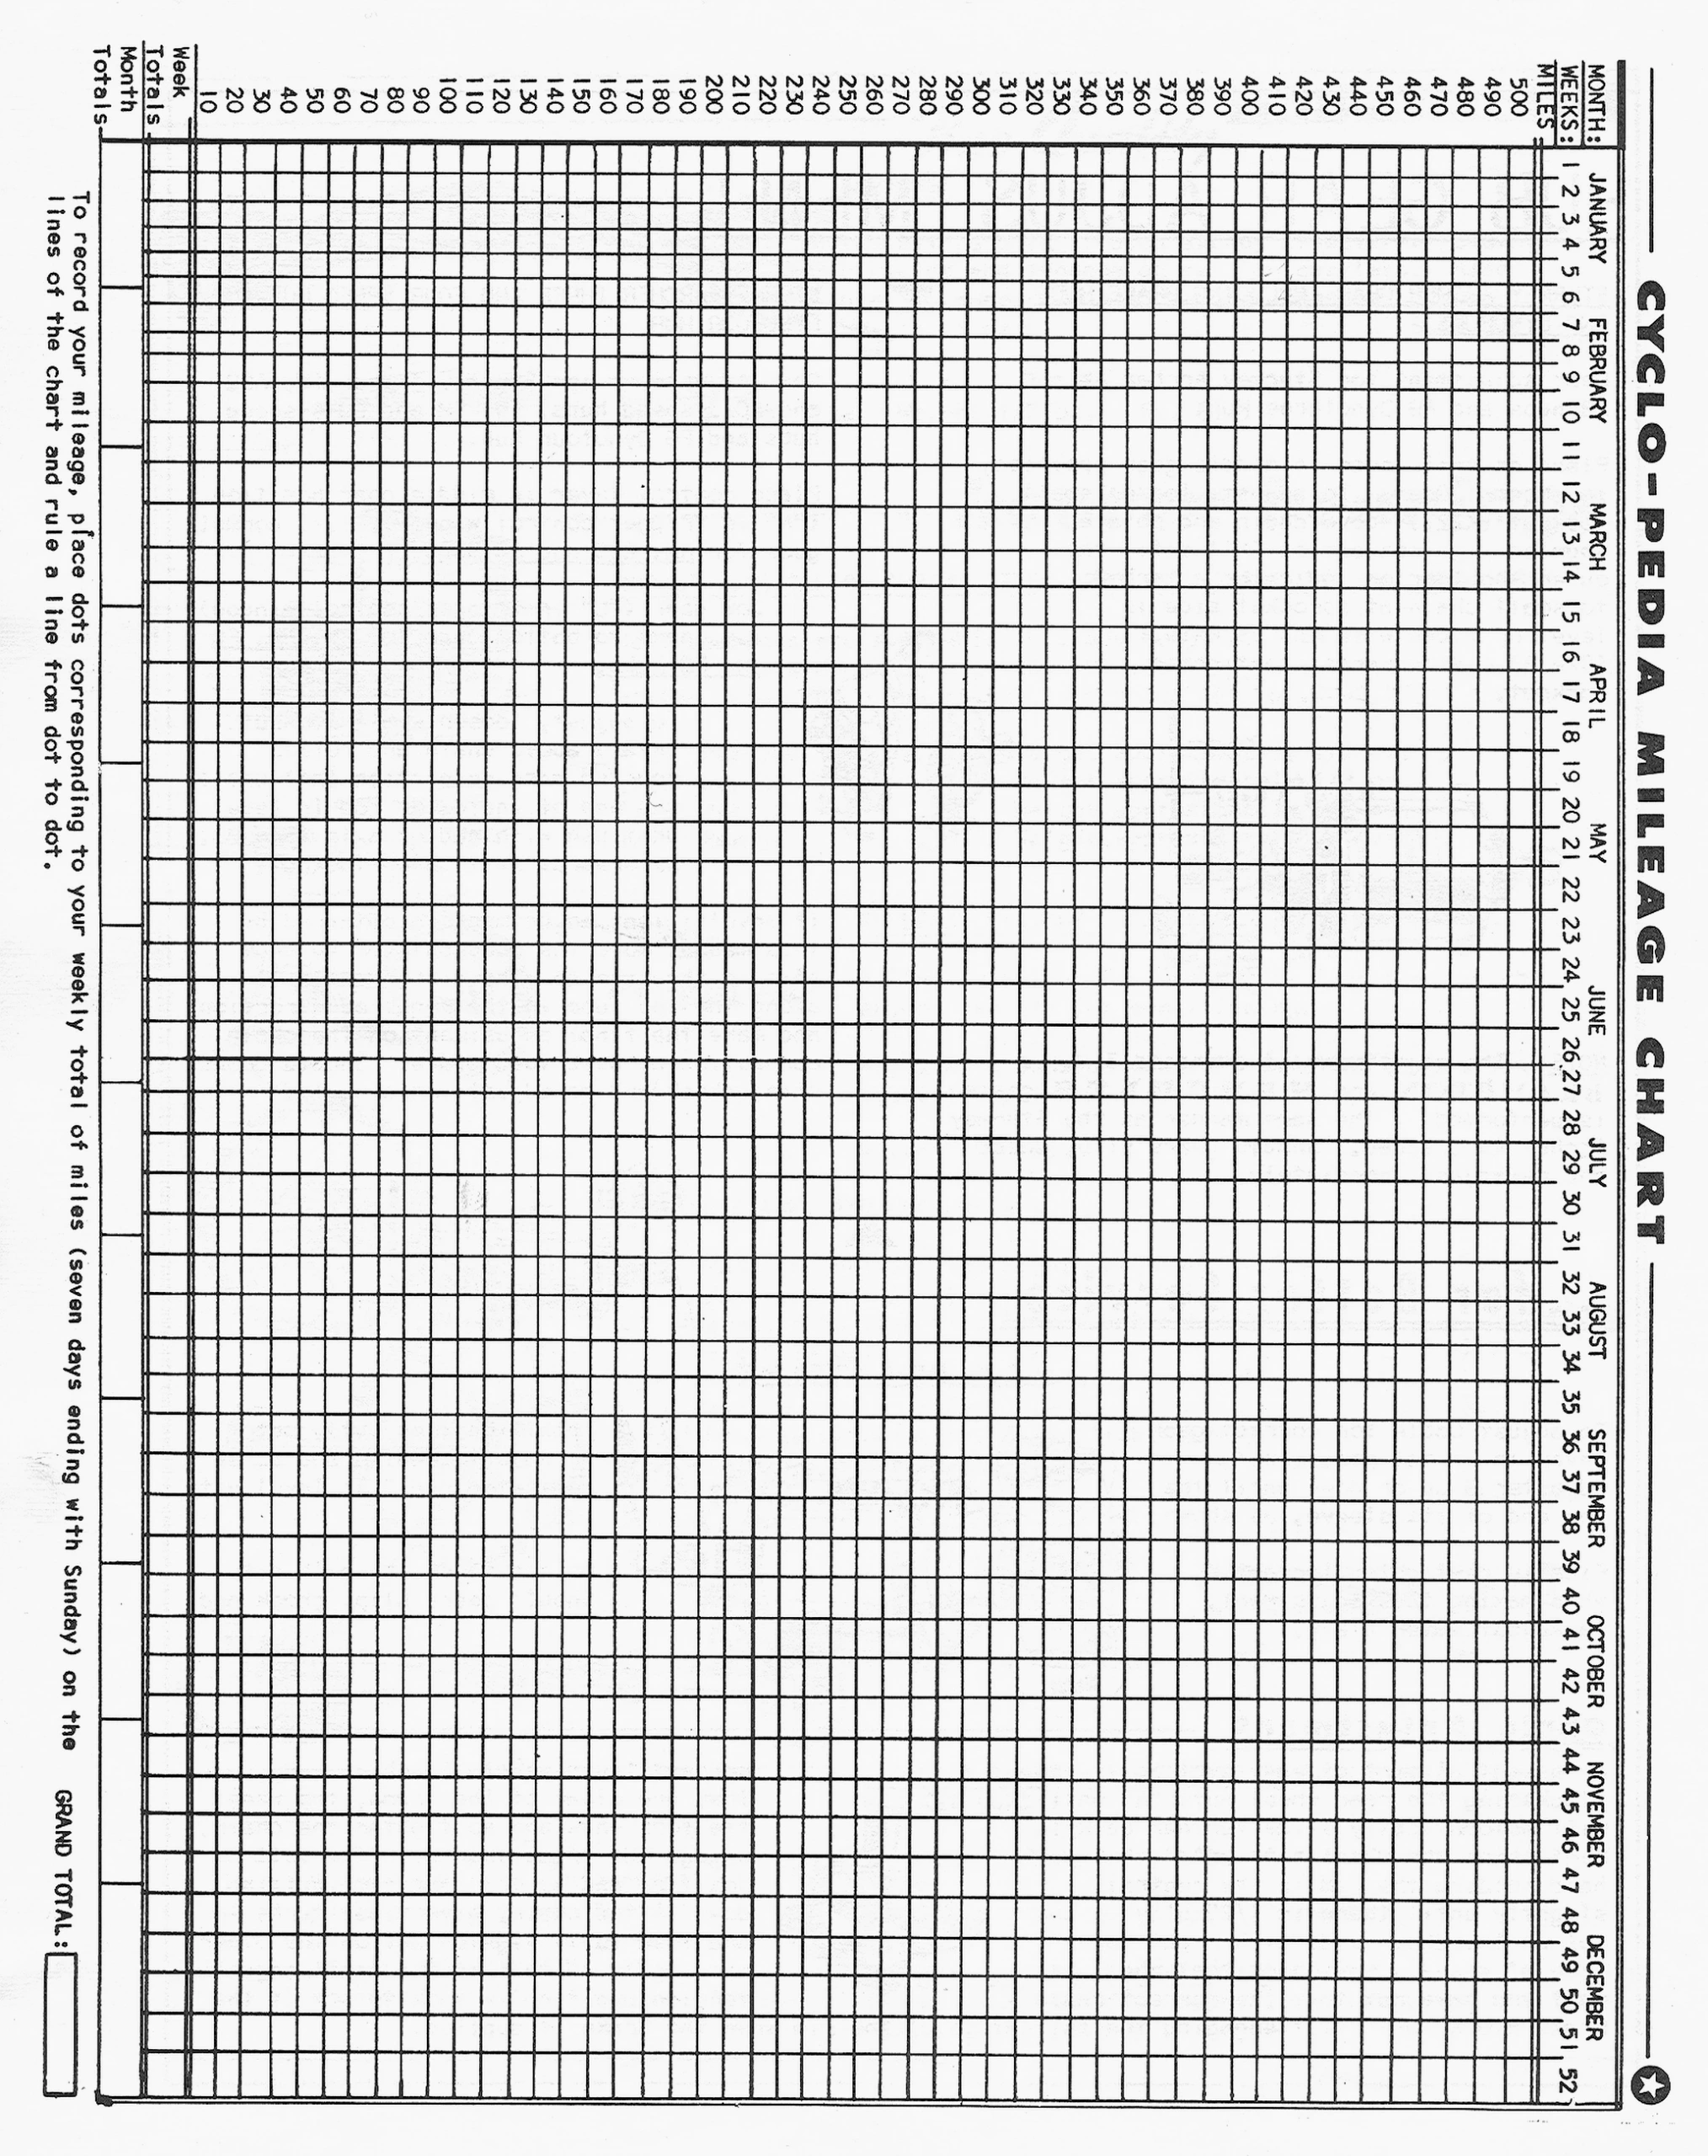
CYCLO-PEDIA MILEAGE CHART
MONTH: | JANUARY | FEBRUARY | MARCH | APRIL | MAY | JUNE | JULY | AUGUST | SEPTEMBER | OCTOBER | NOVEMBER | DECEMBER
WEEKS: | 1 | 2 | 3 | 4 | 5 | 6 | 7 | 8 | 9 | 10 | 11 | 12 | 13 | 14 | 15 | 16 | 17 | 18 | 19 | 20 | 21 | 22 | 23 | 24 | 25 | 26 | 27 | 28 | 29 | 30 | 31 | 32 | 33 | 34 | 35 | 36 | 37 | 38 | 39 | 40 | 41 | 42 | 43 | 44 | 45 | 46 | 47 | 48 | 49 | 50 | 51 | 52
MILES
500
490
480
470
460
450
440
430
420
410
400
390
380
370
360
350
340
330
320
310
300
290
280
270
260
250
240
230
220
210
200
190
180
170
160
150
140
130
120
110
100
90
80
70
60
50
40
30
20
10
Week Totals
Month Totals
To record your mileage, place dots corresponding to your weekly total of miles (seven days ending with Sunday) on the lines of the chart and rule a line from dot to dot.
GRAND TOTAL:
[A blank mileage log printed sideways on the page: a ruled grid of 52 weekly columns grouped under the months of the year, with rows marked in steps of 10 miles from 10 to 500. Below the grid run a row for weekly totals, a row of 12 boxes for monthly totals and a box for the grand total, and a star in a circle ends the rule beside the heading.]
— Gear ratio tables —
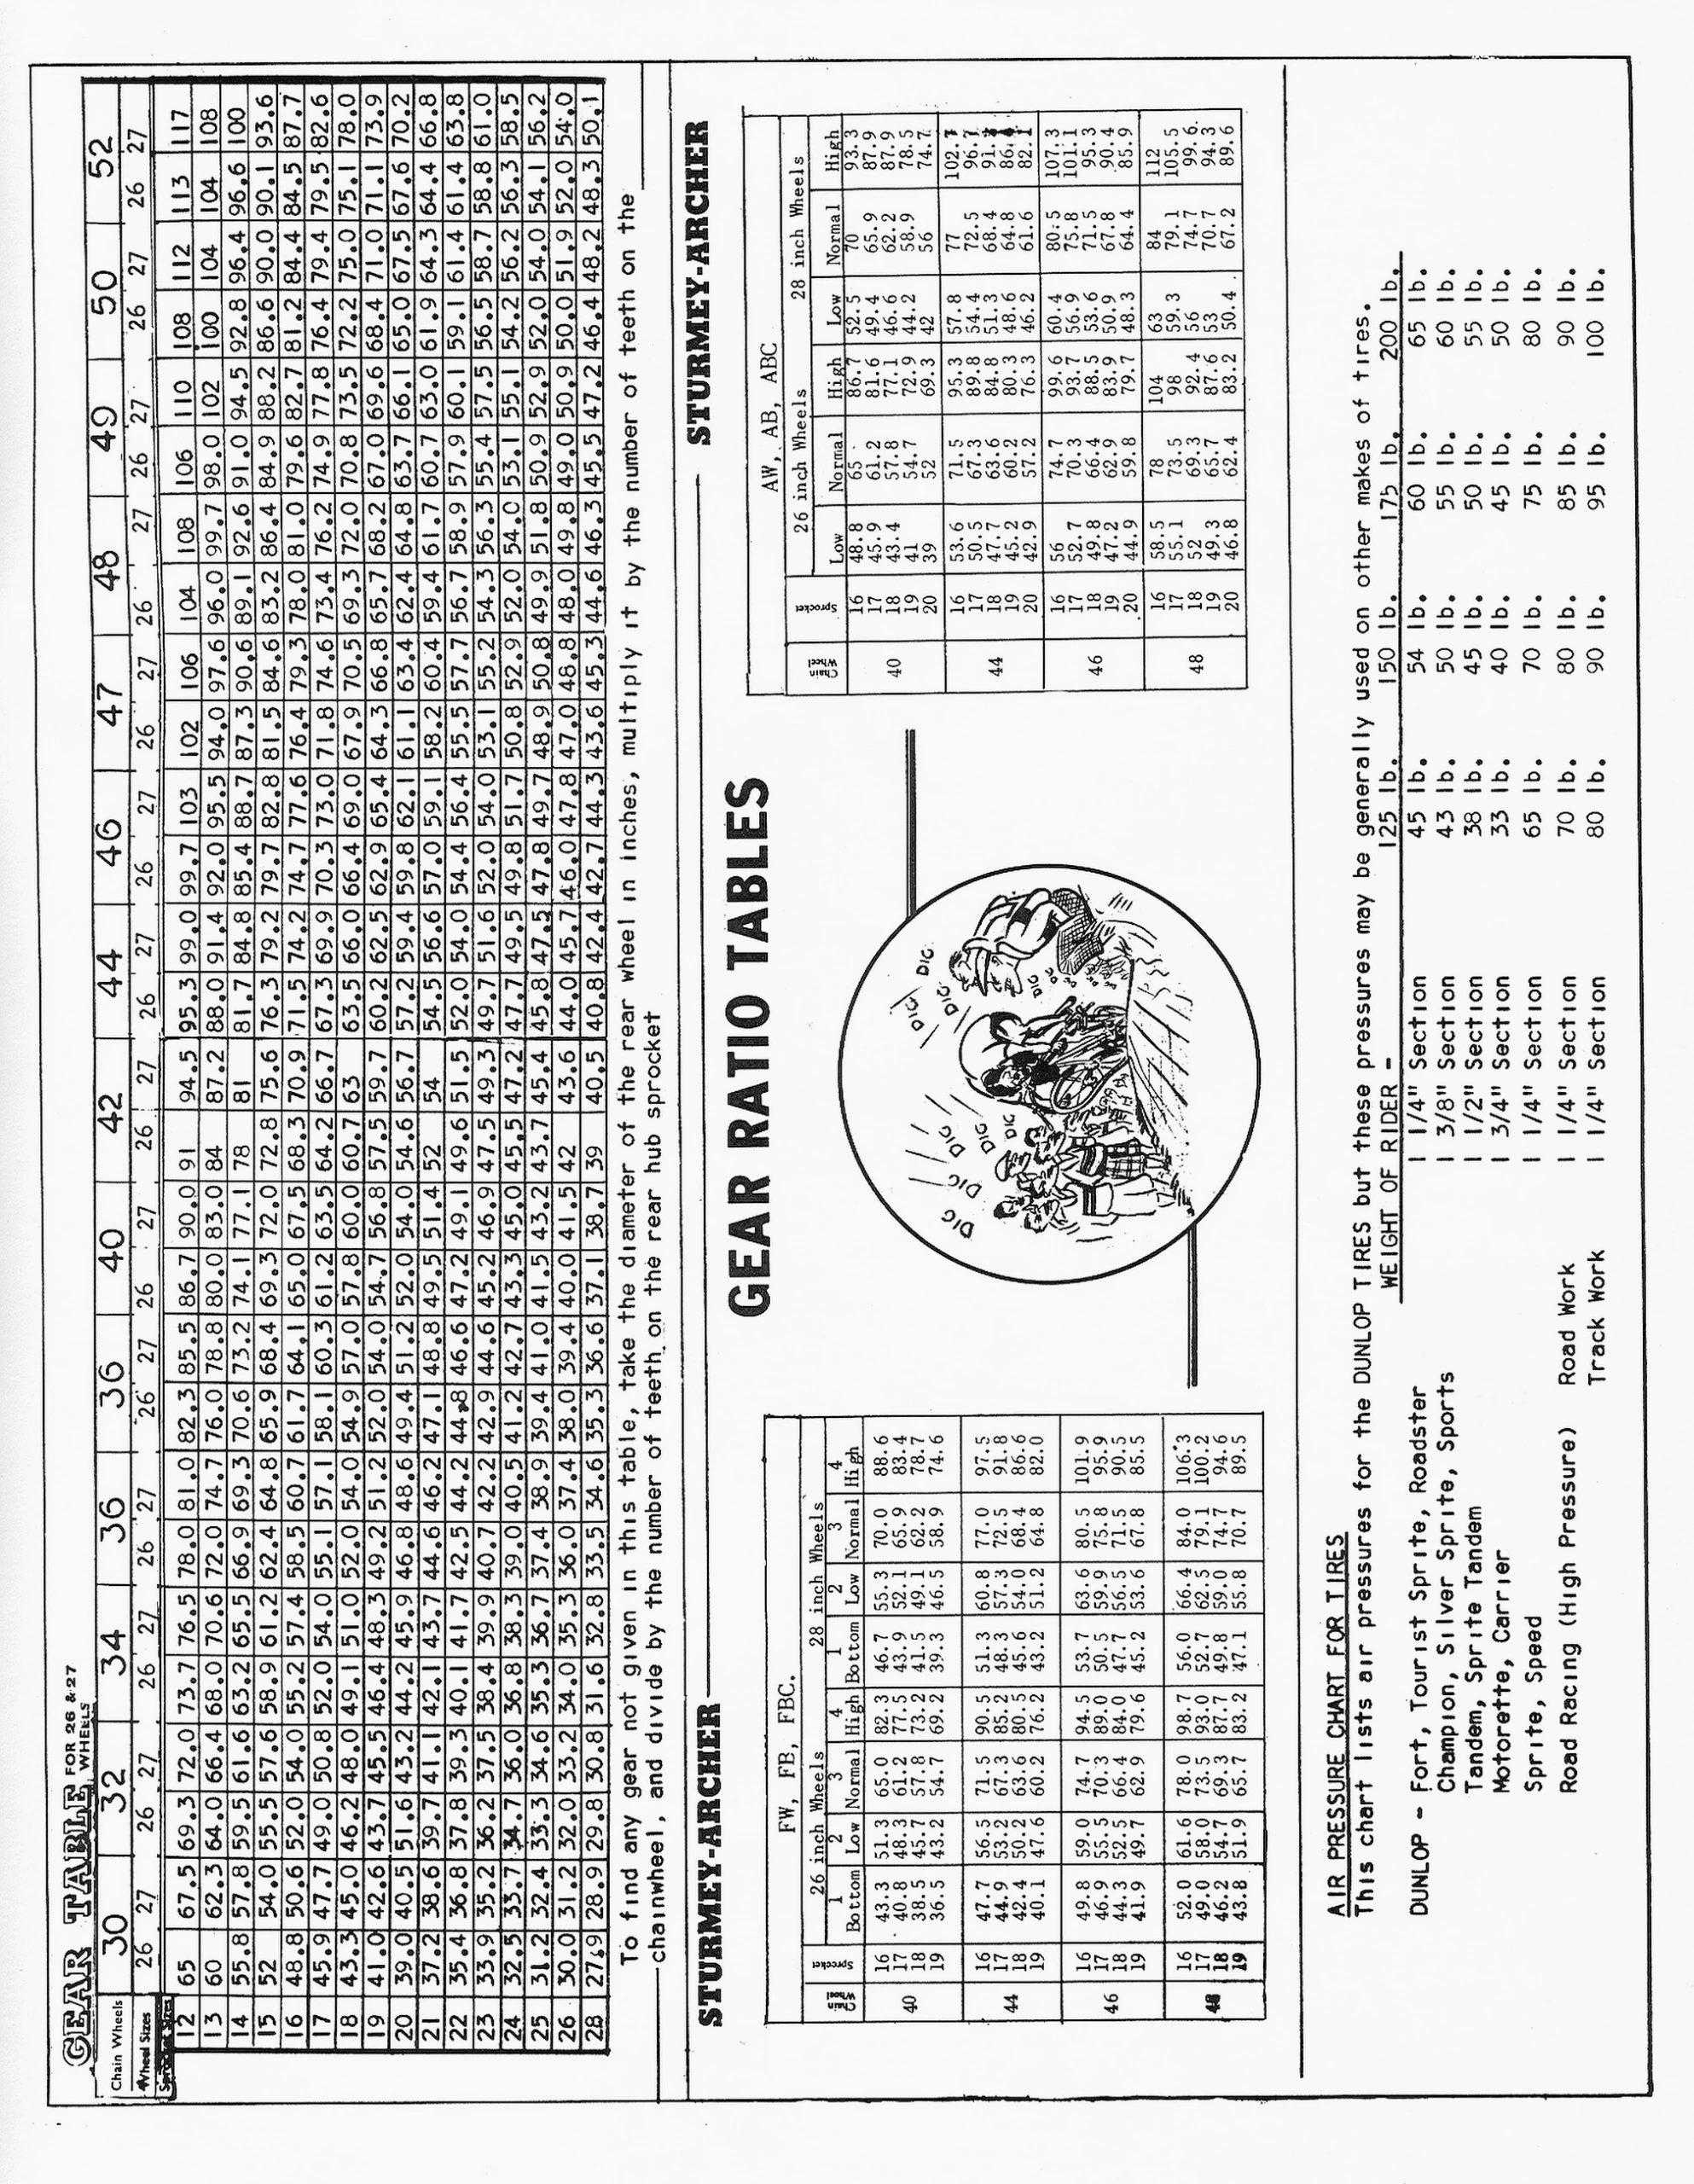
GEAR TABLE FOR 26 & 27 WHEELS
Chain Wheels | 30 | 32 | 34 | 36 | 36 | 40 | 42 | 44 | 46 | 47 | 48 | 49 | 50 | 52
Wheel Sizes | 26 | 27 | 26 | 27 | 26 | 27 | 26 | 27 | 26 | 27 | 26 | 27 | 26 | 27 | 26 | 27 | 26 | 27 | 26 | 27 | 26 | 27 | 26 | 27 | 26 | 27 | 26 | 27
Sprocket [?] Sizes
12 | 65 | 67.5 | 69.3 | 72.0 | 73.7 | 76.5 | 78.0 | 81.0 | 82.3 | 85.5 | 86.7 | 90.0 | 91 | 94.5 | 95.3 | 99.0 | 99.7 | 103 | 102 | 106 | 104 | 108 | 106 | 110 | 108 | 112 | 113 | 117
13 | 60 | 62.3 | 64.0 | 66.4 | 68.0 | 70.6 | 72.0 | 74.7 | 76.0 | 78.8 | 80.0 | 83.0 | 84 | 87.2 | 88.0 | 91.4 | 92.0 | 95.5 | 94.0 | 97.6 | 96.0 | 99.7 | 98.0 | 102 | 100 | 104 | 104 | 108
14 | 55.8 | 57.8 | 59.5 | 61.6 | 63.2 | 65.5 | 66.9 | 69.3 | 70.6 | 73.2 | 74.1 | 77.1 | 78 | 81 | 81.7 | 84.8 | 85.4 | 88.7 | 87.3 | 90.6 | 89.1 | 92.6 | 91.0 | 94.5 | 92.8 | 96.4 | 96.6 | 100
15 | 52 | 54.0 | 55.5 | 57.6 | 58.9 | 61.2 | 62.4 | 64.8 | 65.9 | 68.4 | 69.3 | 72.0 | 72.8 | 75.6 | 76.3 | 79.2 | 79.7 | 82.8 | 81.5 | 84.6 | 83.2 | 86.4 | 84.9 | 88.2 | 86.6 | 90.0 | 90.1 | 93.6
16 | 48.8 | 50.6 | 52.0 | 54.0 | 55.2 | 57.4 | 58.5 | 60.7 | 61.7 | 64.1 | 65.0 | 67.5 | 68.3 | 70.9 | 71.5 | 74.2 | 74.7 | 77.6 | 76.4 | 79.3 | 78.0 | 81.0 | 79.6 | 82.7 | 81.2 | 84.4 | 84.5 | 87.7
17 | 45.9 | 47.7 | 49.0 | 50.8 | 52.0 | 54.0 | 55.1 | 57.1 | 58.1 | 60.3 | 61.2 | 63.5 | 64.2 | 66.7 | 67.3 | 69.9 | 70.3 | 73.0 | 71.8 | 74.6 | 73.4 | 76.2 | 74.9 | 77.8 | 76.4 | 79.4 | 79.5 | 82.6
18 | 43.3 | 45.0 | 46.2 | 48.0 | 49.1 | 51.0 | 52.0 | 54.0 | 54.9 | 57.0 | 57.8 | 60.0 | 60.7 | 63 | 63.5 | 66.0 | 66.4 | 69.0 | 67.9 | 70.5 | 69.3 | 72.0 | 70.8 | 73.5 | 72.2 | 75.0 | 75.1 | 78.0
19 | 41.0 | 42.6 | 43.7 | 45.5 | 46.4 | 48.3 | 49.2 | 51.2 | 52.0 | 54.0 | 54.7 | 56.8 | 57.5 | 59.7 | 60.2 | 62.5 | 62.9 | 65.4 | 64.3 | 66.8 | 65.7 | 68.2 | 67.0 | 69.6 | 68.4 | 71.0 | 71.1 | 73.9
20 | 39.0 | 40.5 | 51.6 | 43.2 | 44.2 | 45.9 | 46.8 | 48.6 | 49.4 | 51.2 | 52.0 | 54.0 | 54.6 | 56.7 | 57.2 | 59.4 | 59.8 | 62.1 | 61.1 | 63.4 | 62.4 | 64.8 | 63.7 | 66.1 | 65.0 | 67.5 | 67.6 | 70.2
21 | 37.2 | 38.6 | 39.7 | 41.1 | 42.1 | 43.7 | 44.6 | 46.2 | 47.1 | 48.8 | 49.5 | 51.4 | 52 | 54 | 54.5 | 56.6 | 57.0 | 59.1 | 58.2 | 60.4 | 59.4 | 61.7 | 60.7 | 63.0 | 61.9 | 64.3 | 64.4 | 66.8
22 | 35.4 | 36.8 | 37.8 | 39.3 | 40.1 | 41.7 | 42.5 | 44.2 | 44.8 | 46.6 | 47.2 | 49.1 | 49.6 | 51.5 | 52.0 | 54.0 | 54.4 | 56.4 | 55.5 | 57.7 | 56.7 | 58.9 | 57.9 | 60.1 | 59.1 | 61.4 | 61.4 | 63.8
23 | 33.9 | 35.2 | 36.2 | 37.5 | 38.4 | 39.9 | 40.7 | 42.2 | 42.9 | 44.6 | 45.2 | 46.9 | 47.5 | 49.3 | 49.7 | 51.6 | 52.0 | 54.0 | 53.1 | 55.2 | 54.3 | 56.3 | 55.4 | 57.5 | 56.5 | 58.7 | 58.8 | 61.0
24 | 32.5 | 33.7 | 34.7 | 36.0 | 36.8 | 38.3 | 39.0 | 40.5 | 41.2 | 42.7 | 43.3 | 45.0 | 45.5 | 47.2 | 47.7 | 49.5 | 49.8 | 51.7 | 50.8 | 52.9 | 52.0 | 54.0 | 53.1 | 55.1 | 54.2 | 56.2 | 56.3 | 58.5
25 | 31.2 | 32.4 | 33.3 | 34.6 | 35.3 | 36.7 | 37.4 | 38.9 | 39.4 | 41.0 | 41.5 | 43.2 | 43.7 | 45.4 | 45.8 | 47.5 | 47.8 | 49.7 | 48.9 | 50.8 | 49.9 | 51.8 | 50.9 | 52.9 | 52.0 | 54.0 | 54.1 | 56.2
26 | 30.0 | 31.2 | 32.0 | 33.2 | 34.0 | 35.3 | 36.0 | 37.4 | 38.0 | 39.4 | 40.0 | 41.5 | 42 | 43.6 | 44.0 | 45.7 | 46.0 | 47.8 | 47.0 | 48.8 | 48.0 | 49.8 | 49.0 | 50.9 | 50.0 | 51.9 | 52.0 | 54.0
28 | 27.9 | 28.9 | 29.8 | 30.8 | 31.6 | 32.8 | 33.5 | 34.6 | 35.3 | 36.6 | 37.1 | 38.7 | 39 | 40.5 | 40.8 | 42.4 | 42.7 | 44.3 | 43.6 | 45.3 | 44.6 | 46.3 | 45.5 | 47.2 | 46.4 | 48.2 | 48.3 | 50.1
To find any gear not given in this table, take the diameter of the rear wheel in inches, multiply it by the number of teeth on the chainwheel, and divide by the number of teeth on the rear hub sprocket
GEAR RATIO TABLES
STURMEY-ARCHER
FW, FB, FBC.
Chain Wheel | Sprocket | 26 inch Wheels | 28 inch Wheels
1 Bottom | 2 Low | 3 Normal | 4 High | 1 Bottom | 2 Low | 3 Normal | 4 High
40 | 16 | 43.3 | 51.3 | 65.0 | 82.3 | 46.7 | 55.3 | 70.0 | 88.6
17 | 40.8 | 48.3 | 61.2 | 77.5 | 43.9 | 52.1 | 65.9 | 83.4
18 | 38.5 | 45.7 | 57.8 | 73.2 | 41.5 | 49.1 | 62.2 | 78.7
19 | 36.5 | 43.2 | 54.7 | 69.2 | 39.3 | 46.5 | 58.9 | 74.6
44 | 16 | 47.7 | 56.5 | 71.5 | 90.5 | 51.3 | 60.8 | 77.0 | 97.5
17 | 44.9 | 53.2 | 67.3 | 85.2 | 48.3 | 57.3 | 72.5 | 91.8
18 | 42.4 | 50.2 | 63.6 | 80.5 | 45.6 | 54.0 | 68.4 | 86.6
19 | 40.1 | 47.6 | 60.2 | 76.2 | 43.2 | 51.2 | 64.8 | 82.0
46 | 16 | 49.8 | 59.0 | 74.7 | 94.5 | 53.7 | 63.6 | 80.5 | 101.9
17 | 46.9 | 55.5 | 70.3 | 89.0 | 50.5 | 59.9 | 75.8 | 95.9
18 | 44.3 | 52.5 | 66.4 | 84.0 | 47.7 | 56.5 | 71.5 | 90.5
19 | 41.9 | 49.7 | 62.9 | 79.6 | 45.2 | 53.6 | 67.8 | 85.5
48 | 16 | 52.0 | 61.6 | 78.0 | 98.7 | 56.0 | 66.4 | 84.0 | 106.3
17 | 49.0 | 58.0 | 73.5 | 93.0 | 52.7 | 62.5 | 79.1 | 100.2
18 | 46.2 | 54.7 | 69.3 | 87.7 | 49.8 | 59.0 | 74.7 | 94.6
19 | 43.8 | 51.9 | 65.7 | 83.2 | 47.1 | 55.8 | 70.7 | 89.5
DIG DIG DIG DIG DIG
DIG DIG DIG
DIG DIG DIG DIG DIG
STURMEY-ARCHER
AW, AB, ABC
Chain Wheel | Sprocket | 26 inch Wheels | 28 inch Wheels
Low | Normal | High | Low | Normal | High
40 | 16 | 48.8 | 65 | 86.7 | 52.5 | 70 | 93.3
17 | 45.9 | 61.2 | 81.6 | 49.4 | 65.9 | 87.9
18 | 43.4 | 57.8 | 77.1 | 46.6 | 62.2 | 87.9
19 | 41 | 54.7 | 72.9 | 44.2 | 58.9 | 78.5
20 | 39 | 52 | 69.3 | 42 | 56 | 74.7
44 | 16 | 53.6 | 71.5 | 95.3 | 57.8 | 77 | 102.7
17 | 50.5 | 67.3 | 89.8 | 54.4 | 72.5 | 96.7
18 | 47.7 | 63.6 | 84.8 | 51.3 | 68.4 | 91.2 [?]
19 | 45.2 | 60.2 | 80.3 | 48.6 | 64.8 | 86.4 [?]
20 | 42.9 | 57.2 | 76.3 | 46.2 | 61.6 | 82.1
46 | 16 | 56 | 74.7 | 99.6 | 60.4 | 80.5 | 107.3
17 | 52.7 | 70.3 | 93.7 | 56.9 | 75.8 | 101.1
18 | 49.8 | 66.4 | 88.5 | 53.6 | 71.5 | 95.3
19 | 47.2 | 62.9 | 83.9 | 50.9 | 67.8 | 90.4
20 | 44.9 | 59.8 | 79.7 | 48.3 | 64.4 | 85.9
48 | 16 | 58.5 | 78 | 104 | 63 | 84 | 112
17 | 55.1 | 73.5 | 98 | 59.3 | 79.1 | 105.5
18 | 52 | 69.3 | 92.4 | 56 | 74.7 | 99.6
19 | 49.3 | 65.7 | 87.6 | 53 | 70.7 | 94.3
20 | 46.8 | 62.4 | 83.2 | 50.4 | 67.2 | 89.6
AIR PRESSURE CHART FOR TIRES
This chart lists air pressures for the DUNLOP TIRES but these pressures may be generally used on other makes of tires.
WEIGHT OF RIDER – | 125 lb. | 150 lb. | 175 lb. | 200 lb.
DUNLOP – Fort, Tourist Sprite, Roadster | 1 1/4″ Section | 45 lb. | 54 lb. | 60 lb. | 65 lb.
Champion, Silver Sprite, Sports | 1 3/8″ Section | 43 lb. | 50 lb. | 55 lb. | 60 lb.
Tandem, Sprite Tandem | 1 1/2″ Section | 38 lb. | 45 lb. | 50 lb. | 55 lb.
Motorette, Carrier | 1 3/4″ Section | 33 lb. | 40 lb. | 45 lb. | 50 lb.
Sprite, Speed | 1 1/4″ Section | 65 lb. | 70 lb. | 75 lb. | 80 lb.
Road Racing (High Pressure) | Road Work | 1 1/4″ Section | 70 lb. | 80 lb. | 85 lb. | 90 lb.
Track Work | 1 1/4” Section | 80 lb. | 90 lb. | 95 lb. | 100 lb.
[A page of gearing and tire tables printed sideways: a gear table giving gear inches for 26- and 27-inch wheels with chainwheels of 30 to 52 teeth and sprockets of 12 to 28 teeth, two Sturmey-Archer hub gear tables for 26- and 28-inch wheels and a Dunlop tire pressure chart by rider weight. Between the hub tables a round cartoon shows a racing cyclist straining up a steep rise past a crowd of spectators, some of them in kilts, who shout at him.]
Ebykr presents this material for research and education. If you hold rights to it or notice an ownership issue, please contact us and we will respond promptly.
The Ebykr Digest
New articles, timelines, catalog finds and registry activity — assembled from the archive once a month. Your address is never shared.
Double opt-in. One email per month. Unsubscribe at any time with one click.