About Ebykr
Ebykr celebrates classic and vintage lightweight bicycles through provocative imagery and opinion. Ride along with us.
About Ebykr
Ebykr celebrates classic and vintage lightweight bicycles through provocative imagery and opinion. Ride along with us.

Source: bulgier.net (Mark Bulgier's catalog archive), no scanner named for this folder; enlarged for Ebykr.
| Marque | Mavic |
|---|---|
| Type | Ephemera |
| Year | 1984 (estimated) |
| Publisher | Mavic (France) |
| Country | France |
| Language | French, English, Spanish |
| Pages | 4 |
| Source | bulgier.net (Mark Bulgier's catalog archive), no scanner named for this folder; enlarged for Ebykr. |
| Credit | Ebykr archive |
| Identifier | Permalink http://bulgier.net/pics/bike/Catalogs/Mavic/ |
| Transcription | Transcribed by eye |
Reference
Mavic (France). Mavic 610 URD and 616 RD VTT Bottom Bracket Instruction Sheet and the Triple 635 Crankset of about 1984: French, English, Spanish, Italian and German Instructions. c. 1984. Ebykr, https://ebykr.com/library/mavic-610-urd-616-rd-bottom-bracket-sheet-and-635-triple-about-1984/.
Wikipedia
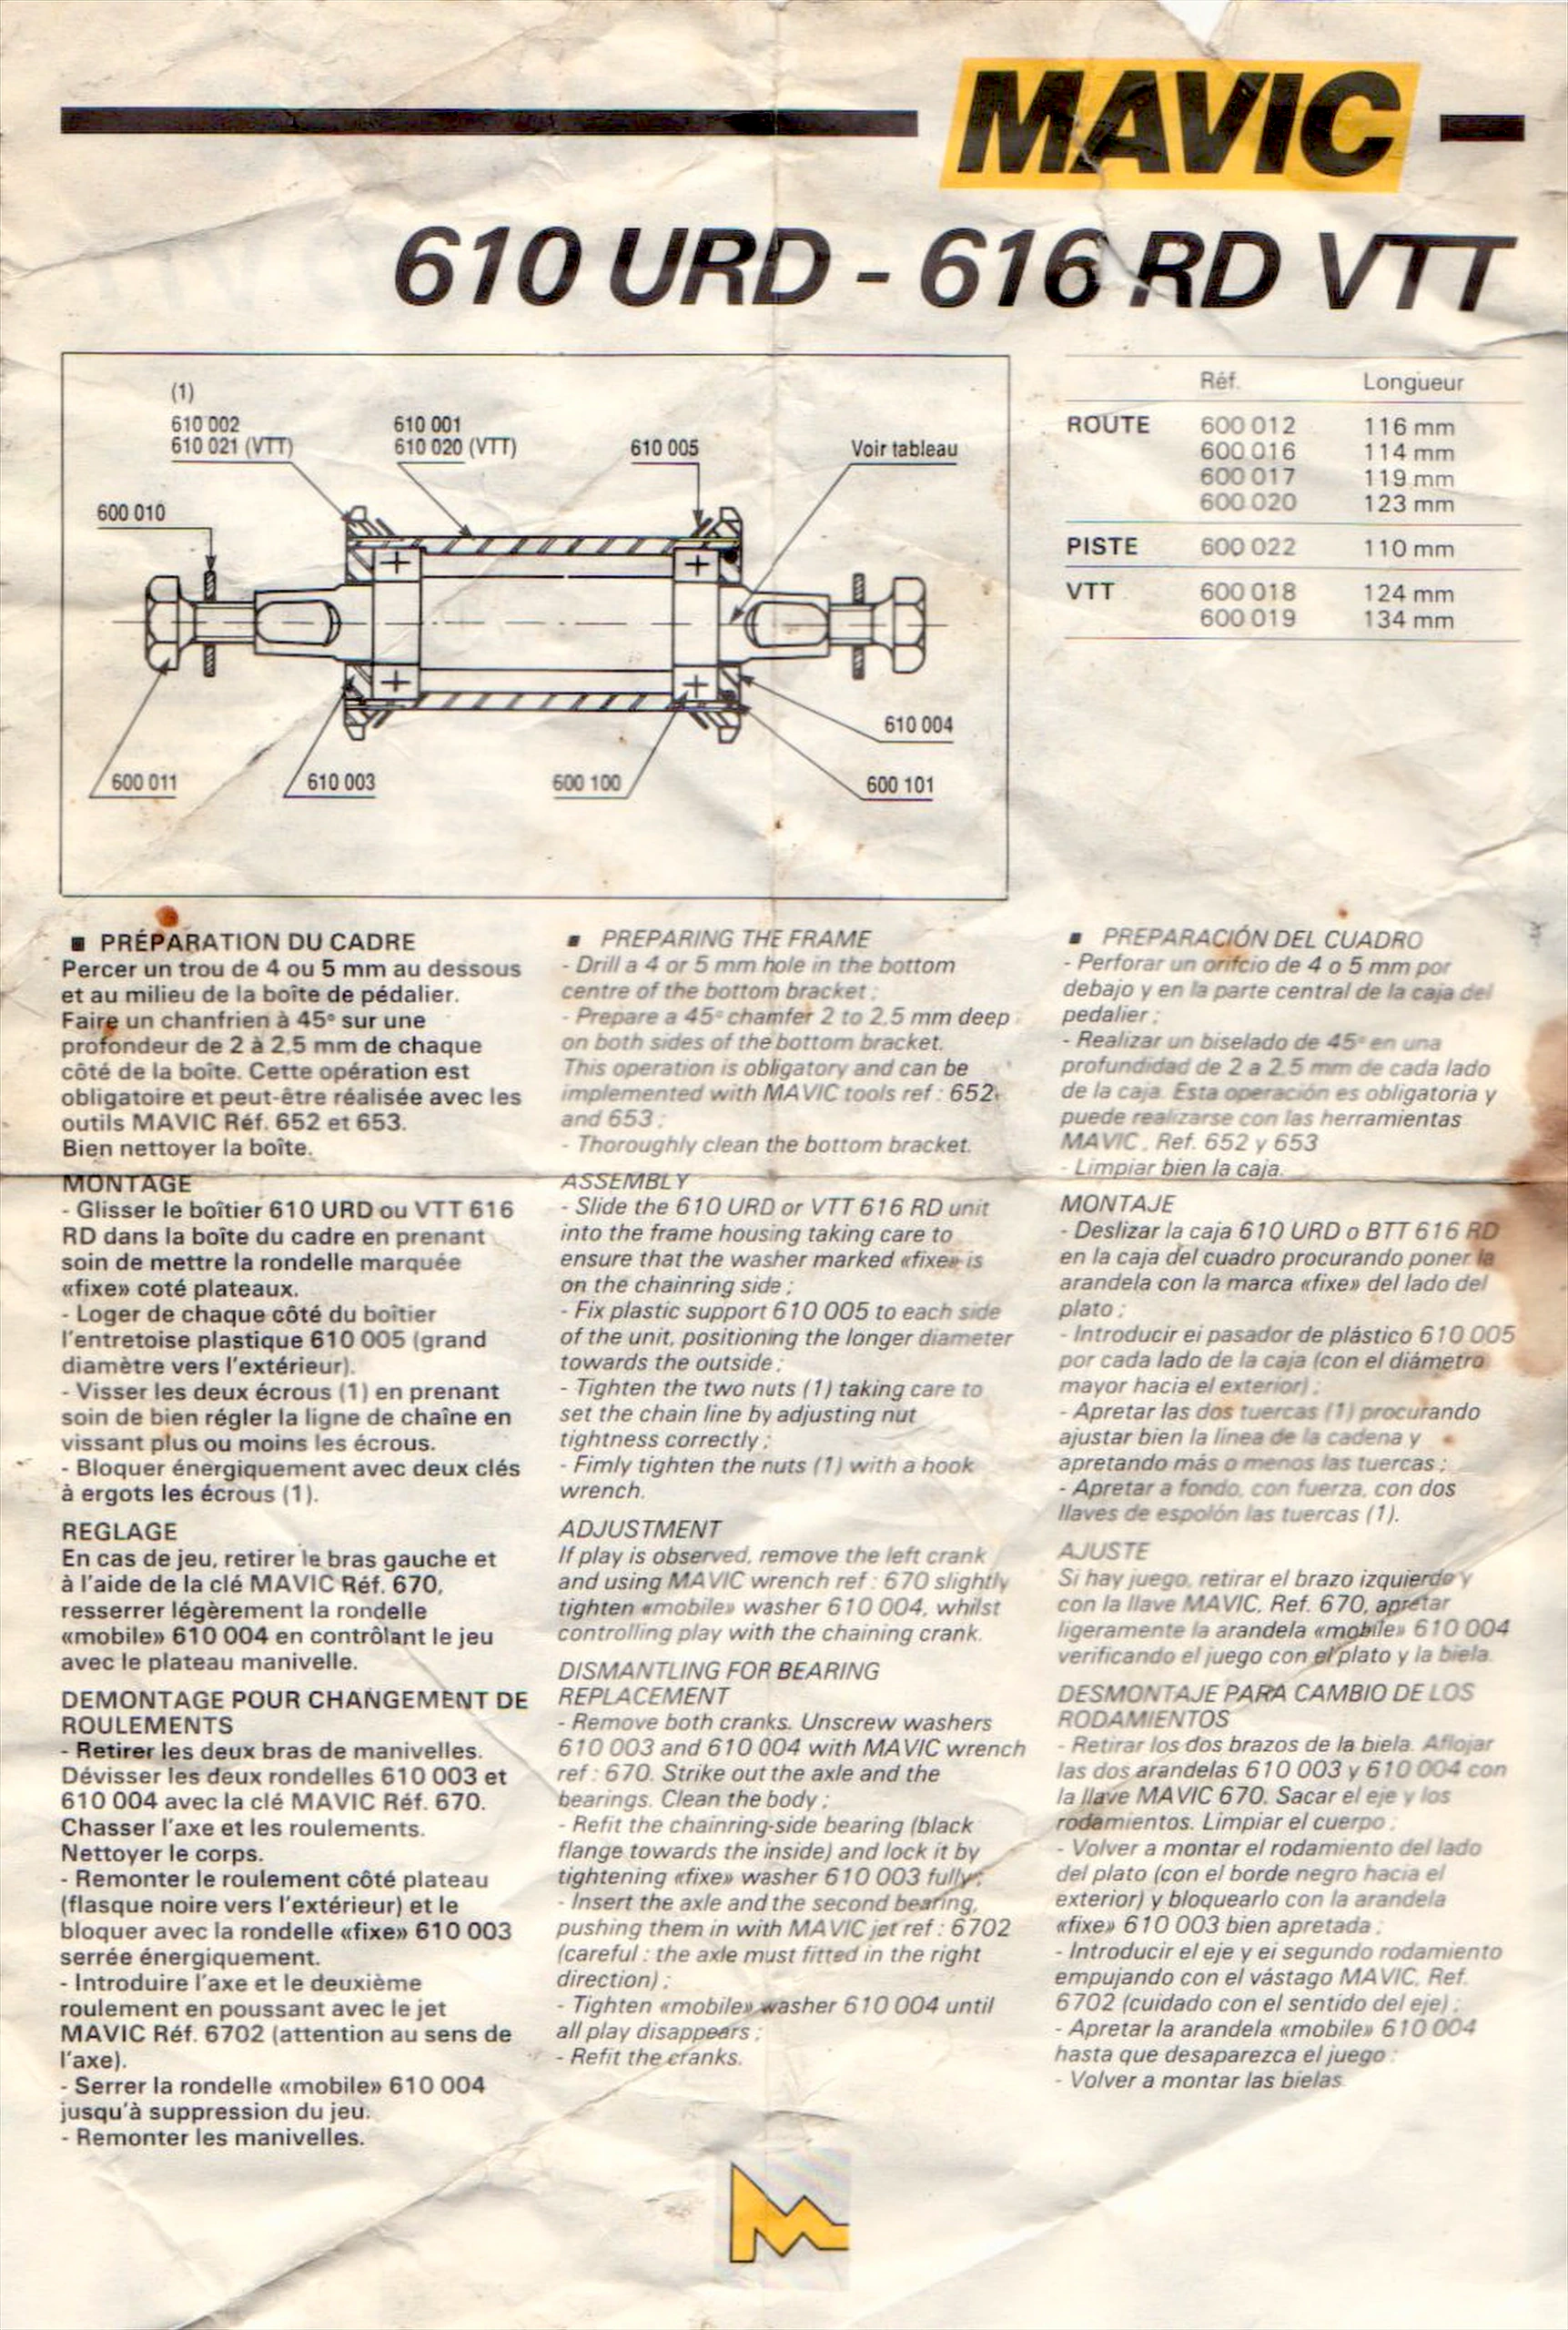
{{cite web |title=Mavic 610 URD and 616 RD VTT Bottom Bracket Instruction Sheet and the Triple 635 Crankset of about 1984: French, English, Spanish, Italian and German Instructions |publisher=Mavic (France) |date=c. 1984 |url=https://ebykr.com/library/mavic-610-urd-616-rd-bottom-bracket-sheet-and-635-triple-about-1984/ |website=Ebykr |access-date=}}MAVIC 610 URD - 616 RD VTT (1) 610 002 610 021 (VTT) 610 001 610 020 (VTT) 610 005 Voir tableau 600 010 600 011 610 003 600 100 610 004 600 101 | Réf. | Longueur ROUTE | 600 012 | 116 mm | 600 016 | 114 mm | 600 017 | …
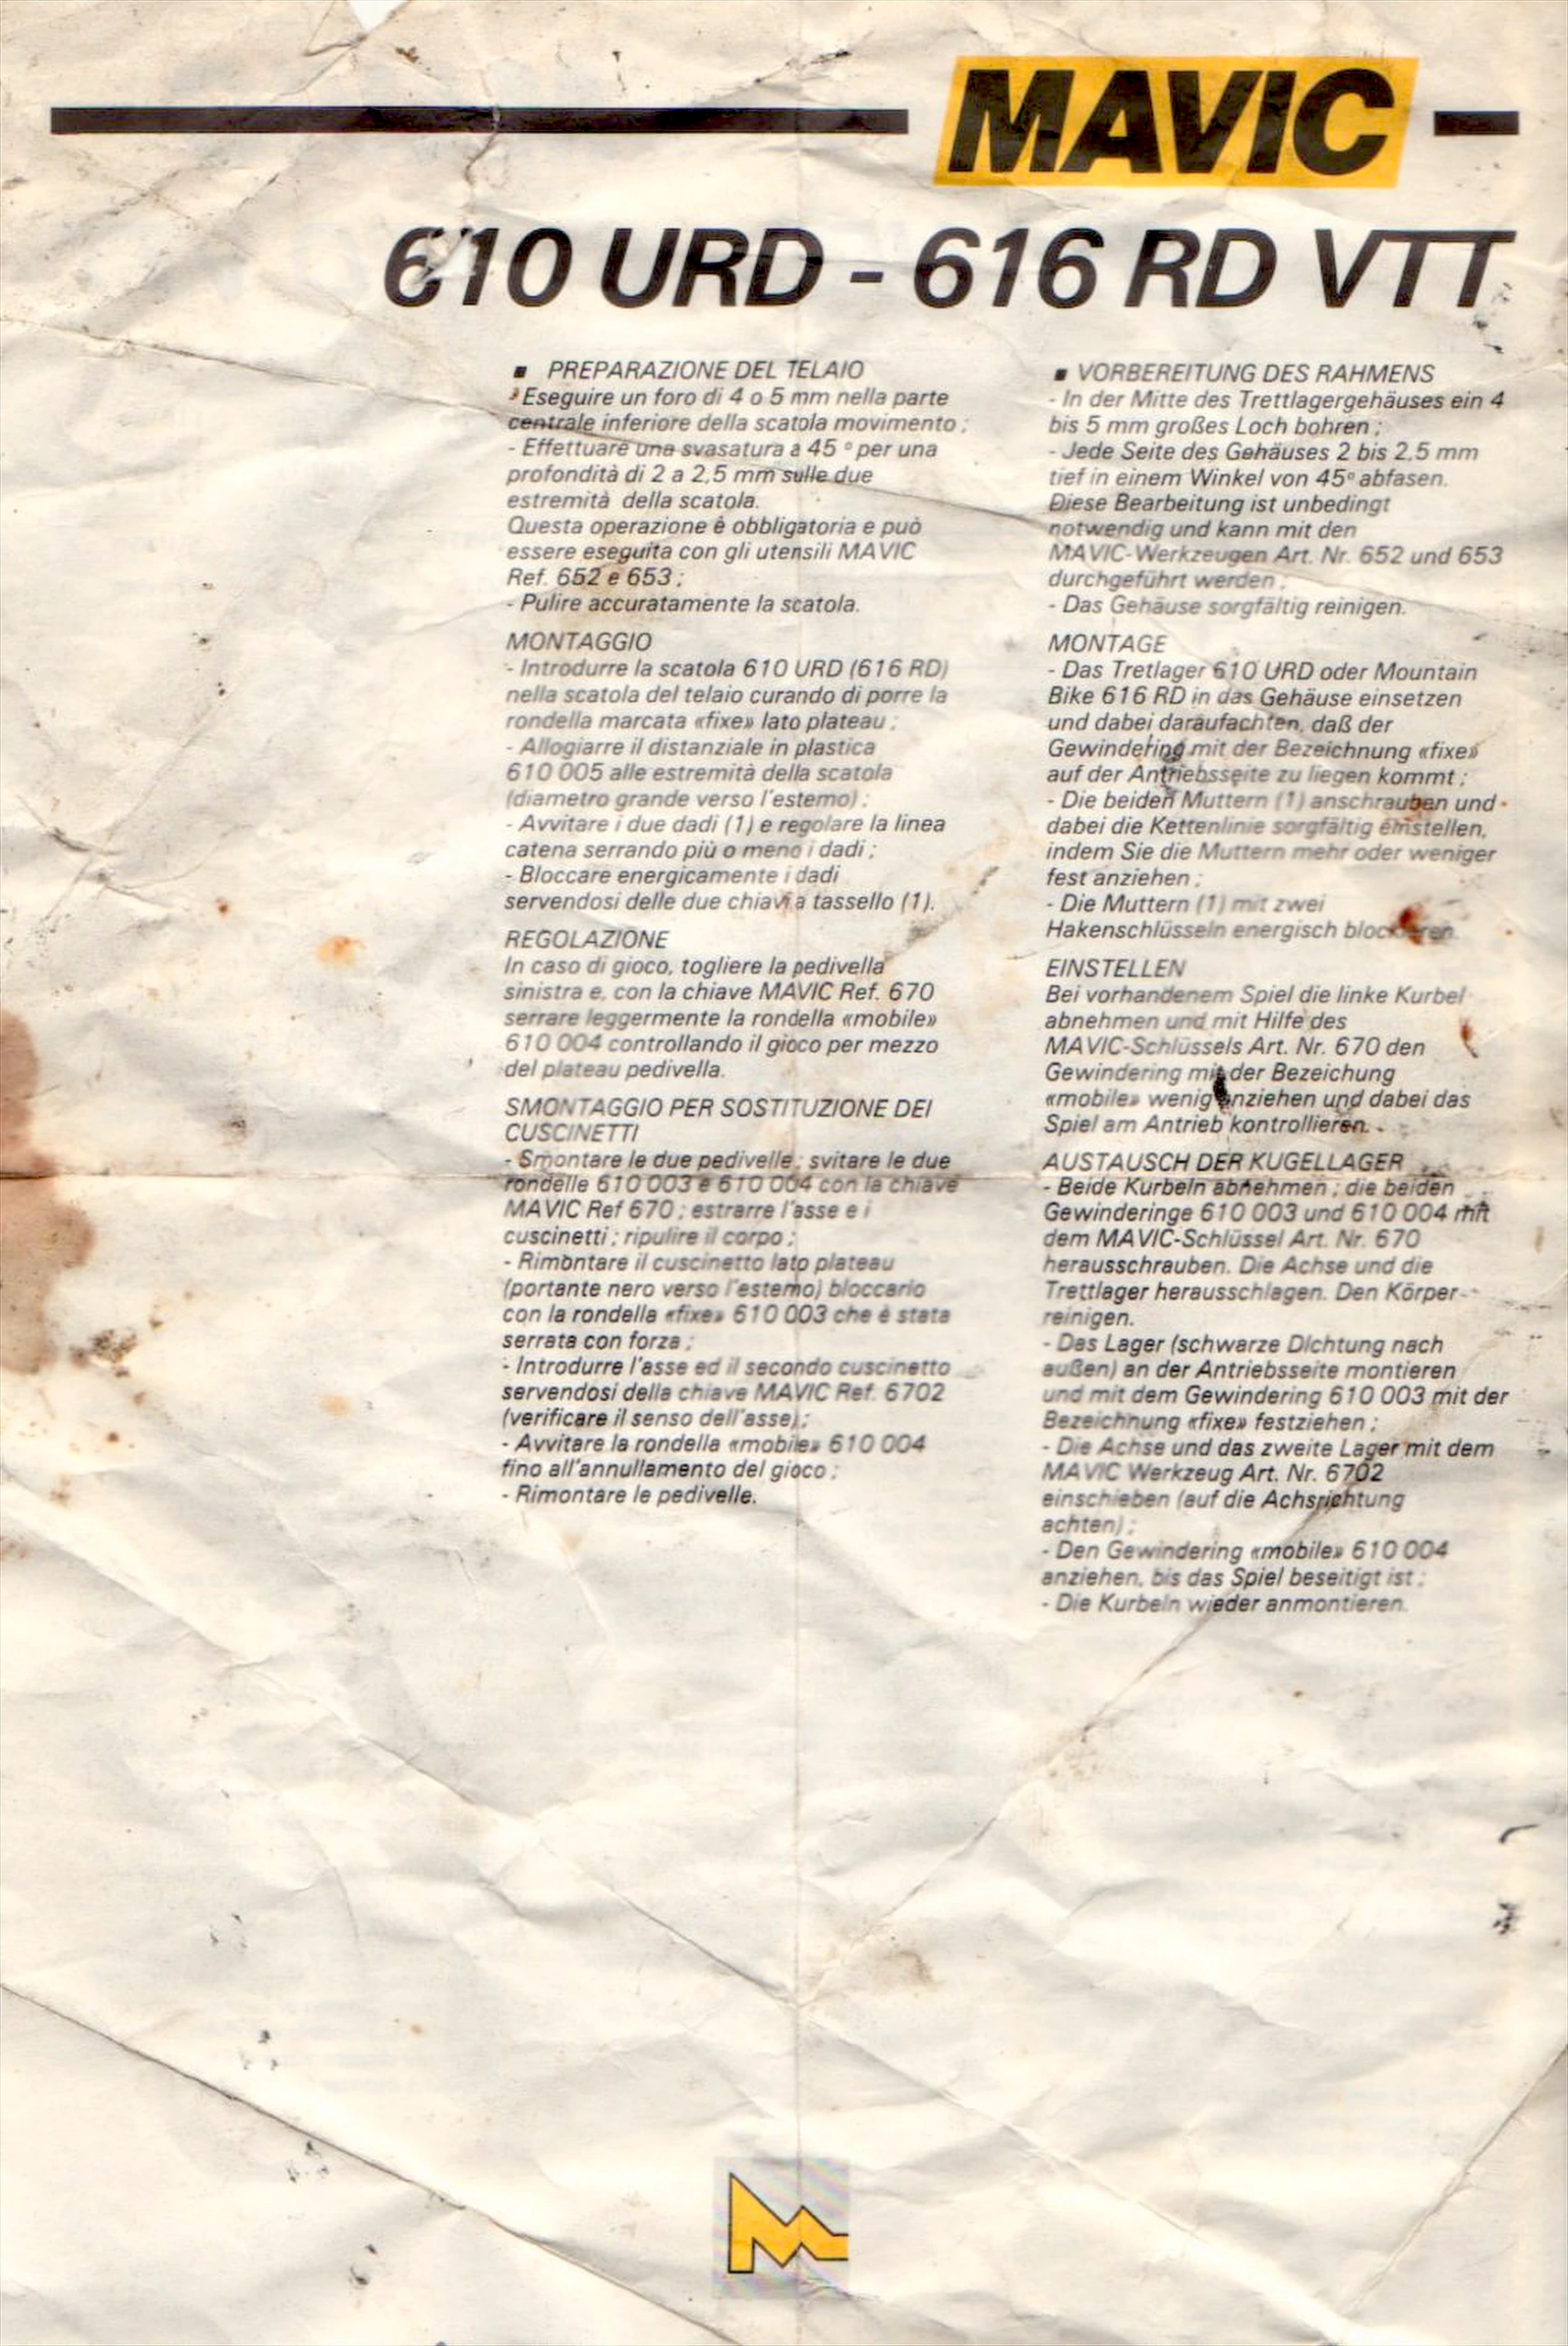
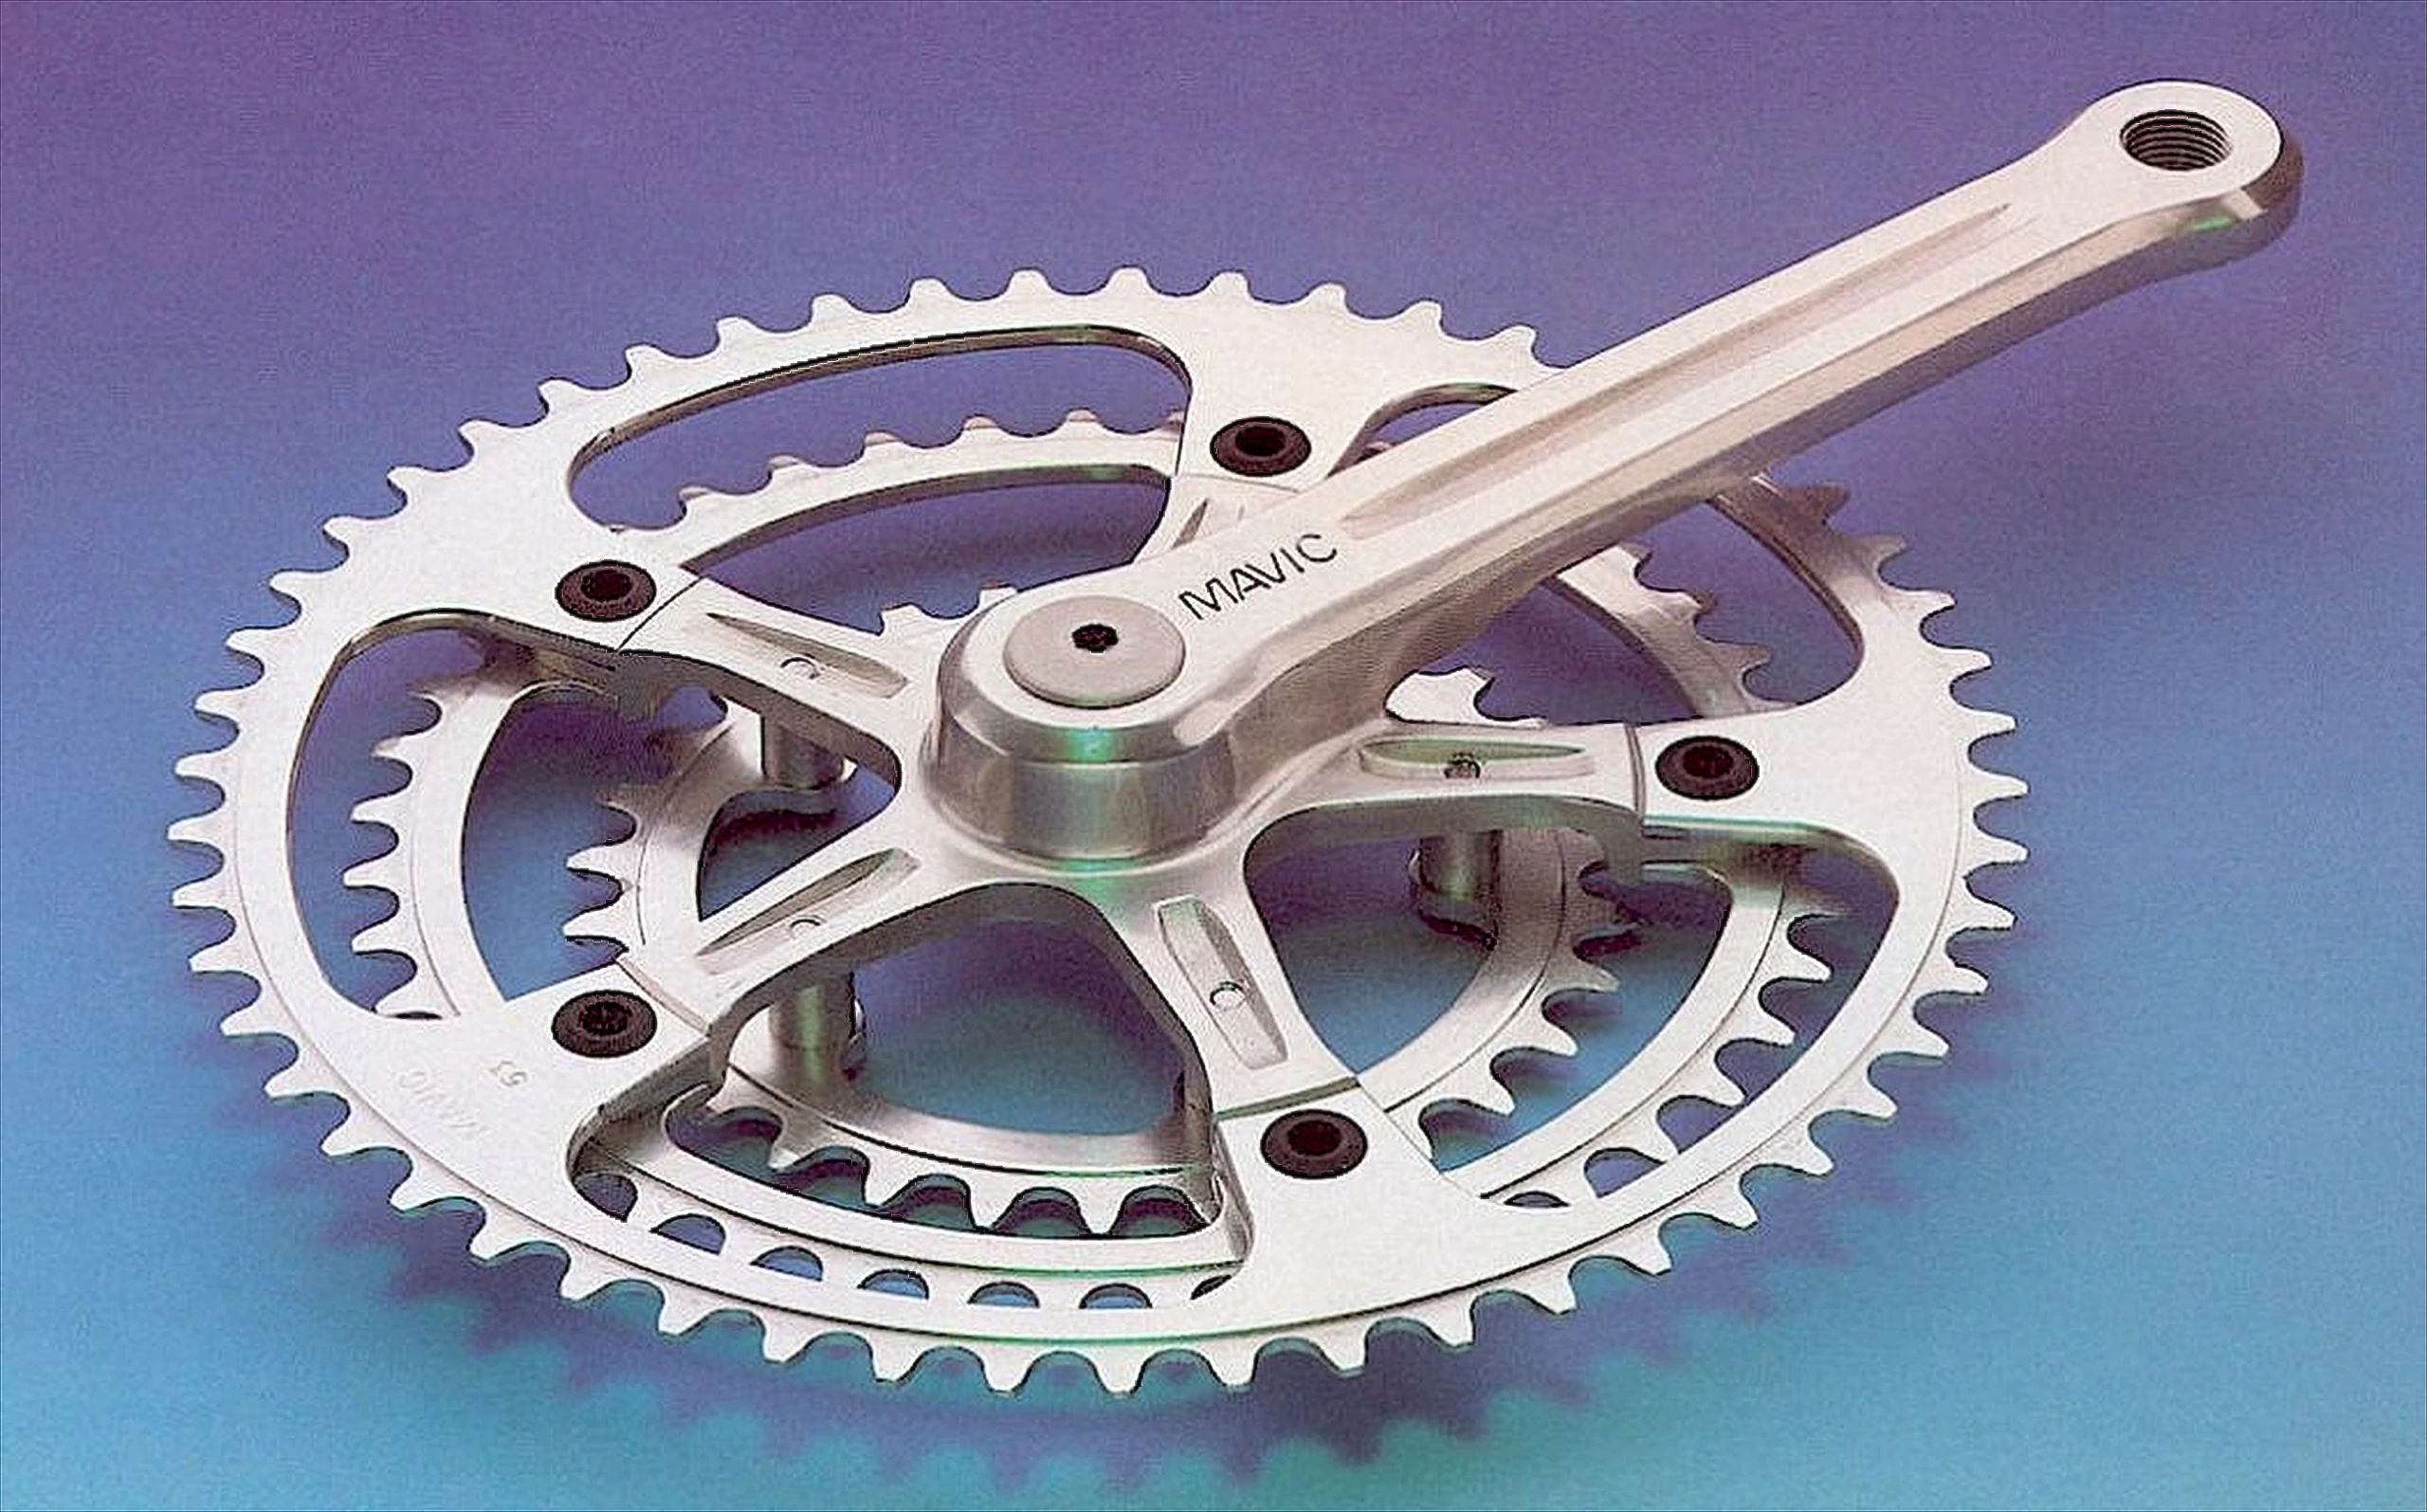
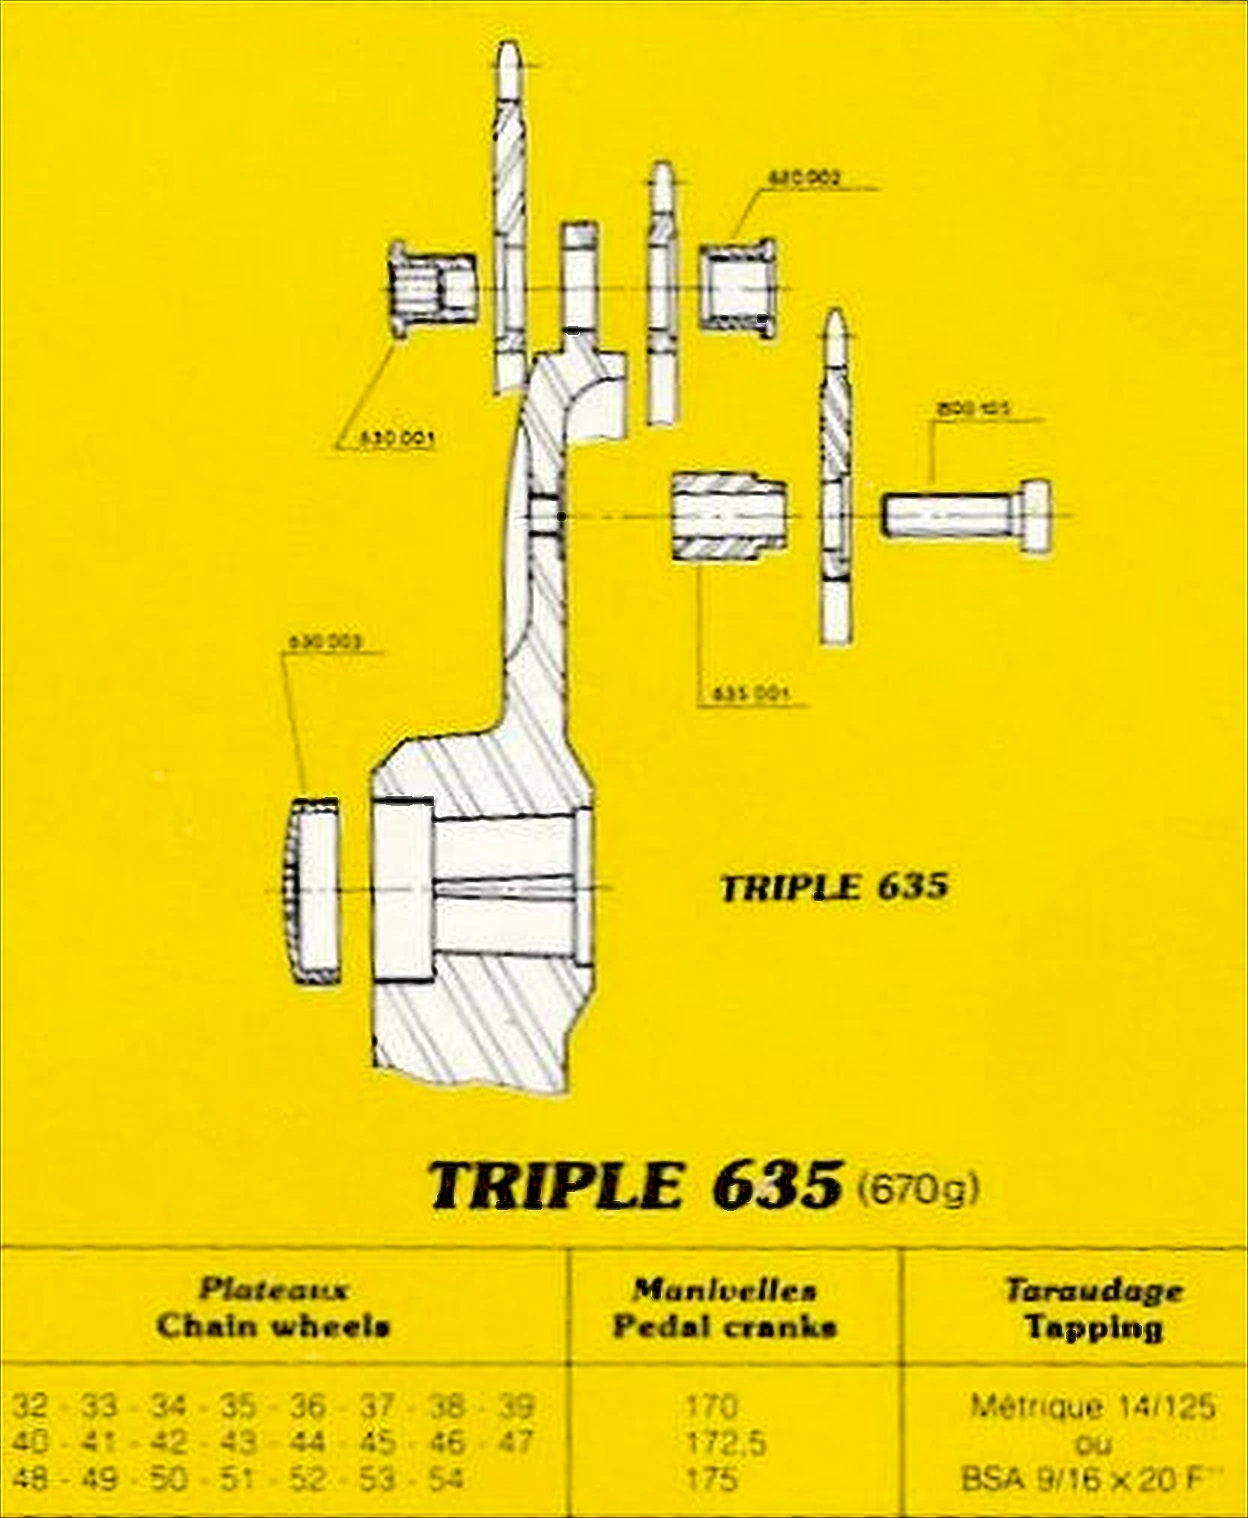
Four Mavic items: both faces of a folded instruction sheet for the 610 URD and 616 RD VTT bottom brackets in five languages, a photograph of the Triple 635 crankset and its diagram with the specification table. No year is printed.
— Page 1 —
MAVIC
610 URD – 616 RD VTT
(1)
610 002
610 021 (VTT)
610 001
610 020 (VTT)
610 005
Voir tableau
600 010
600 011
610 003
600 100
610 004
600 101
| Réf. | Longueur
ROUTE | 600 012 | 116 mm
| 600 016 | 114 mm
| 600 017 | 119 mm
| 600 020 | 123 mm
PISTE | 600 022 | 110 mm
VTT | 600 018 | 124 mm
| 600 019 | 134 mm
PRÉPARATION DU CADRE
Percer un trou de 4 ou 5 mm au dessous et au milieu de la boîte de pédalier.
Faire un chanfrien à 45° sur une profondeur de 2 à 2,5 mm de chaque côté de la boîte. Cette opération est obligatoire et peut-être réalisée avec les outils MAVIC Réf. 652 et 653.
Bien nettoyer la boîte.
MONTAGE
– Glisser le boîtier 610 URD ou VTT 616 RD dans la boîte du cadre en prenant soin de mettre la rondelle marquée «fixe» coté plateaux.
– Loger de chaque côté du boîtier l’entretoise plastique 610 005 (grand diamètre vers l’extérieur).
– Visser les deux écrous (1) en prenant soin de bien régler la ligne de chaîne en vissant plus ou moins les écrous.
– Bloquer énergiquement avec deux clés à ergots les écrous (1).
REGLAGE
En cas de jeu, retirer le bras gauche et à l’aide de la clé MAVIC Réf. 670, resserrer légèrement la rondelle «mobile» 610 004 en contrôlant le jeu avec le plateau manivelle.
DEMONTAGE POUR CHANGEMENT DE ROULEMENTS
– Retirer les deux bras de manivelles.
Dévisser les deux rondelles 610 003 et 610 004 avec la clé MAVIC Réf. 670.
Chasser l’axe et les roulements.
Nettoyer le corps.
– Remonter le roulement côté plateau (flasque noire vers l’extérieur) et le bloquer avec la rondelle «fixe» 610 003 serrée énergiquement.
– Introduire l’axe et le deuxième roulement en poussant avec le jet MAVIC Réf. 6702 (attention au sens de l’axe).
– Serrer la rondelle «mobile» 610 004 jusqu’à suppression du jeu.
– Remonter les manivelles.
PREPARING THE FRAME
– Drill a 4 or 5 mm hole in the bottom centre of the bottom bracket ;
– Prepare a 45° chamfer 2 to 2.5 mm deep on both sides of the bottom bracket. This operation is obligatory and can be implemented with MAVIC tools ref : 652 and 653 ;
– Thoroughly clean the bottom bracket.
ASSEMBLY
– Slide the 610 URD or VTT 616 RD unit into the frame housing taking care to ensure that the washer marked «fixe» is on the chainring side ;
– Fix plastic support 610 005 to each side of the unit, positioning the longer diameter towards the outside ;
– Tighten the two nuts (1) taking care to set the chain line by adjusting nut tightness correctly ;
– Fimly tighten the nuts (1) with a hook wrench.
ADJUSTMENT
If play is observed, remove the left crank and using MAVIC wrench ref : 670 slightly tighten «mobile» washer 610 004, whilst controlling play with the chaining crank.
DISMANTLING FOR BEARING REPLACEMENT
– Remove both cranks. Unscrew washers 610 003 and 610 004 with MAVIC wrench ref : 670. Strike out the axle and the bearings. Clean the body ;
– Refit the chainring-side bearing (black flange towards the inside) and lock it by tightening «fixe» washer 610 003 fully ;
– Insert the axle and the second bearing, pushing them in with MAVIC jet ref : 6702 (careful : the axle must fitted in the right direction) ;
– Tighten «mobile» washer 610 004 until all play disappears ;
– Refit the cranks.
PREPARACIÓN DEL CUADRO
– Perforar un orificio de 4 o 5 mm por debajo y en la parte central de la caja del pedalier ;
– Realizar un biselado de 45° en una profundidad de 2 a 2.5 mm de cada lado de la caja. Esta operación es obligatoria y puede realizarse con las herramientas MAVIC, Ref. 652 y 653
– Limpiar bien la caja.
MONTAJE
– Deslizar la caja 610 URD o BTT 616 RD en la caja del cuadro procurando poner la arandela con la marca «fixe» del lado del plato ;
– Introducir ei pasador de plástico 610 005 por cada lado de la caja (con el diámetro mayor hacia el exterior) ;
– Apretar las dos tuercas (1) procurando ajustar bien la línea de la cadena y apretando más o menos las tuercas ;
– Apretar a fondo, con fuerza, con dos llaves de espolón las tuercas (1).
AJUSTE
Si hay juego, retirar el brazo izquierdo y con la llave MAVIC, Ref. 670, apretar ligeramente la arandela «mobile» 610 004 verificando el juego con el plato y la biela.
DESMONTAJE PARA CAMBIO DE LOS RODAMIENTOS
– Retirar los dos brazos de la biela. Aflojar las dos arandelas 610 003 y 610 004 con la llave MAVIC 670. Sacar el eje y los rodamientos. Limpiar el cuerpo ;
– Volver a montar el rodamiento del lado del plato (con el borde negro hacia el exterior) y bloquearlo con la arandela «fixe» 610 003 bien apretada ;
– Introducir el eje y ei segundo rodamiento empujando con el vástago MAVIC, Ref. 6702 (cuidado con el sentido del eje) ;
– Apretar la arandela «mobile» 610 004 hasta que desaparezca el juego ;
– Volver a montar las bielas.
[The Mavic 610 URD and 616 RD VTT bottom bracket instruction sheet with a labeled parts diagram, a table of references and lengths for ROUTE, PISTE and VTT, and French, English and Spanish instruction blocks. The paper is creased and stained, with a fold across the text blocks and a brown stain at the right edge, and the Mavic logo mark sits at the foot of the page.]
— Page 2 —
MAVIC
610 URD – 616 RD VTT
PREPARAZIONE DEL TELAIO
– Eseguire un foro di 4 o 5 mm nella parte centrale inferiore della scatola movimento ;
– Effettuare una svasatura a 45 ° per una profondità di 2 a 2,5 mm sulle due estremità della scatola.
Questa operazione è obbligatoria e può essere eseguita con gli utensili MAVIC Ref. 652 e 653 ;
– Pulire accuratamente la scatola.
MONTAGGIO
– Introdurre la scatola 610 URD (616 RD) nella scatola del telaio curando di porre la rondella marcata «fixe» lato plateau ;
– Allogiarre il distanziale in plastica 610 005 alle estremità della scatola (diametro grande verso l’estemo) ;
– Avvitare i due dadi (1) e regolare la linea catena serrando più o meno i dadi ;
– Bloccare energicamente i dadi servendosi delle due chiavi a tassello (1).
REGOLAZIONE
In caso di gioco, togliere la pedivella sinistra e, con la chiave MAVIC Ref. 670 serrare leggermente la rondella «mobile» 610 004 controllando il gioco per mezzo del plateau pedivella.
SMONTAGGIO PER SOSTITUZIONE DEI CUSCINETTI
– Smontare le due pedivelle ; svitare le due rondelle 610 003 e 610 004 con la chiave MAVIC Ref 670 ; estrarre l’asse e i cuscinetti ; ripulire il corpo ;
– Rimontare il cuscinetto lato plateau (portante nero verso l’estemo) bloccario con la rondella «fixe» 610 003 che è stata serrata con forza ;
– Introdurre l’asse ed il secondo cuscinetto servendosi della chiave MAVIC Ref. 6702 (verificare il senso dell’asse) ;
– Avvitare la rondella «mobile» 610 004 fino all’annullamento del gioco ;
– Rimontare le pedivelle.
VORBEREITUNG DES RAHMENS
– In der Mitte des Trettlagergehäuses ein 4 bis 5 mm großes Loch bohren ;
– Jede Seite des Gehäuses 2 bis 2,5 mm tief in einem Winkel von 45° abfasen.
Diese Bearbeitung ist unbedingt notwendig und kann mit den MAVIC-Werkzeugen Art. Nr. 652 und 653 durchgeführt werden ;
– Das Gehäuse sorgfältig reinigen.
MONTAGE
– Das Tretlager 610 URD oder Mountain Bike 616 RD in das Gehäuse einsetzen und dabei daraufachten, daß der Gewindering mit der Bezeichnung «fixe» auf der Antriebsseite zu liegen kommt ;
– Die beiden Muttern (1) anschrauben und dabei die Kettenlinie sorgfältig einstellen, indem Sie die Muttern mehr oder weniger fest anziehen ;
– Die Muttern (1) mit zwei Hakenschlüsseln energisch bloc[illegible]eren.
EINSTELLEN
Bei vorhandenem Spiel die linke Kurbel abnehmen und mit Hilfe des MAVIC-Schlüssels Art. Nr. 670 den Gewindering mit der Bezeichnung «mobile» wenig anziehen[?] und dabei das Spiel am Antrieb kontrollieren.
AUSTAUSCH DER KUGELLAGER
– Beide Kurbeln abnehmen ; die beiden Gewinderinge 610 003 und 610 004 mit dem MAVIC-Schlüssel Art. Nr. 670 herausschrauben. Die Achse und die Trettlager herausschlagen. Den Körper reinigen.
– Das Lager (schwarze Dichtung nach außen) an der Antriebsseite montieren und mit dem Gewindering 610 003 mit der Bezeichnung «fixe» festziehen ;
– Die Achse und das zweite Lager mit dem MAVIC Werkzeug Art. Nr. 6702 einschieben (auf die Achsrichtung achten) ;
– Den Gewindering «mobile» 610 004 anziehen, bis das Spiel beseitigt ist ;
– Die Kurbeln wieder anmontieren.
[The second face of the Mavic 610 URD and 616 RD VTT bottom bracket instruction sheet, headed with the Mavic logo, carrying two blocks of instructions in Italian and German with no diagram. The paper is heavily creased with brown stains, and dark spots cover parts of the German block.]
[A color photograph of a silver Mavic triple crankset with three chainrings and one crank arm, set on a blue and violet gradient background. The crank arm carries the Mavic name as a mark on the metal, and the photograph has no printed caption, text or folio.]
— Page 4 —
620 002[?]
630 001[?]
800 105[?]
630 003[?]
635 001
TRIPLE 635
TRIPLE 635 (670g)
Plateaux Chain wheels | Manivelles Pedal cranks | Taraudage Tapping
32 – 33 – 34 – 35 – 36 – 37 – 38 – 39 40 – 41 – 42 – 43 – 44 – 45 – 46 – 47 48 – 49 – 50 – 51 – 52 – 53 – 54 | 170 172.5 175 | Métrique 14/125 ou BSA 9/16 x 20 F”
[An exploded cross-section drawing of the Triple 635 crankset in black line on yellow, with chainring, bolt, bushing and crank arm parts labeled by number, above the heading “TRIPLE 635 (670g)” and a three column table of chain wheels, pedal cranks and tapping. The small part numbers on the drawing are only partly legible.]
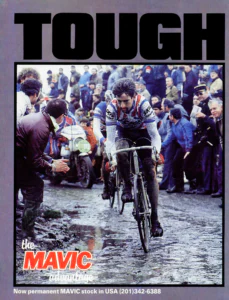 Mavic 1984 Advertisement — Tough. Light! The Mavic Advantage
 Mavic Catalogue Général 84-85 — Rims, Hubs, Stems and Bends, Brakes, Headsets, Cranks and Pedals, Bottom Brackets, Derailleurs, Sets and BMX, in French and English
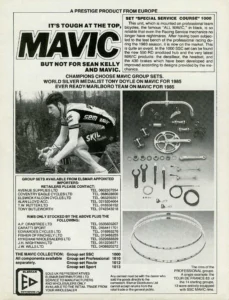 Mavic 1985 Advertisement — It’s Tough at the Top, but Not for Sean Kelly and Mavic
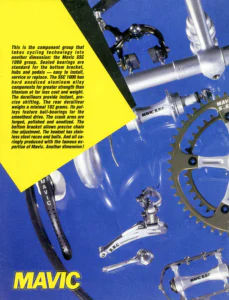 Mavic 1985 Advertisement — Mavic SSC 1000 Group: Another Dimension
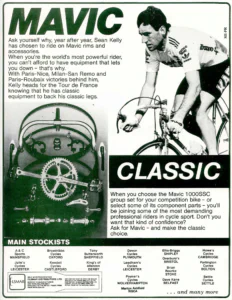 Mavic 1986 Advertisement — Mavic Classic
Ebykr presents this material for research and education. If you hold rights to it or notice an ownership issue, please contact us and we will respond promptly.
The Ebykr Digest
New articles, timelines, catalog finds and registry activity — assembled from the archive once a month. Your address is never shared.
Double opt-in. One email per month. Unsubscribe at any time with one click.